UB Bookshop for Magento 2 (new)
Theme Introduction
UB Bookshop is a premium Magento 2 theme we developed from the ground up. It is packed with UB Theme Helper -- a powerful theme customisation tool, plus 3 complimentary Magento extensions including Mega Menu, Content Slider, Quick View. This documentation is to guide you through all steps how to install and configure responsive Magento theme Bookshop to your own website at the most convenient.
I. Installation Prerequisites
UB Bookshop is native with Magento 2.x. Please make sure your system meets the Magento 2 System requirements.
II. Download Packages
The download package includes:
- Theme: UB Bookshop (single theme including UB Theme Helper for manual installation)
- Extensions: contains all extensions built in the theme
- Quickstart: is a full Magento 2 CMS version with our template and extensions already integrated to match demo
- PSD source files: all graphic source files
III. Installation Instruction
There are two ways to install a UberTheme Magento theme:
- Manual Installation: Applicable if your store is full with content that you don’t want to overwrite.
- QuickStart Installation: Applicable if you want to get a whole new fresh site as per Demo.
Provided that you have installed the Magento base already, decide which way to install and follow steps as below.
Manual Installation
To install UB Bookshop manually, you need to take a few steps, including:
- Step 1: Download and extract UB Bookshop theme
- Step 2: Enable UB Theme Helper and built in Magento 2 extensions
- Step 3: Import Sample Data
- Step 4: Activate theme
Step 1. Download and extract UB Bookshop theme
1.1. Download and extract UB Bookshop theme
Download the ub_bookshop_vx.x.x zip file from your profile at Ubertheme, and extract it on your computer. Navigate inside the extracted folder, you should see the necessary folders listed below:
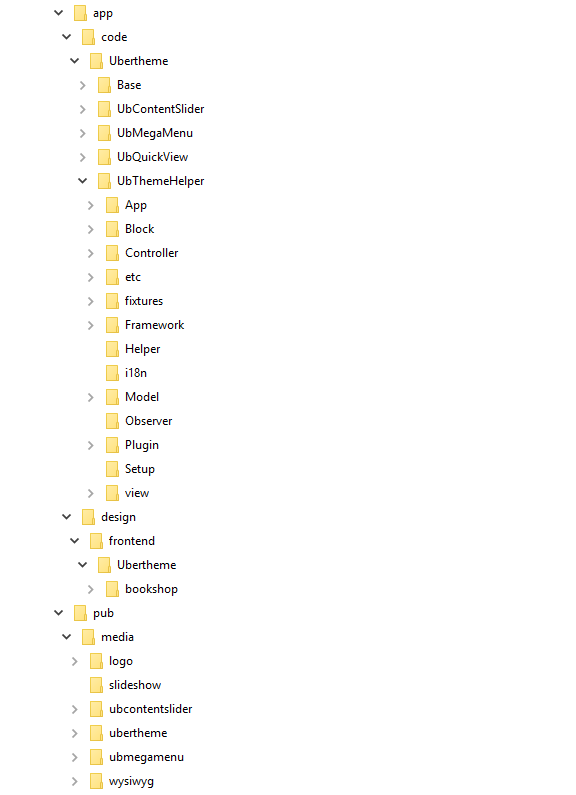
1.2. Copy and paste the folders to your web root
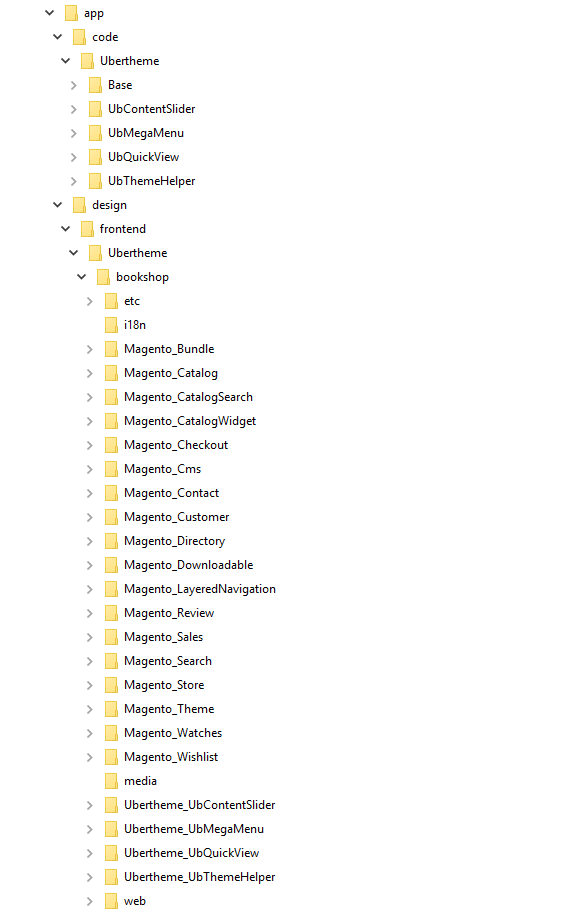
1.2.1. Copy and paste the folder app of the package you have unzipped to your web root. Once done, you should see the path:
..app/design/frontend/Ubertheme/bookshop/
The overwritten folders should have a directory layout like this:
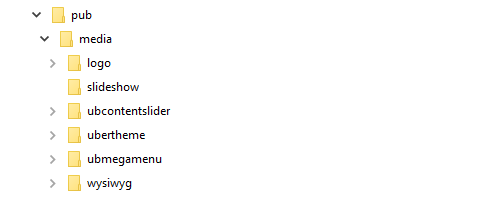
1.2.2. Copy and paste folder pub/media of the package you have unzipped to your web root. Make sure you *merge*, not ‘replace’ existing media folder contents. The overwritten folders should have a directory layout like this:
Step 2: Enable UB Theme Helper and built in Magento 2 extensions
Open your terminal and go to the Magento directory. In this directory, run the following commands:
- php -f bin/magento setup:upgrade
- php -f bin/magento cache:clean
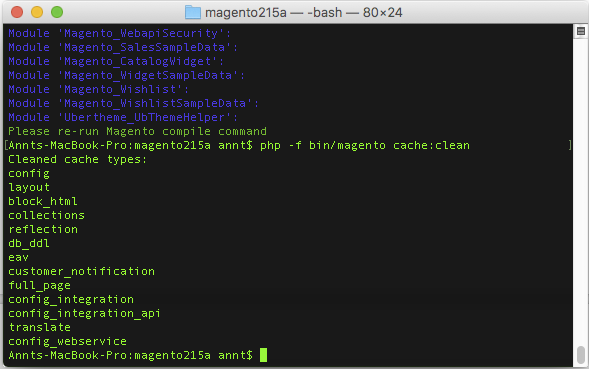
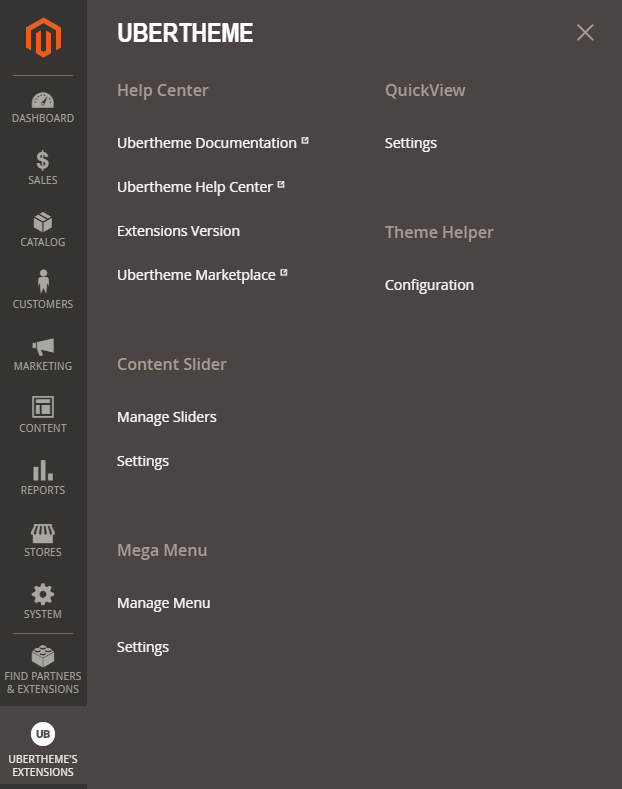
Once you finish the last command, navigate to your Magento Admin Panel | Ubertheme’s Extension, you should see the extension’s menu respectively as follows:
Step 3: Import Sample Data
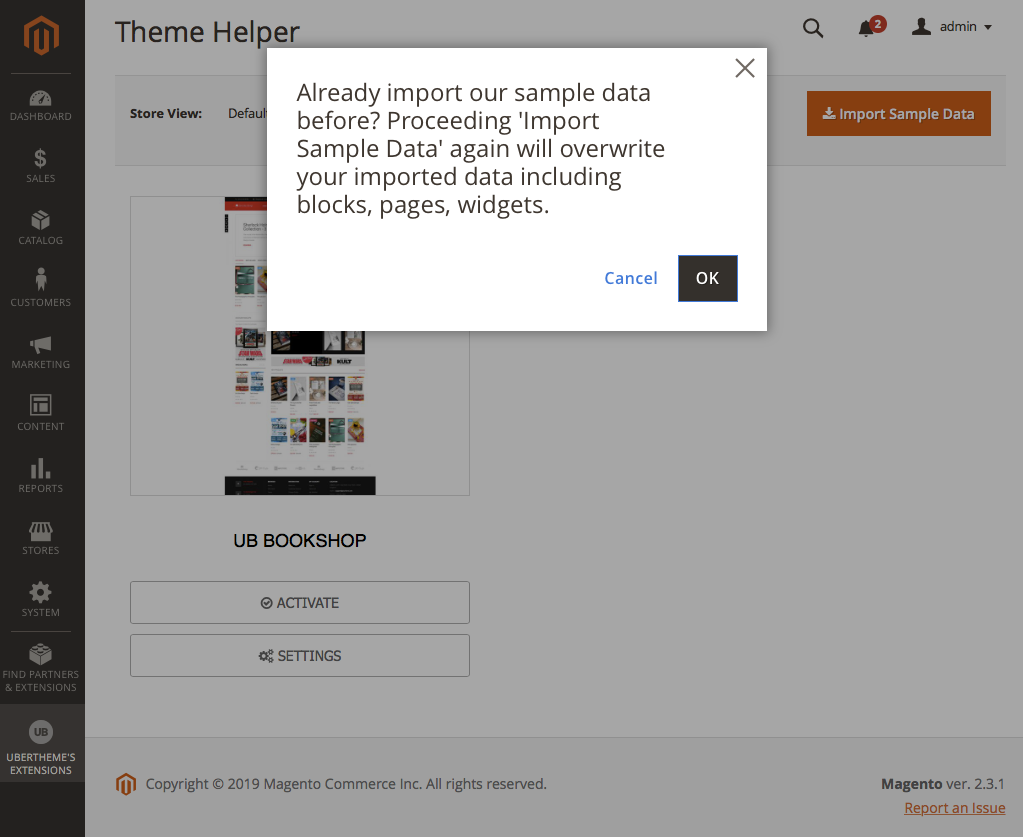
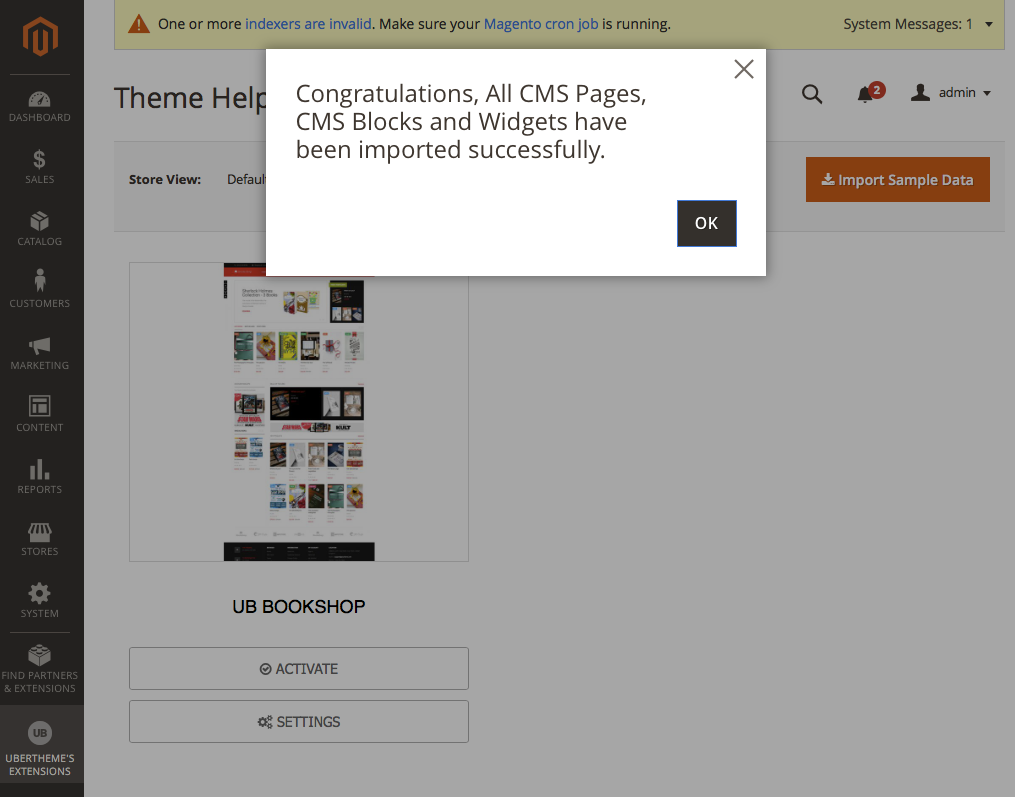
Now that you’ve installed UB Bookshop theme and all built-in extensions, let’s move on to the next step — Import Sample data.
Sample data refers to all CMS pages, CMS blocks and widgets we created for UB Bookshop.
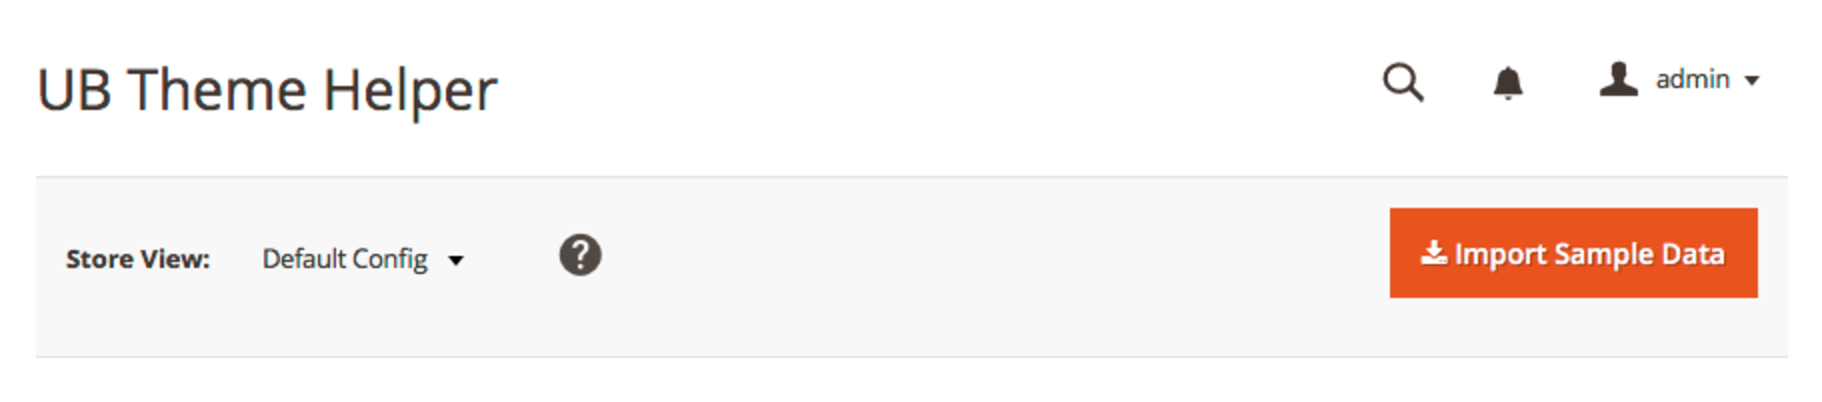
In your Magento Admin Panel, navigate to Ubertheme’s Extension | (Theme Helper) Theme Configuration, then simply click Import Sample Data button.
Step 4: Activate theme
1. In your Magento Admin Panel, navigate to System | Tools | Cache Management, Sellect All the cache types, take Action as Refresh and Submit.
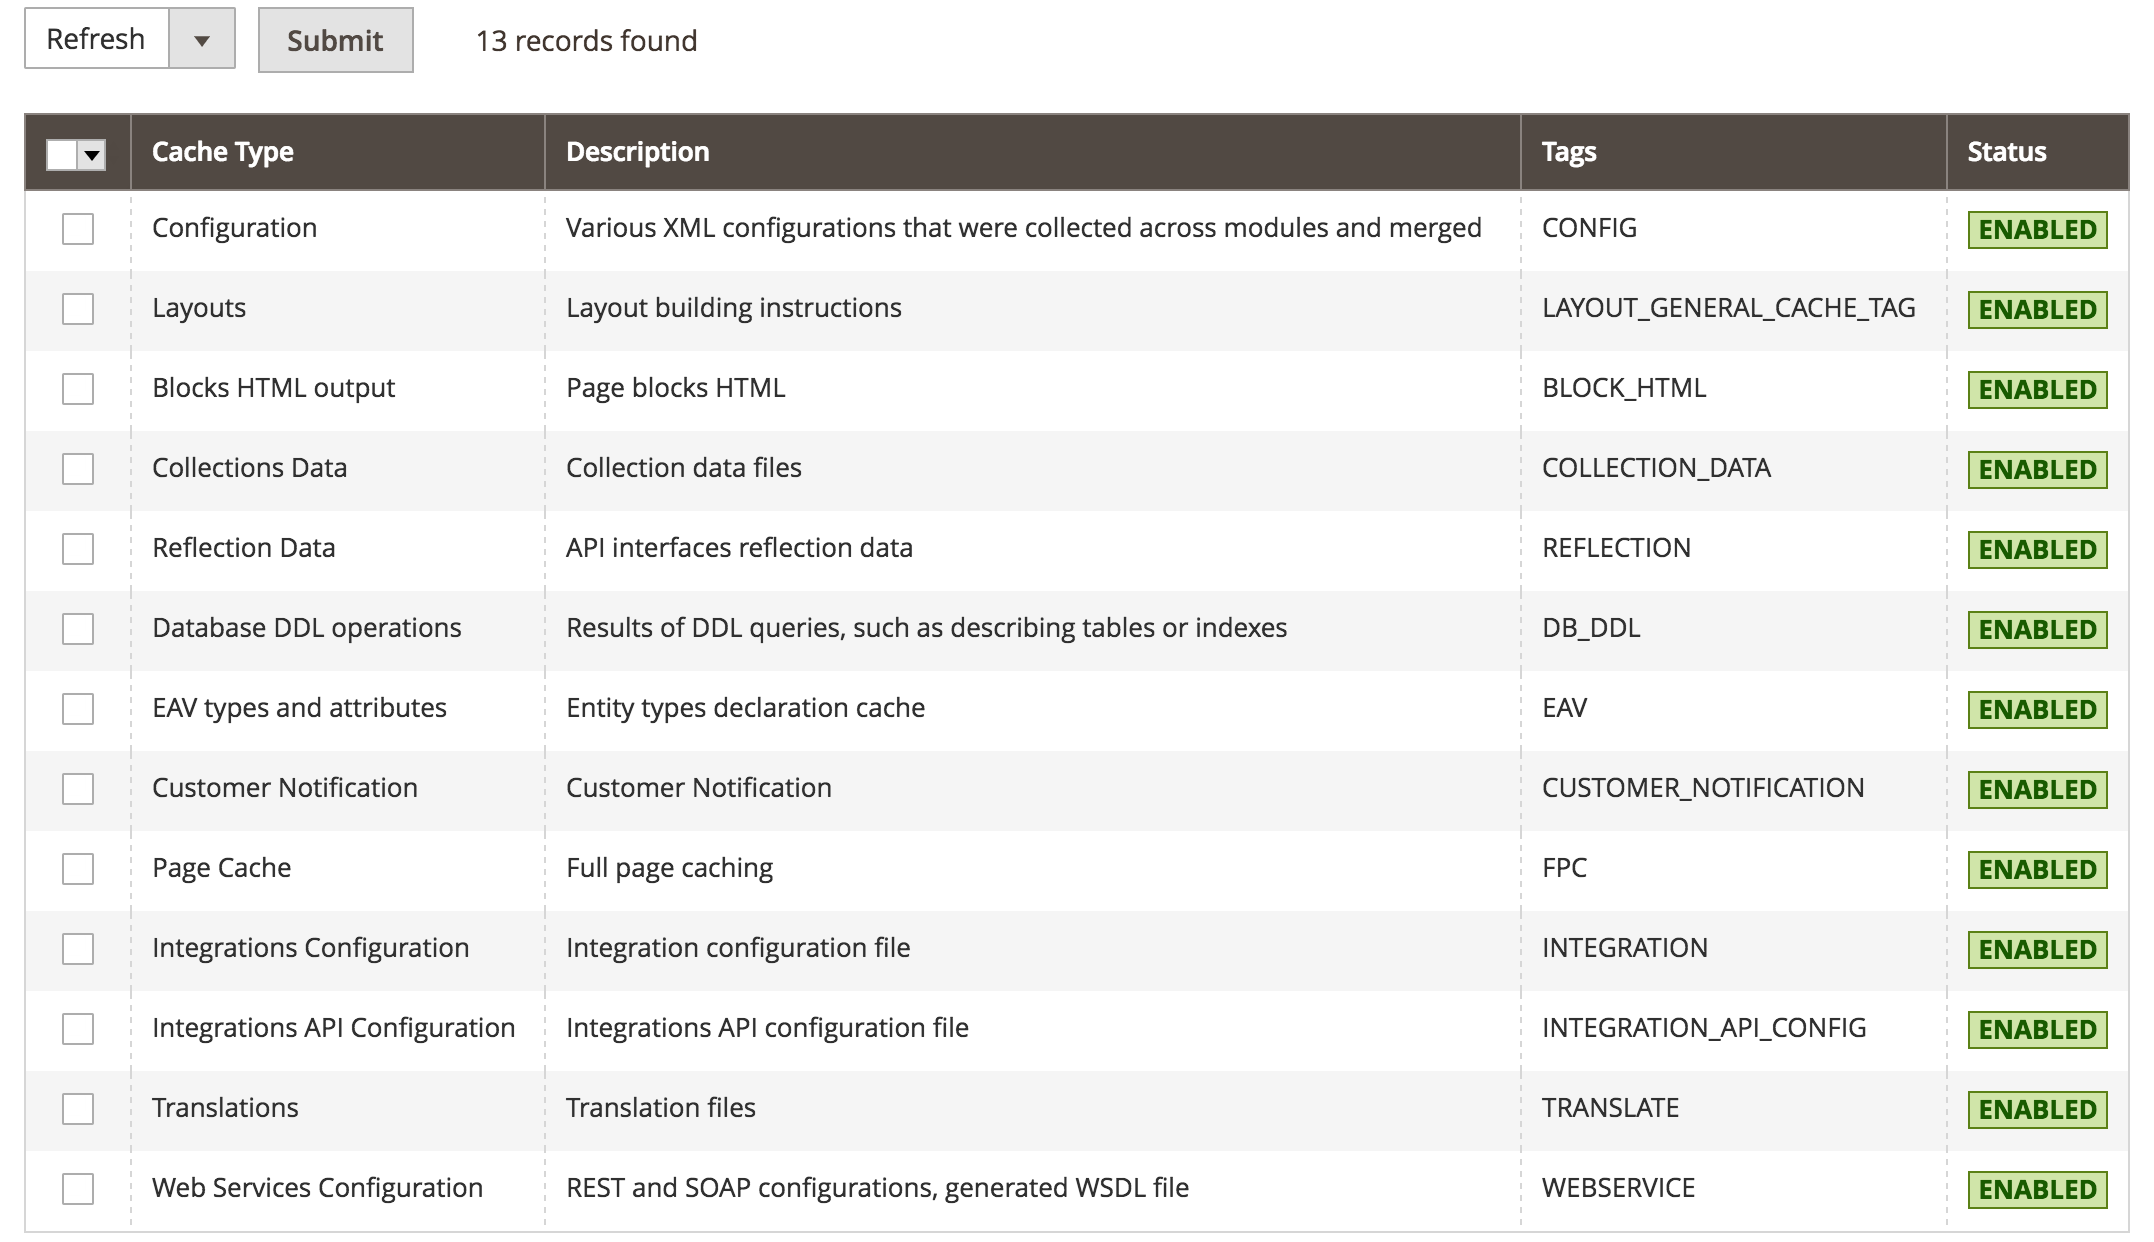
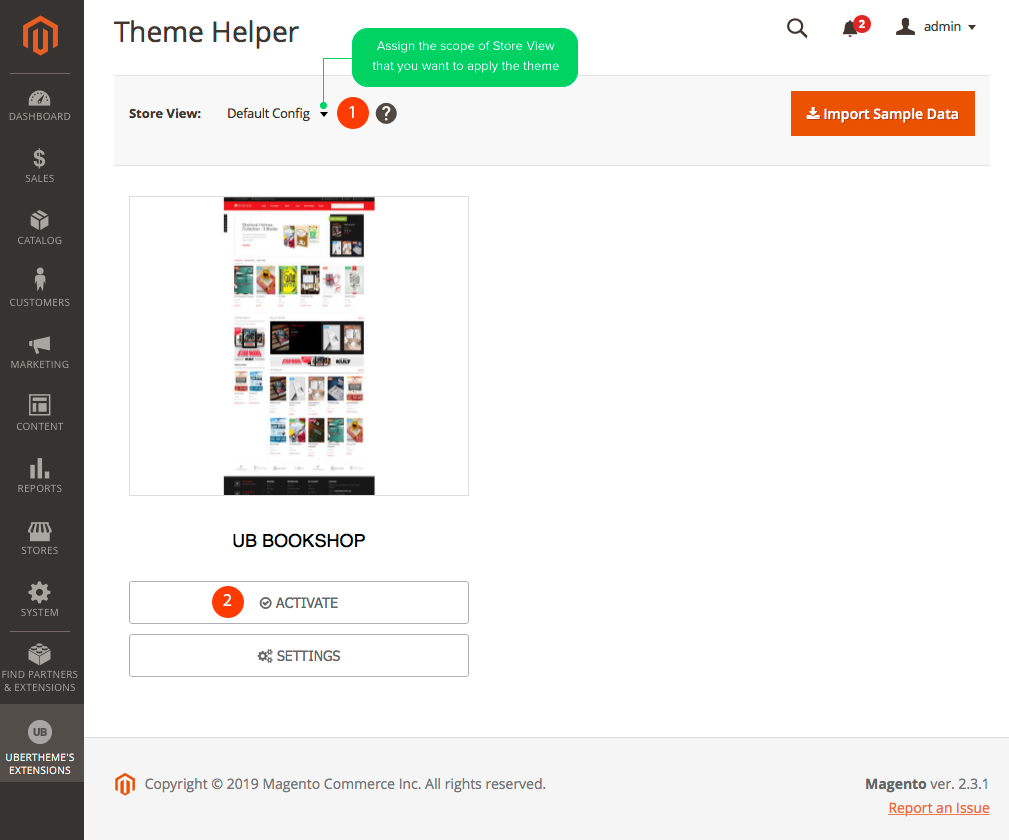
2. Then, navigate to Ubertheme’s Extension | (Theme Helper) Theme Configuration. You will see a grid of themes available.
3. Specify scope of Store View you want to apply the theme (if you do not set scope of Store View, Default Config will be applied). Then click Activate button to apply specific theme you select.
4. Once done, you run the following commands before you see the theme applied in the frontend.
- php -f bin/magento setup:static-content:deploy
- php -f bin/magento indexer:reindex
- php -f bin/magento cache:clean
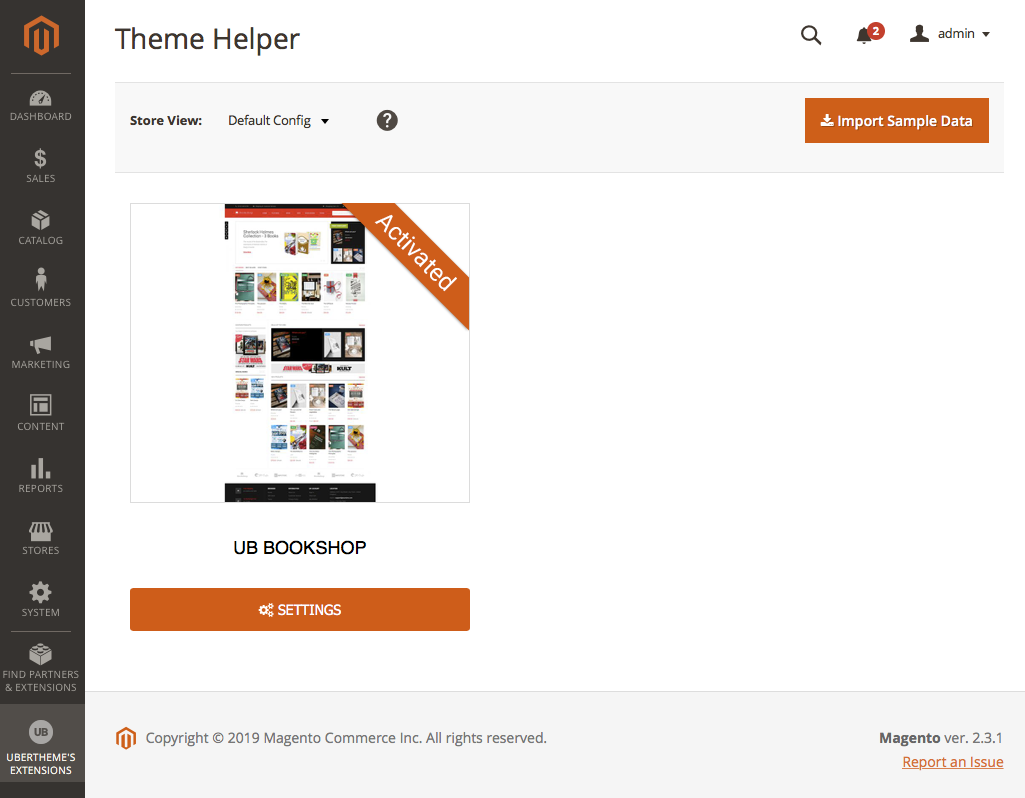
Display when successful activation:
And the storefront like on the following screenshot:
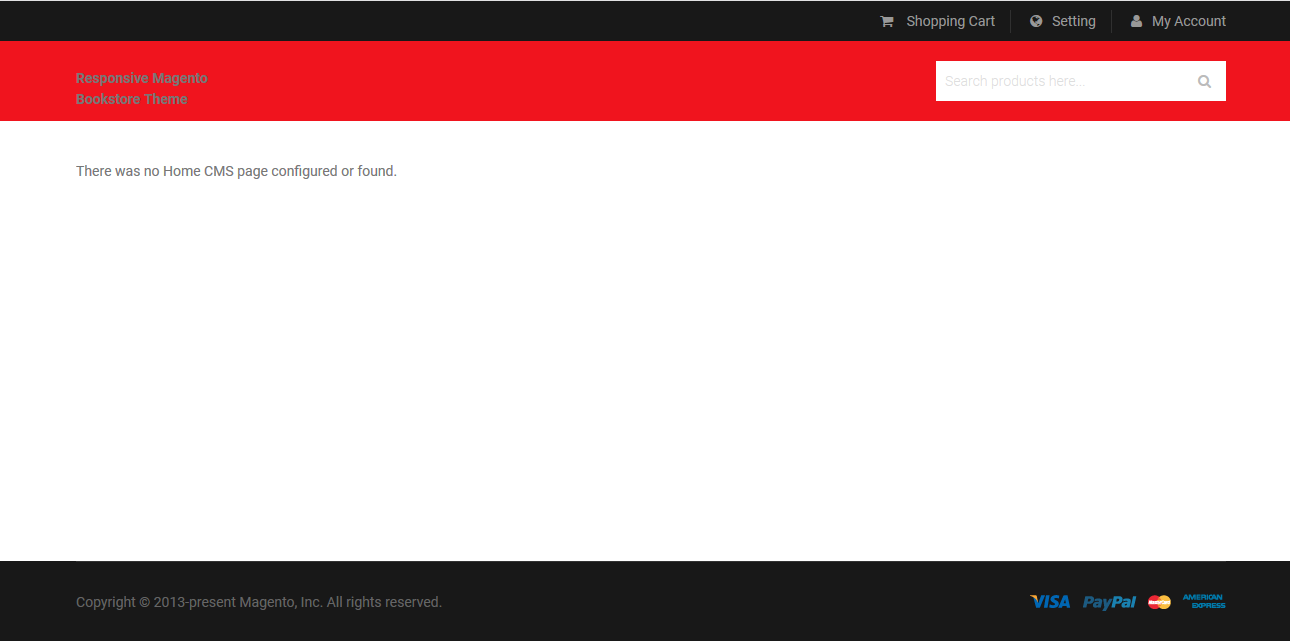
That’s all. Now you can scroll down to learn more how to configure the theme.
Quickstart Installation
Quickstart package is to minimize time and effort in installing the theme as per Demo site. Kindly note that, with Quickstart, all your existing data will be overwritten. Thus, we recommend using Quickstart for your first installation or just in case you want to refresh your site to the very beginning. For step by step guide, please Click here
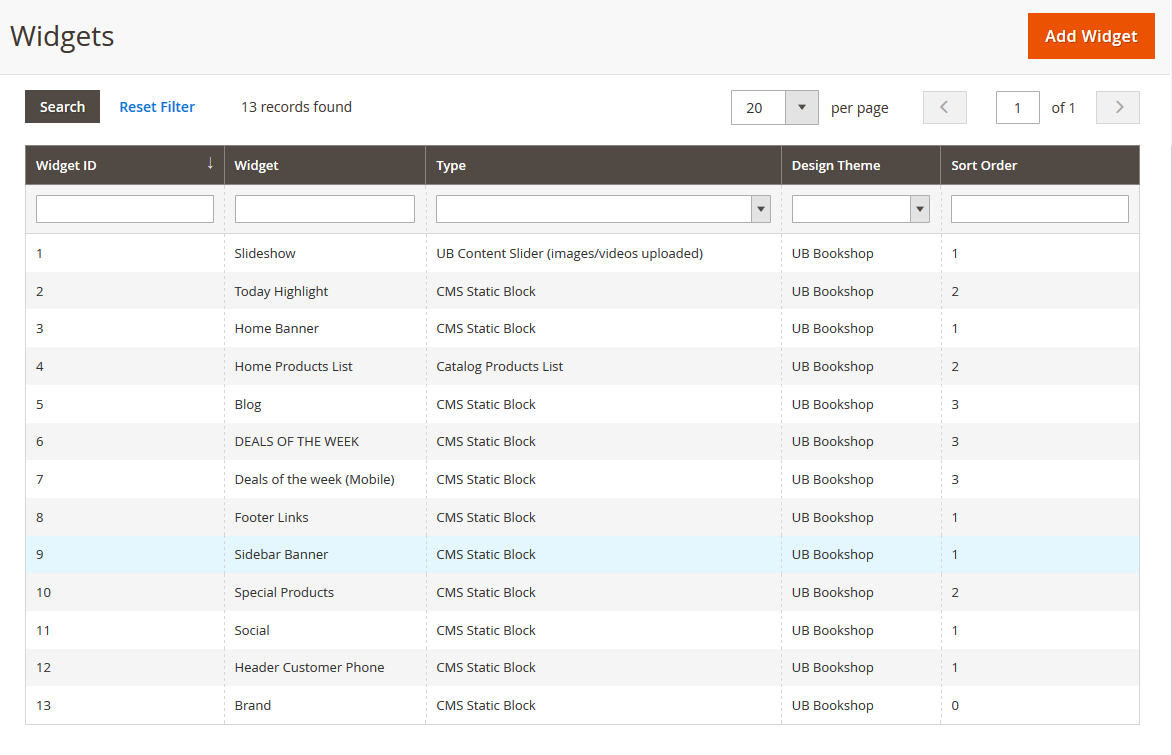
IV. Layout and Block positions
Before we walk you through steps to configure each page as per demo, here is an overview of static blocks you will see in UB Bookshop theme:
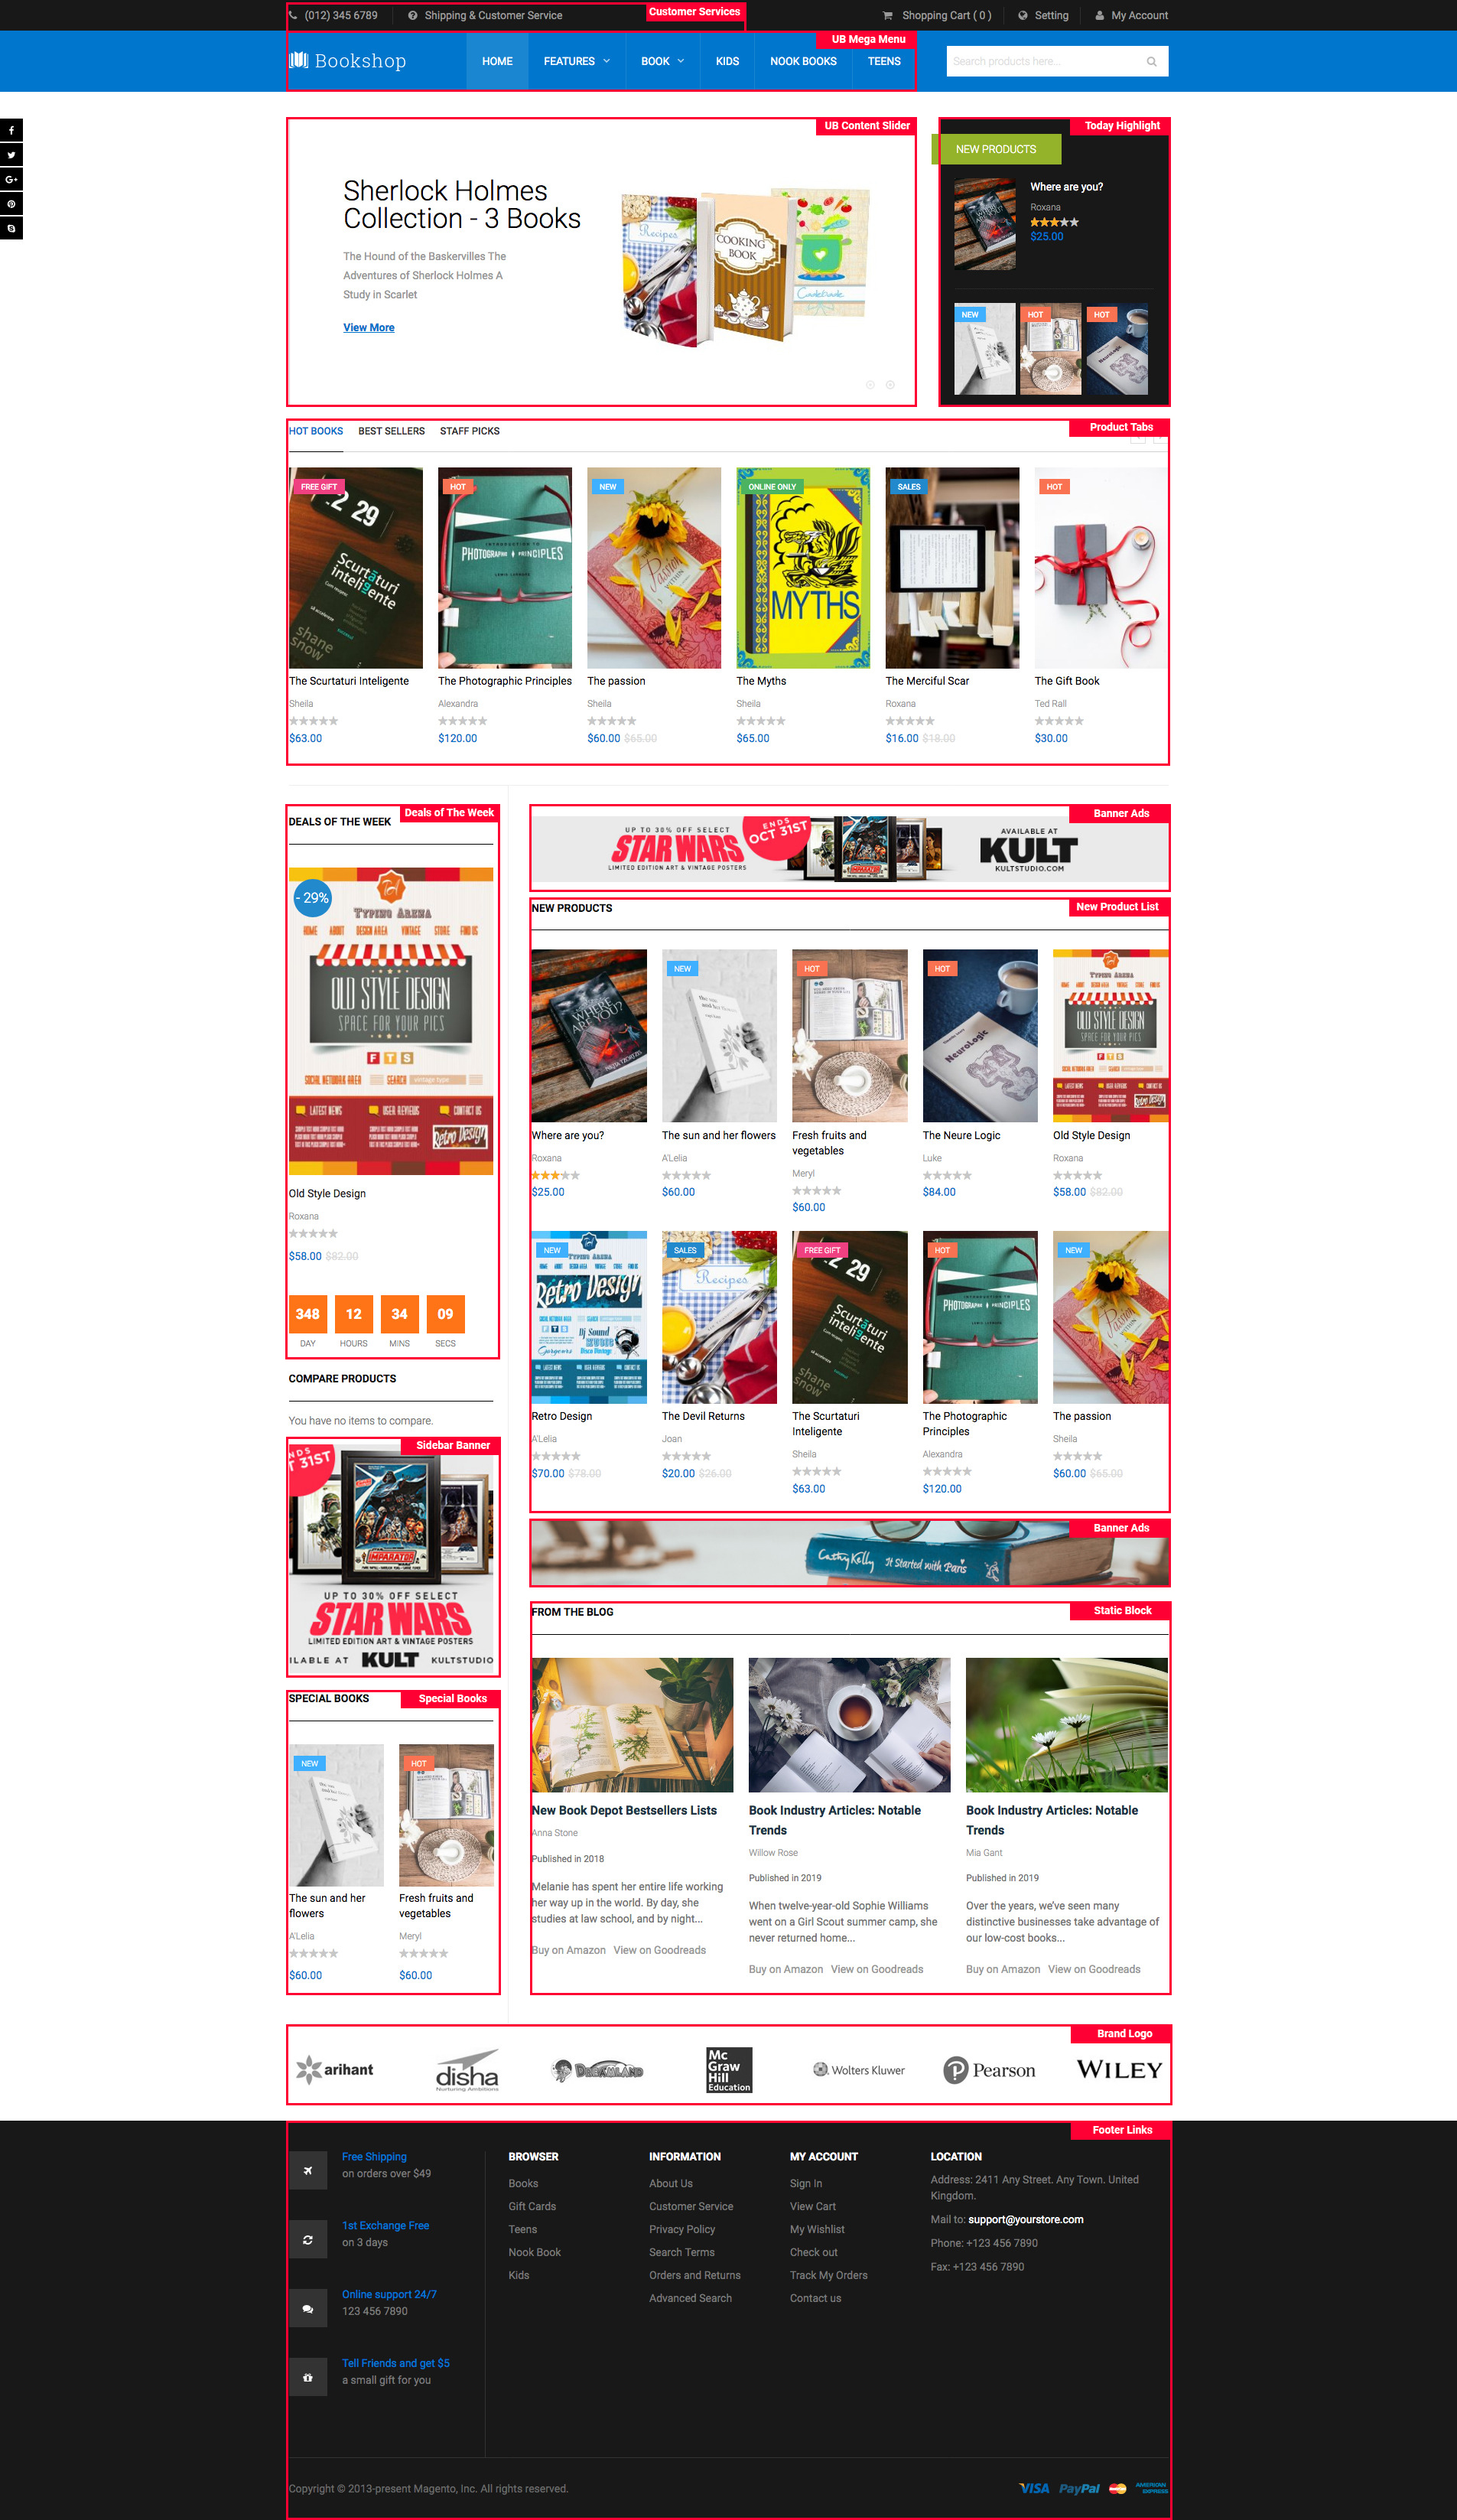
As seen in the screenshot, the UB Bookshop frontend has the following static blocks:
- UB MegaMenu
- UB Content Slider
- Static Block: Customer Services
- Static Block: Today Hightlight
- Static Block: Product Tabs
- Static Block: Social
- Static Block: Deals of The Week
- Static Block: Banner ADV
- Static Block: Sidebar Banner
- Static Block: Special Books
- Static Block: Blog
- Static Block: Popular Products
- Static Block: Brand Logo
- Static Block: Footer Links
- Static Block: Masshead
- Static Block: Deals of The Week (Mobile)
- Static Block: Custom Tab (in Product Detail page)
- Static Block: Contacts Map (on the Contact Us Page)
V. Pages Configuration
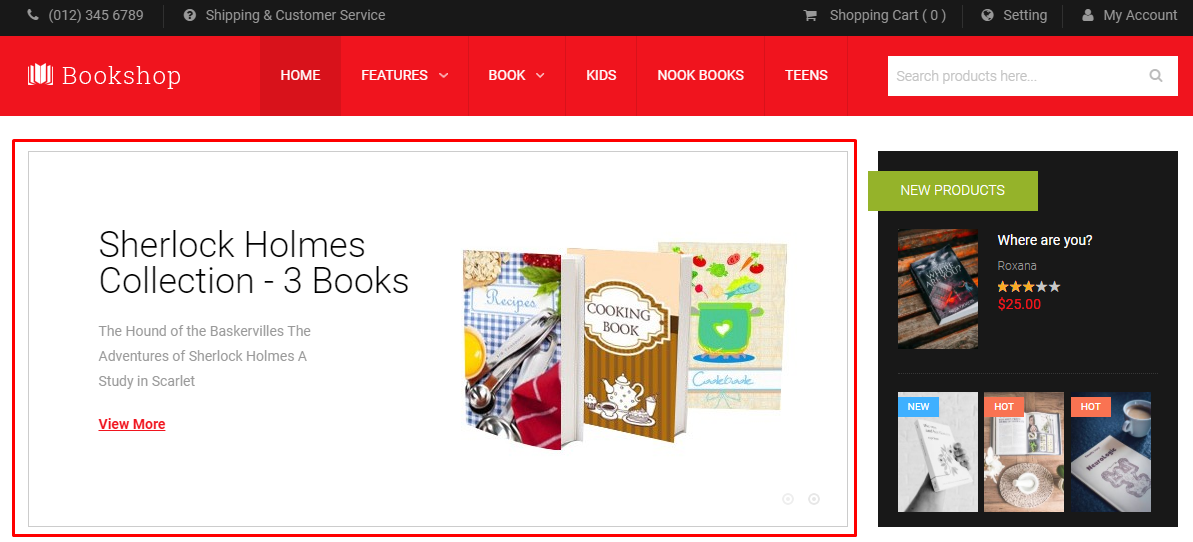
HomePage Configuration
Supposed that you install the theme manually without importing our theme’s Sample Data, you can follow steps below to set up Homepage that matches our demo exactly.
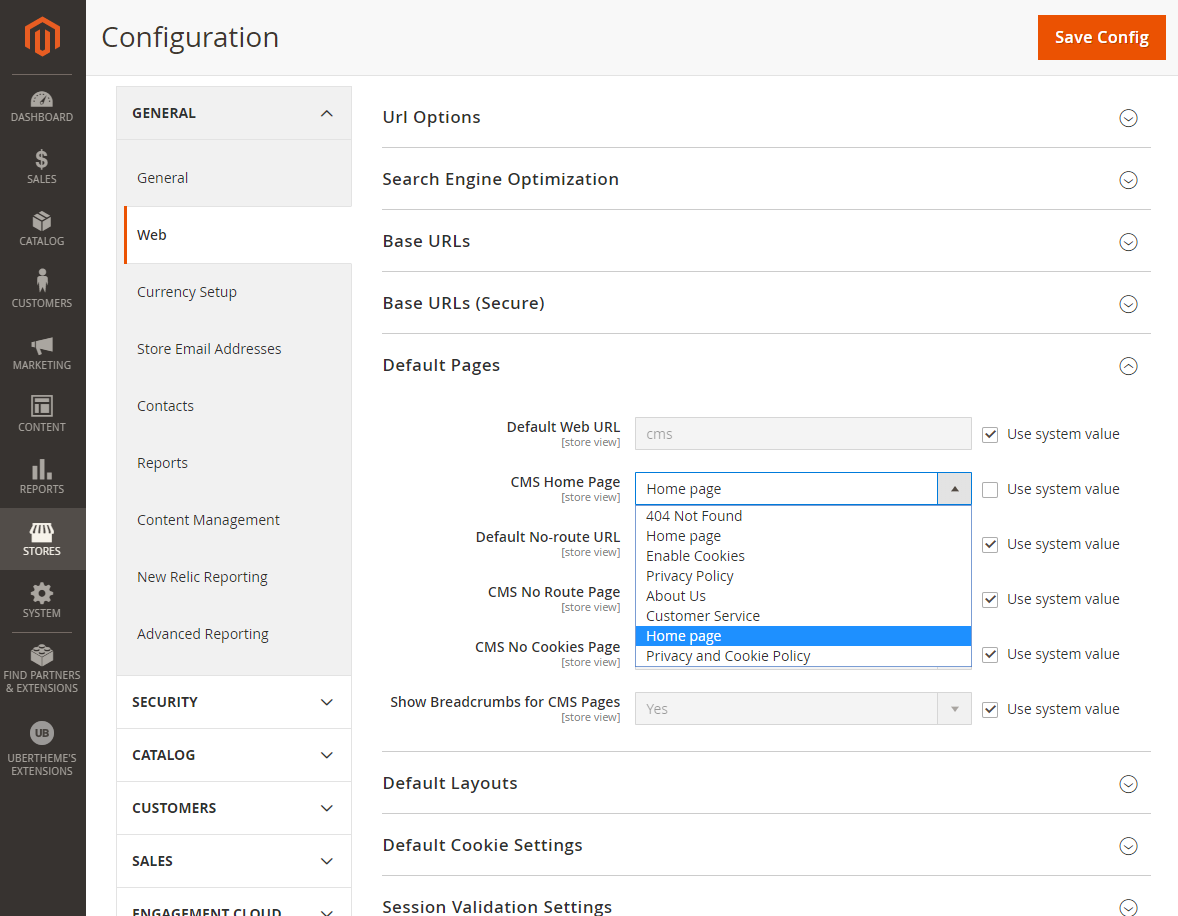
Step 1: In the Admin Panel, navigate to Stores | Settings (Configuration) | [General] Web (Default Pages) with configuration as follows:
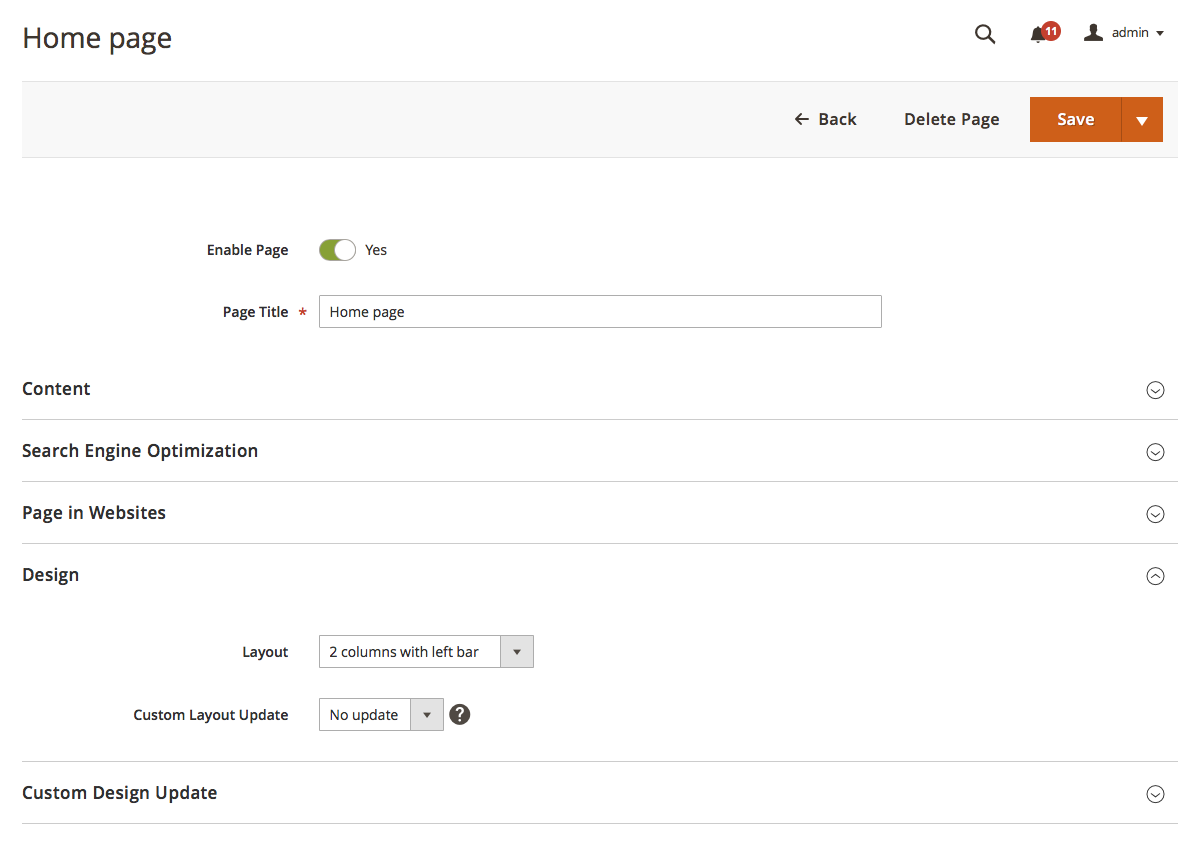
Step 2: In the Admin Panel, navigate to Content | (Elements) Pages | Add New Page with configuration as follows (You can disable the default Home page of your M2 instance for now):
- Content tab: click to see the Back-end setting
- Page in Websites tab: set Store View to All Store Views
- Design tab: click to see the Back-end setting
Step 3: After adding the Homepage, you need to add related CMS blocks to get the Homepage including:
- UB Top Menu (Extension: UB MegaMenu)
- Static Block: Customer Service
- Static Block: Slideshow (Extension: UB Content Slider)
- Static Block: Today highlight
- Static Block: Product Tabs
- Static Block: Banner ADV
- Static Block: Deals of The Week
- Static Block: Socials
- Static Block: Popular Books
- Static Block: Sidebar Banner
- Static Block: Special Books
- Static Block: From the Blog
- Static Block: Brand Logo
- Static Block: Footer Links
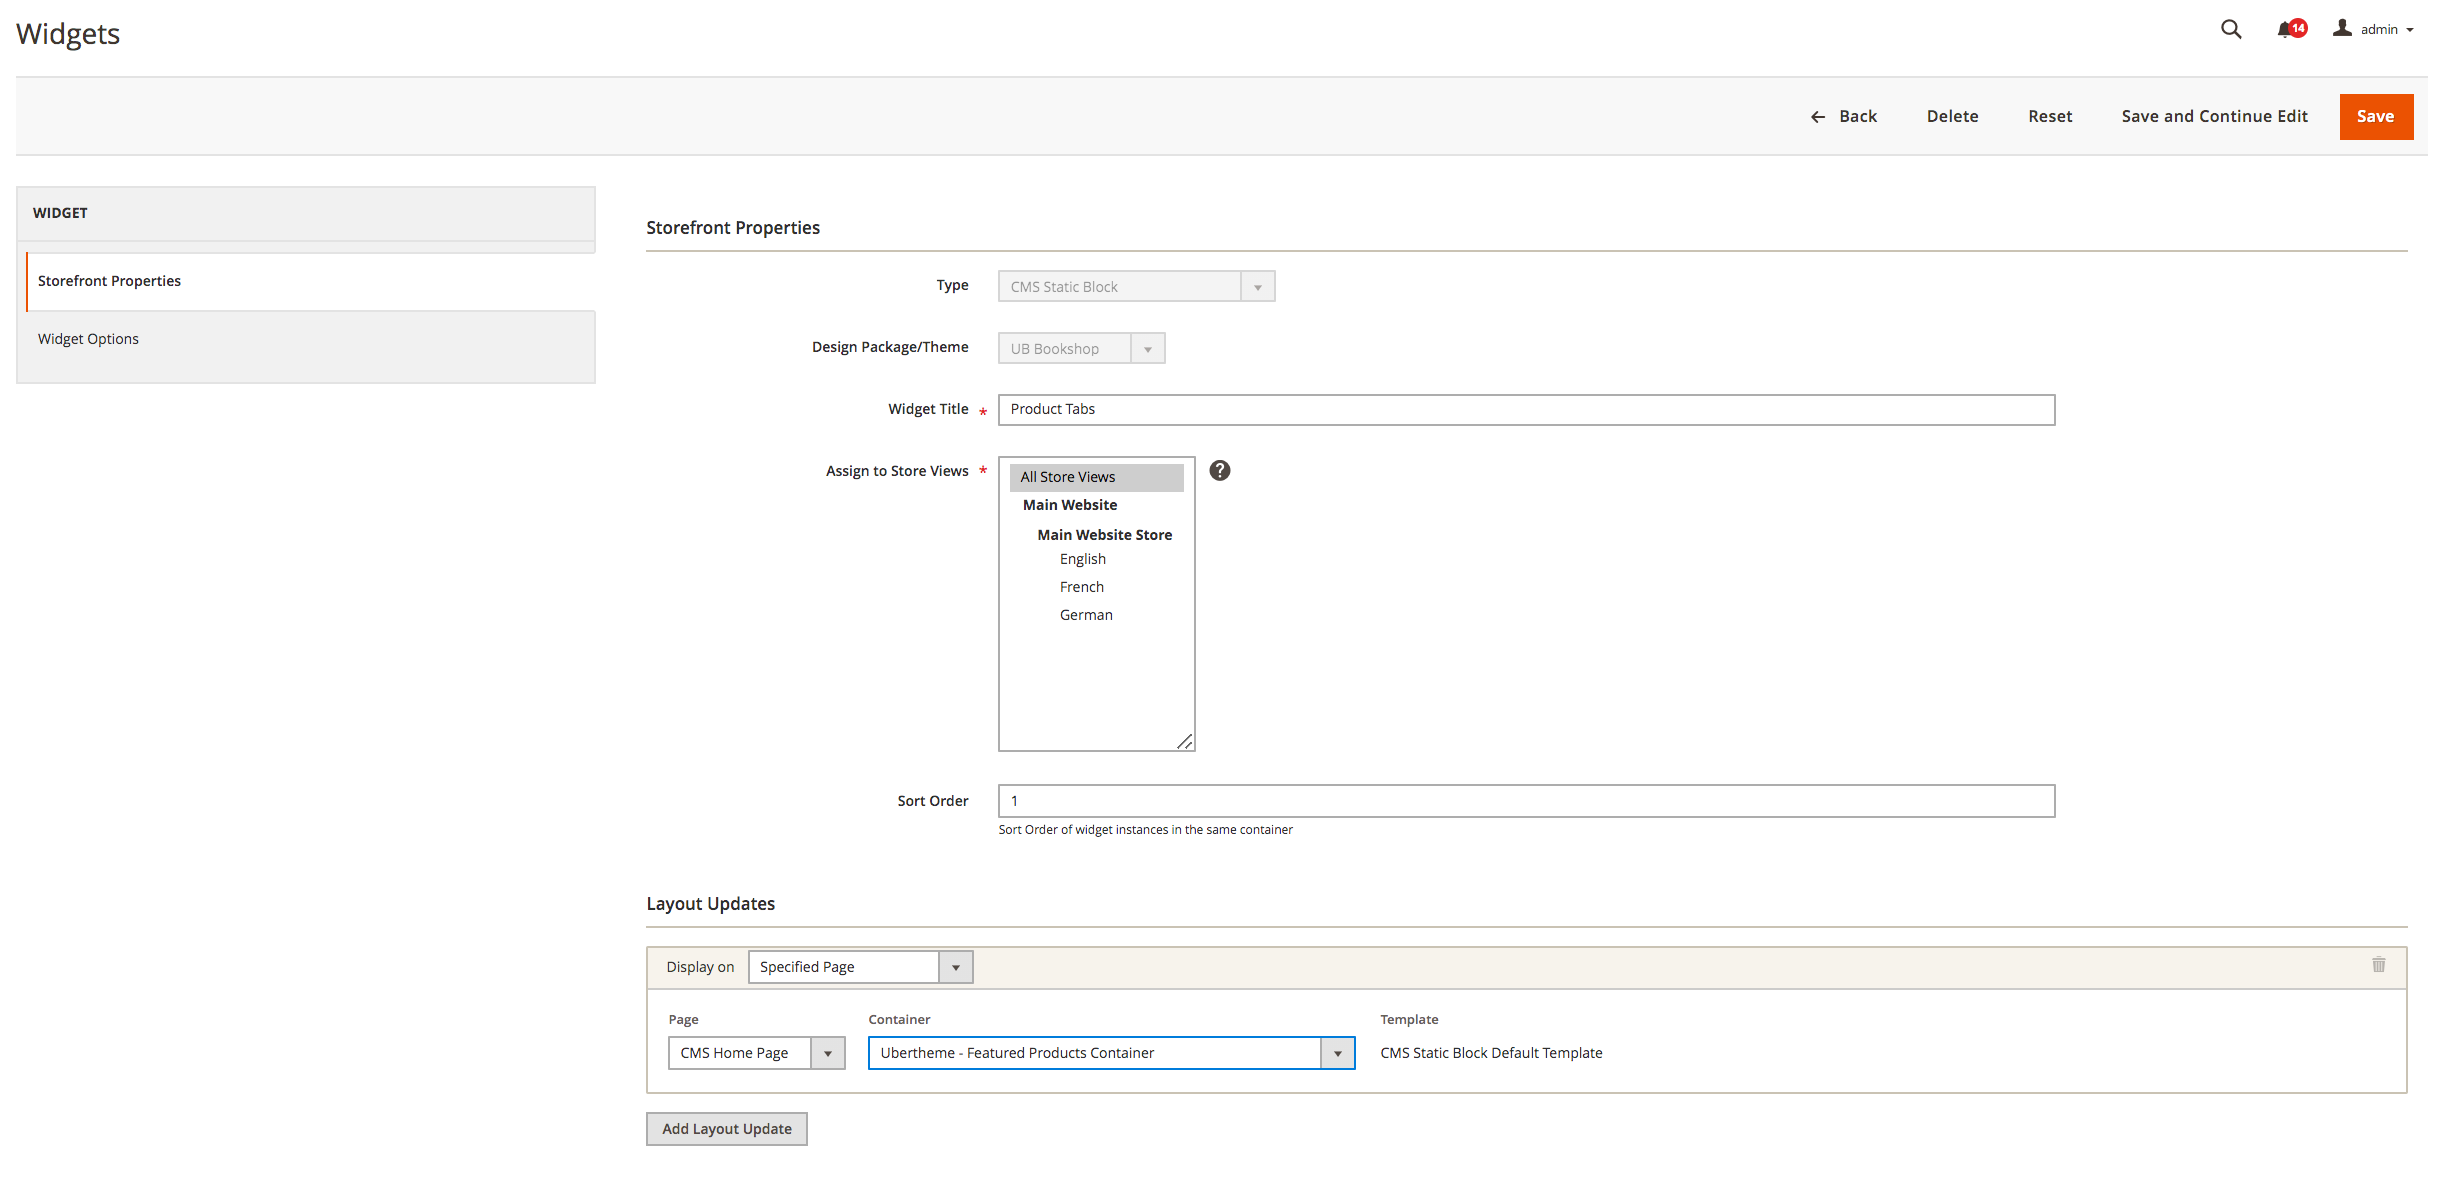
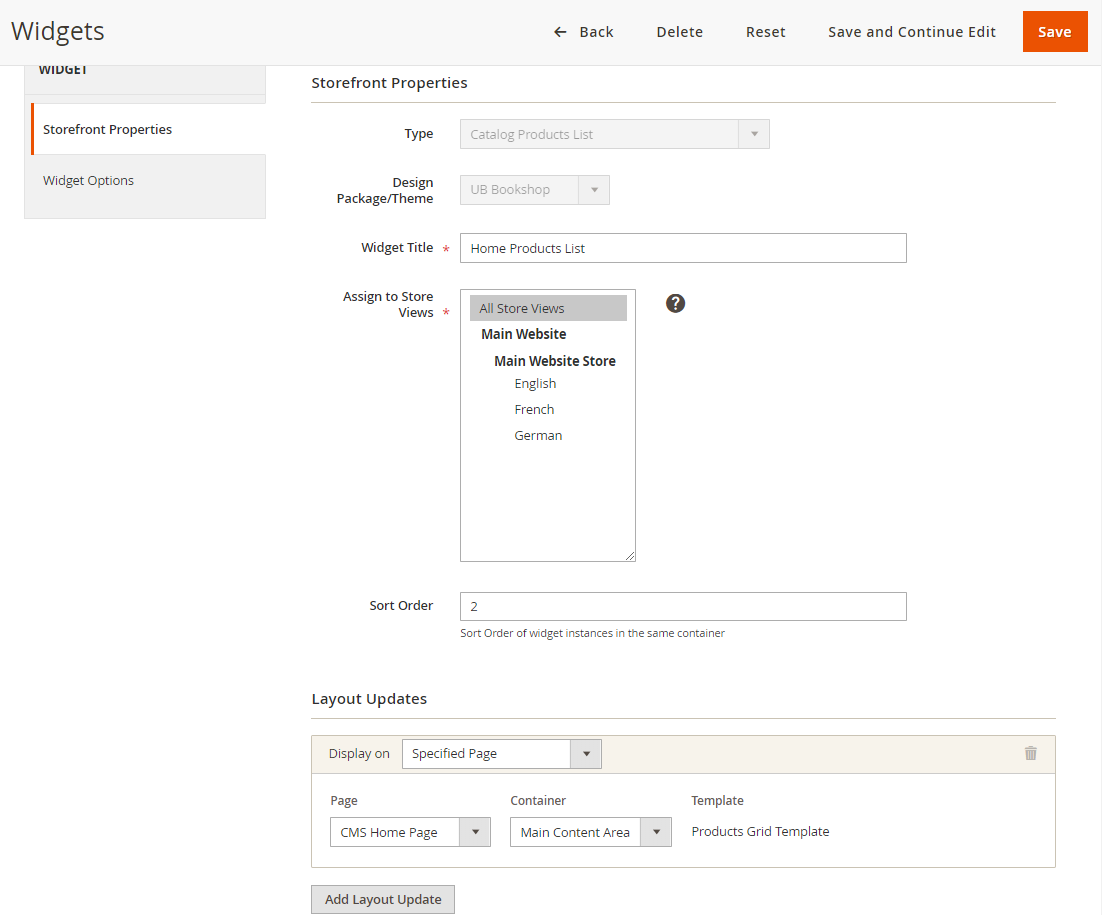
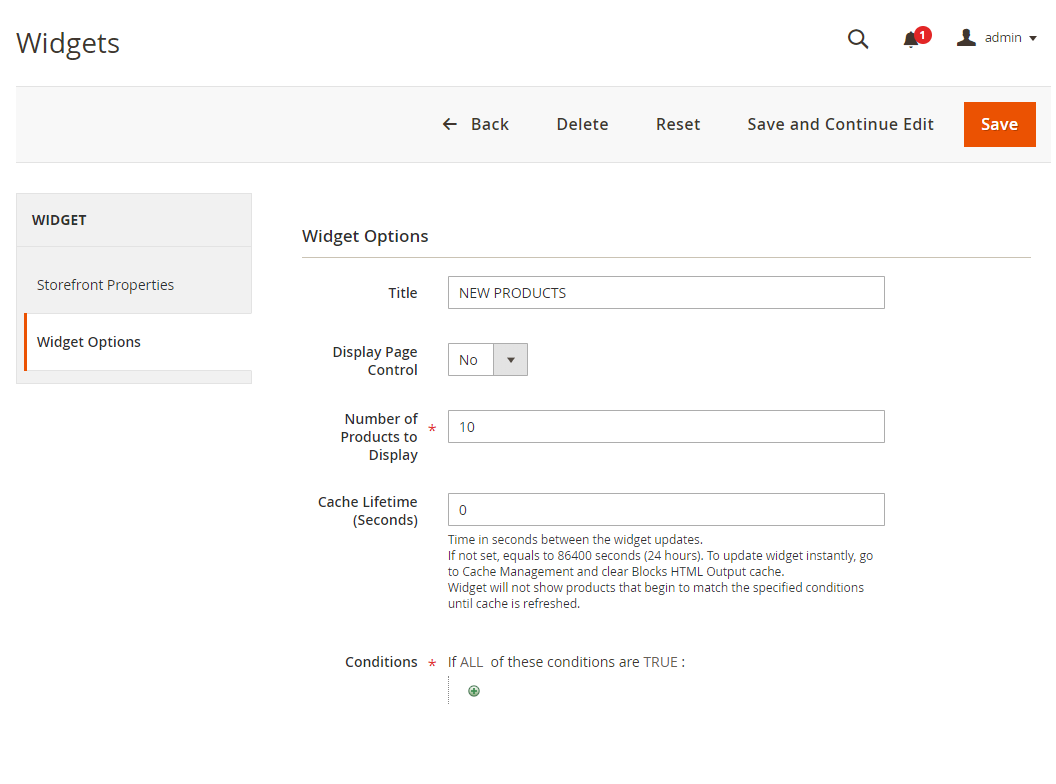
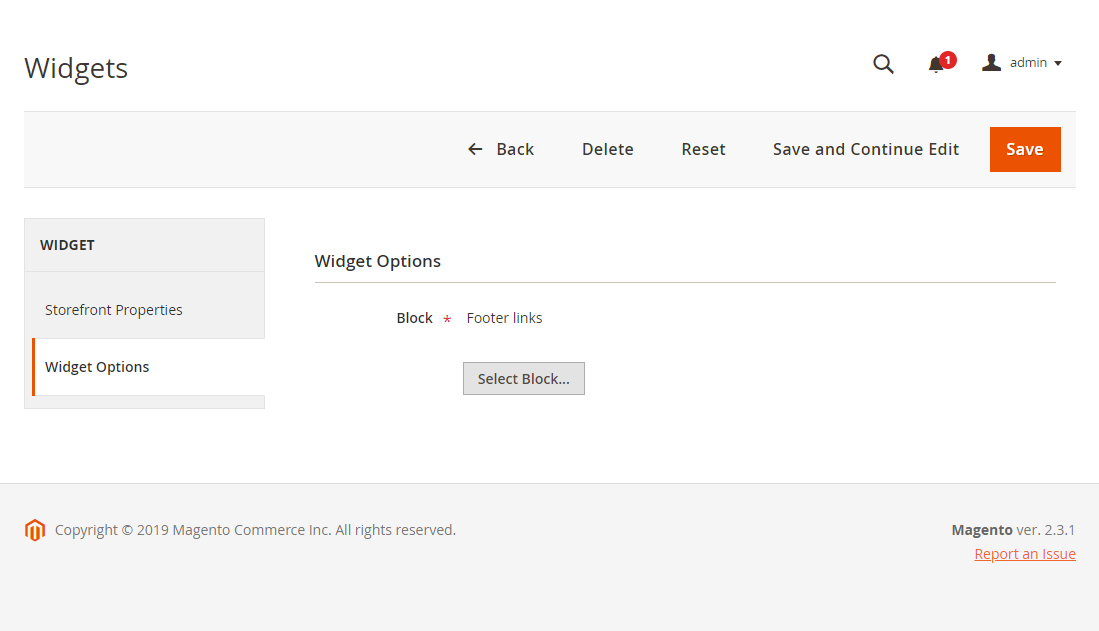
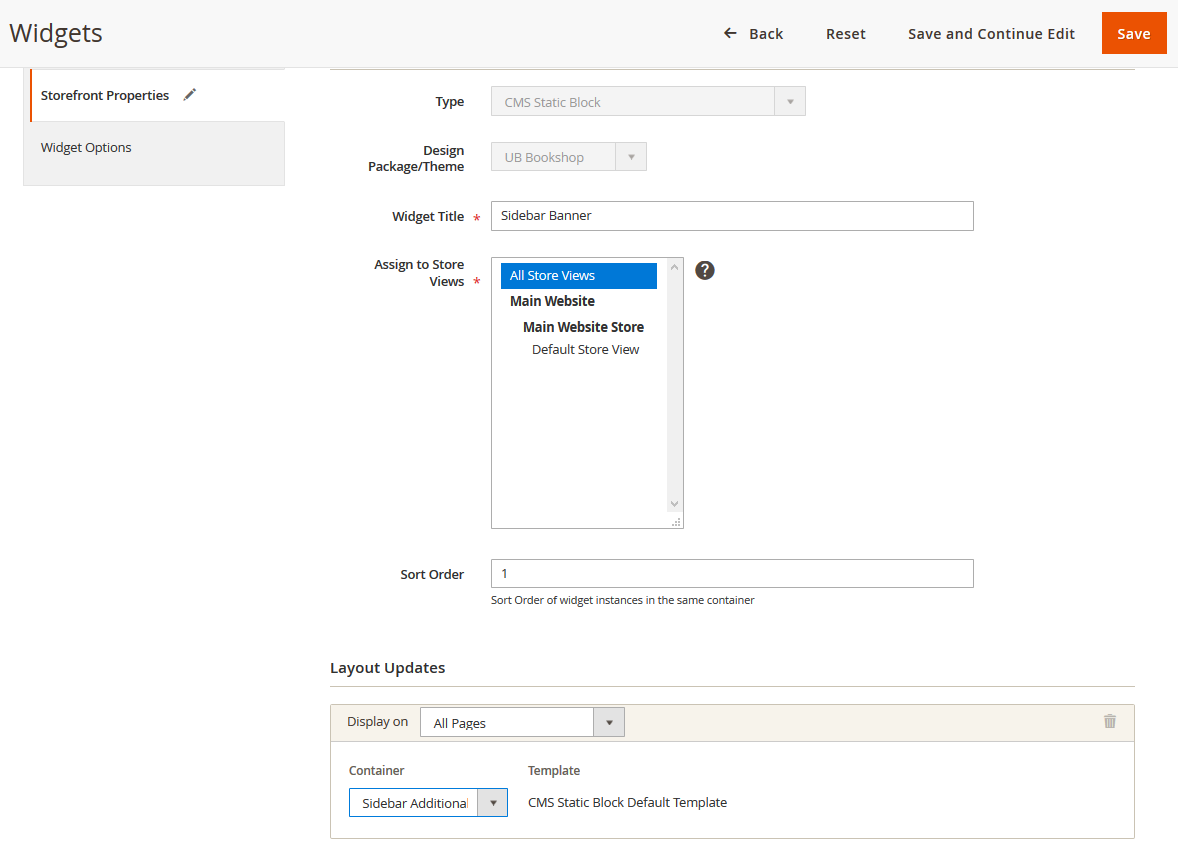
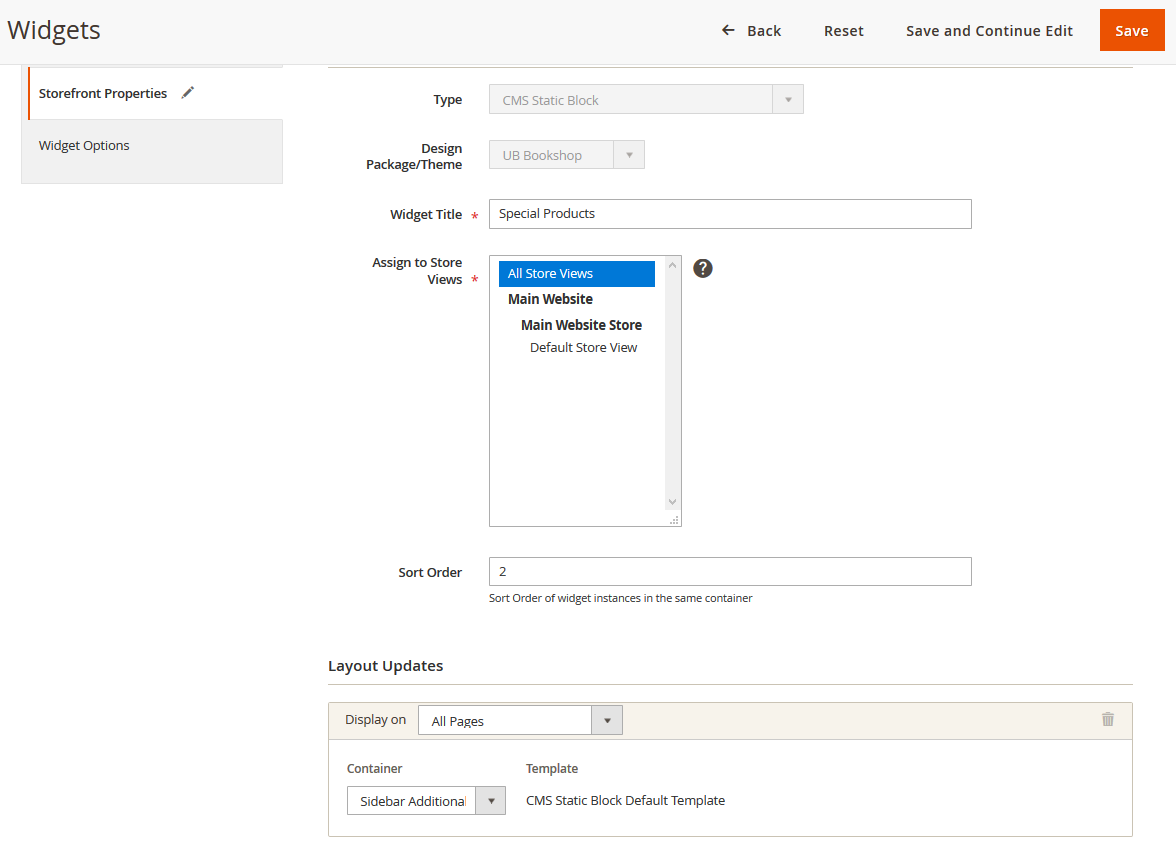
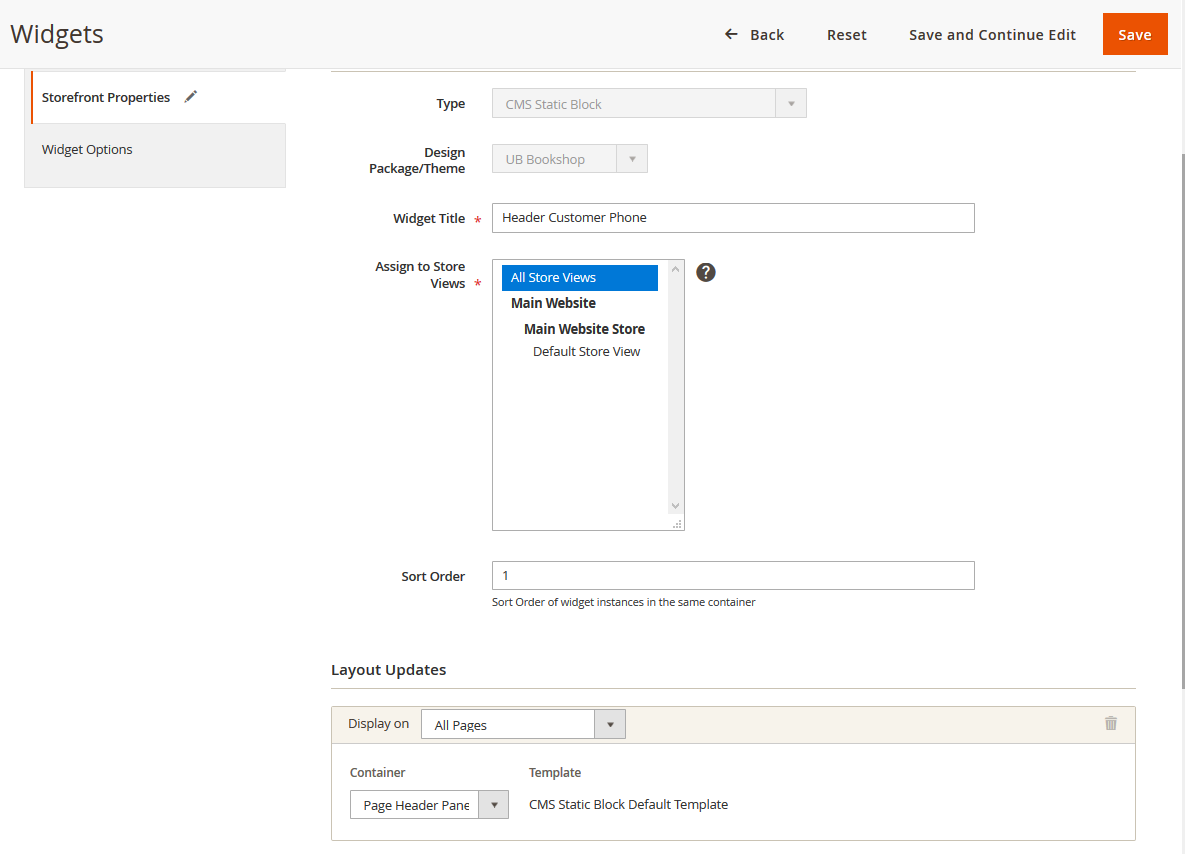
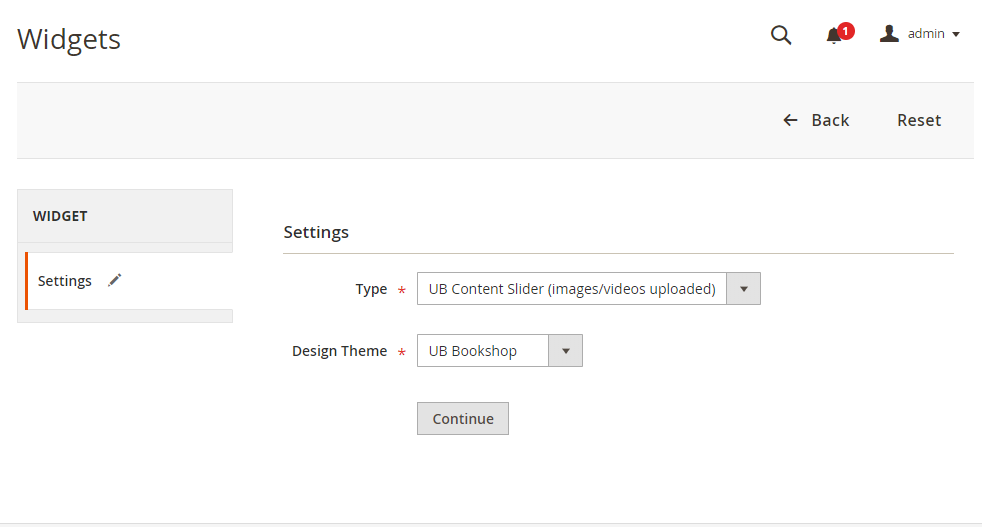
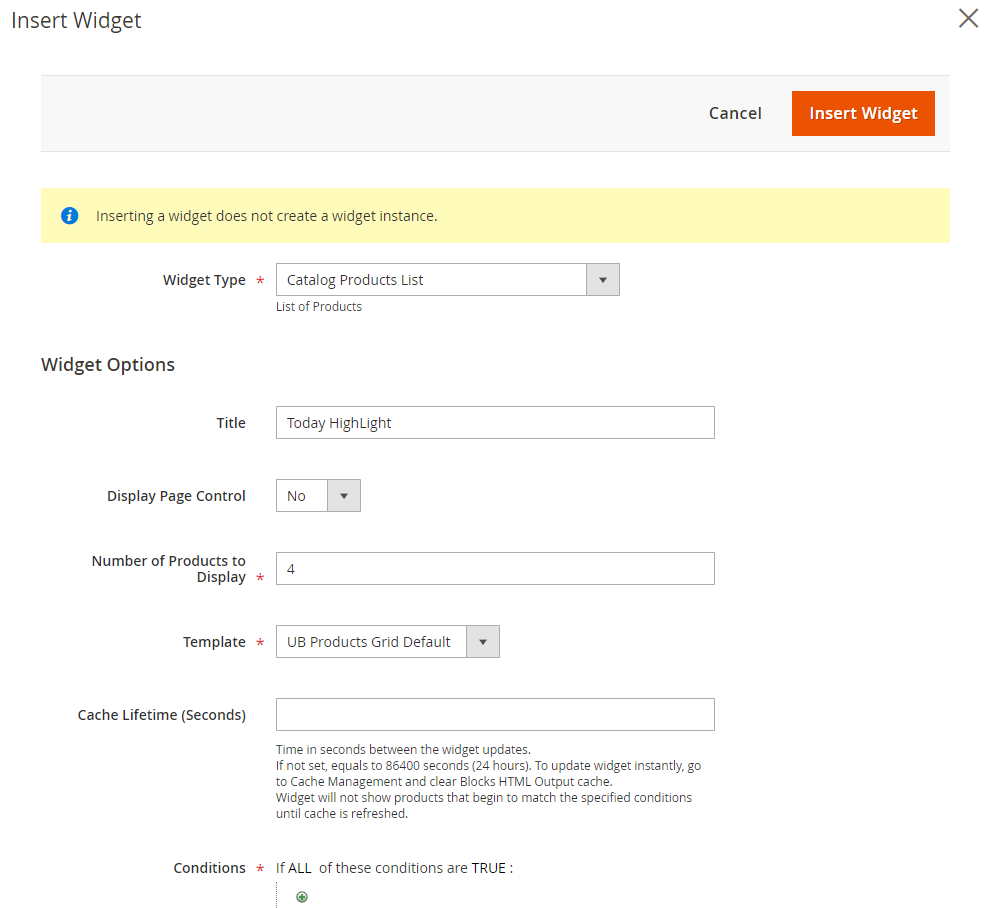
Step 4:In the Admin Panel, navigate to Content | (Elements) Widget | Add Widget with the configuration as follows:
- Today Highlight: backend setting > backend setting
- Product Tabs: backend setting > backend setting
- Home Banner: backend setting > backend setting
- Home Product List: backend setting > backend setting
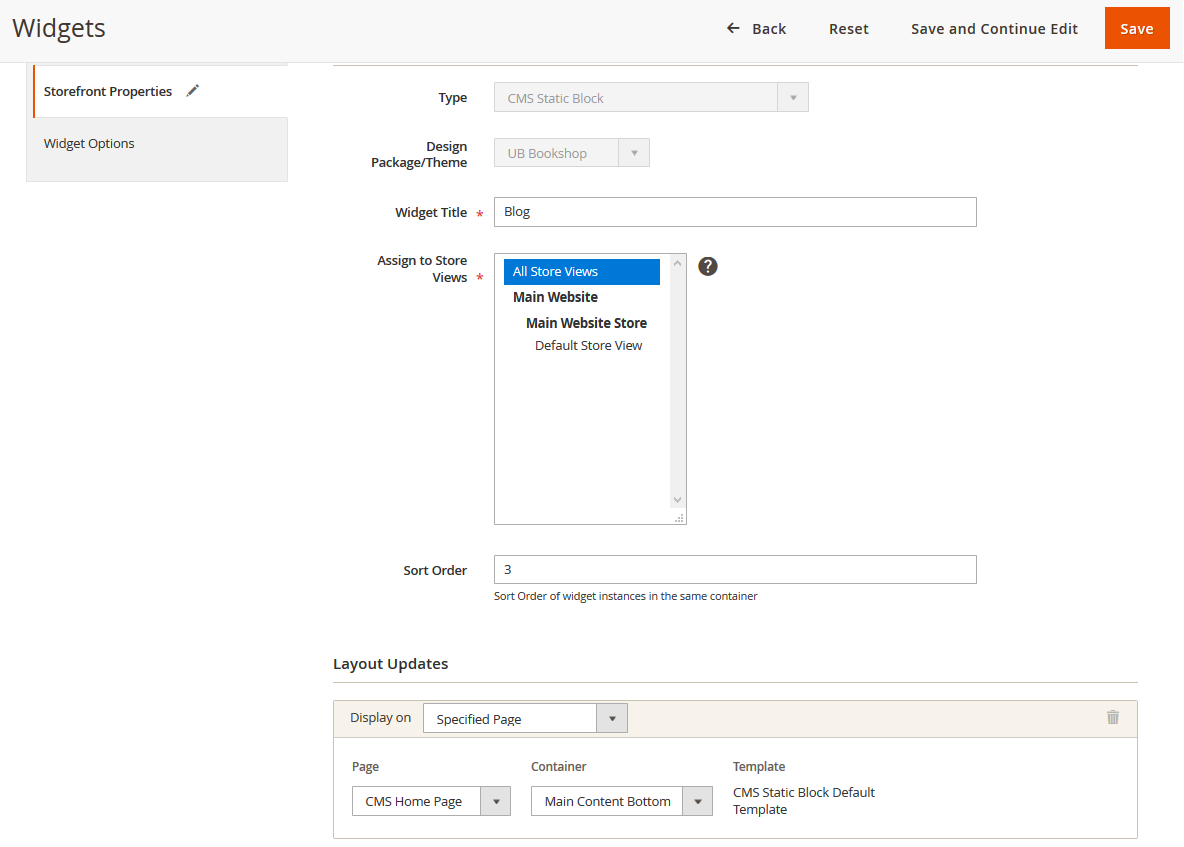
- Blog: backend setting > backend setting
- Deals of the week: backend setting > backend setting
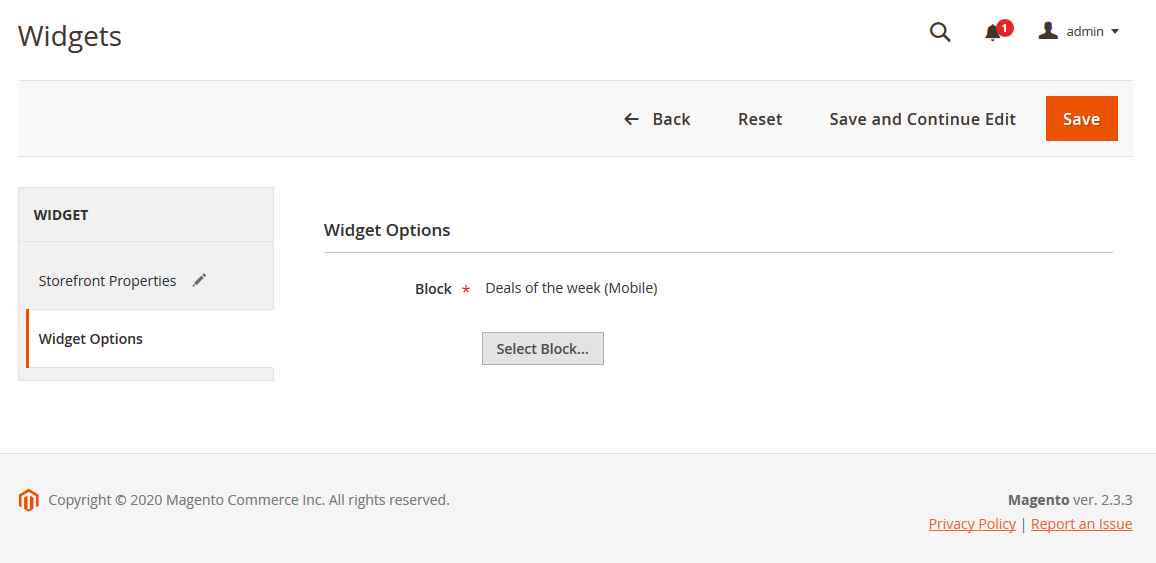
- Deals of the week (Mobile): backend setting > backend setting
- Footer Link: backend setting > backend setting
- Sidebar Banner: backend setting > backend setting
- Special Products: backend setting > backend setting
- Social: backend setting > backend setting
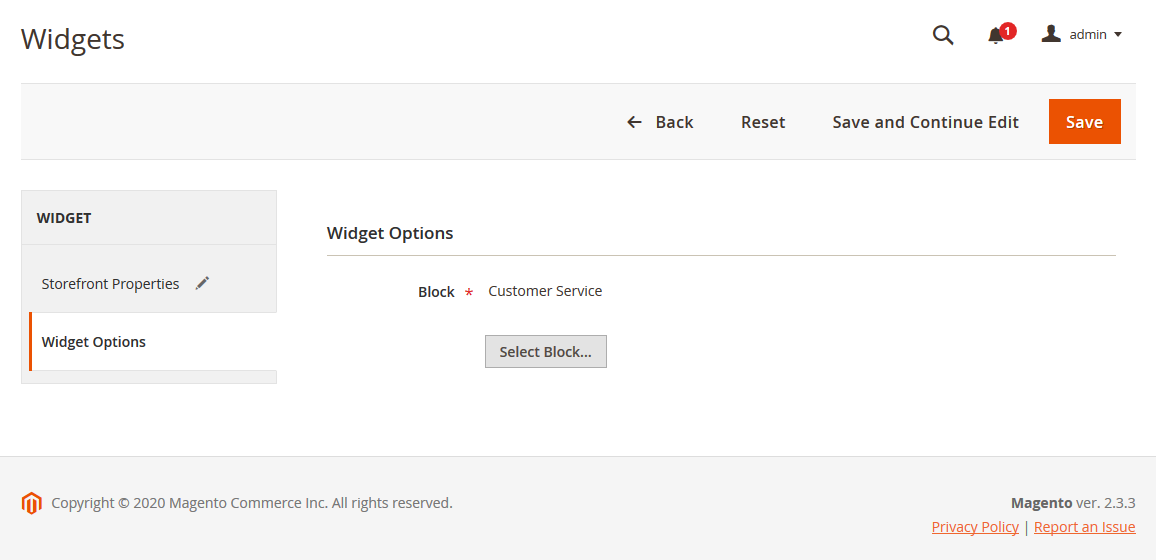
- Customer Service: backend setting > backend setting
- Brand: backend setting > backend setting
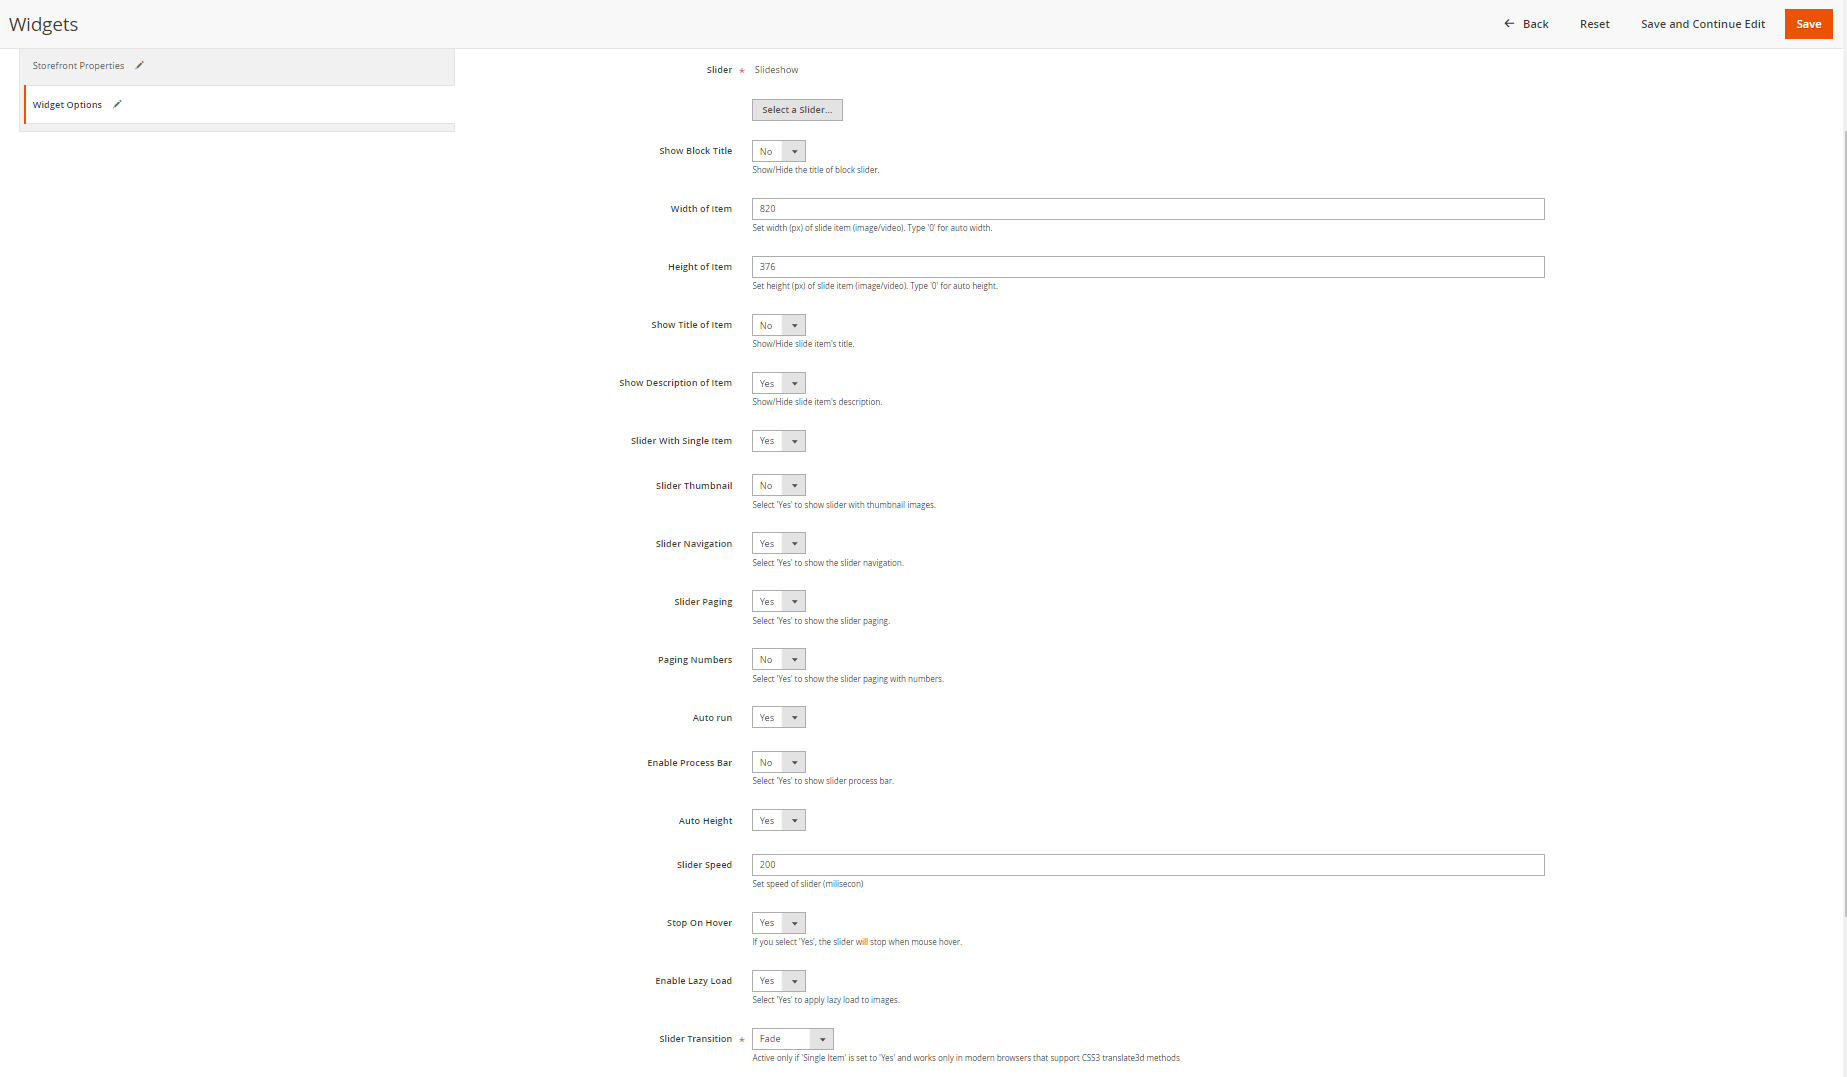
Step 5: Content Slider Configuration:
1. In the Magento Admin Panel, navigate to Ubertheme’s Extensions | Content Slider | Manage Slider | Add New Slider and configure the default settings as the Back-end setting.
2. In the Admin Panel, navigate to Content | (Elements) Widget | Add Widget with the configuration as follows:
slideshow setting 1 > slideshow setting 2 > slideshow setting 3
3. After configuration is complete, in your Magento Admin Panel, navigate to System | Tools | Cache Management, Sellect All the cache types, take Action as Refresh and Submit.
Front-end Appearance:
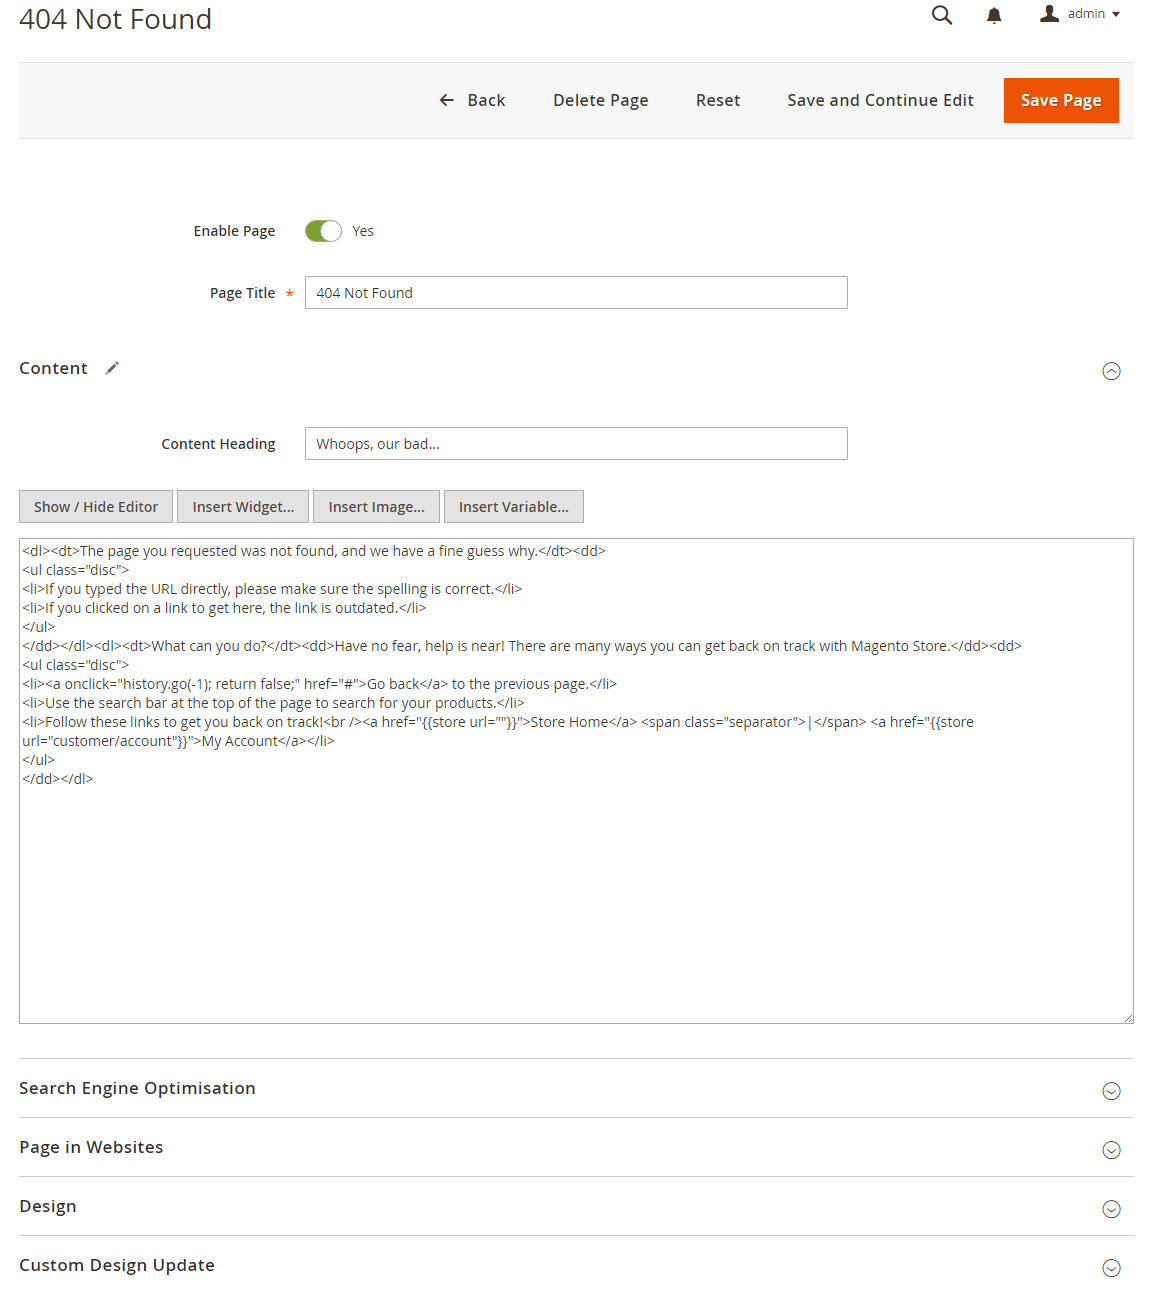
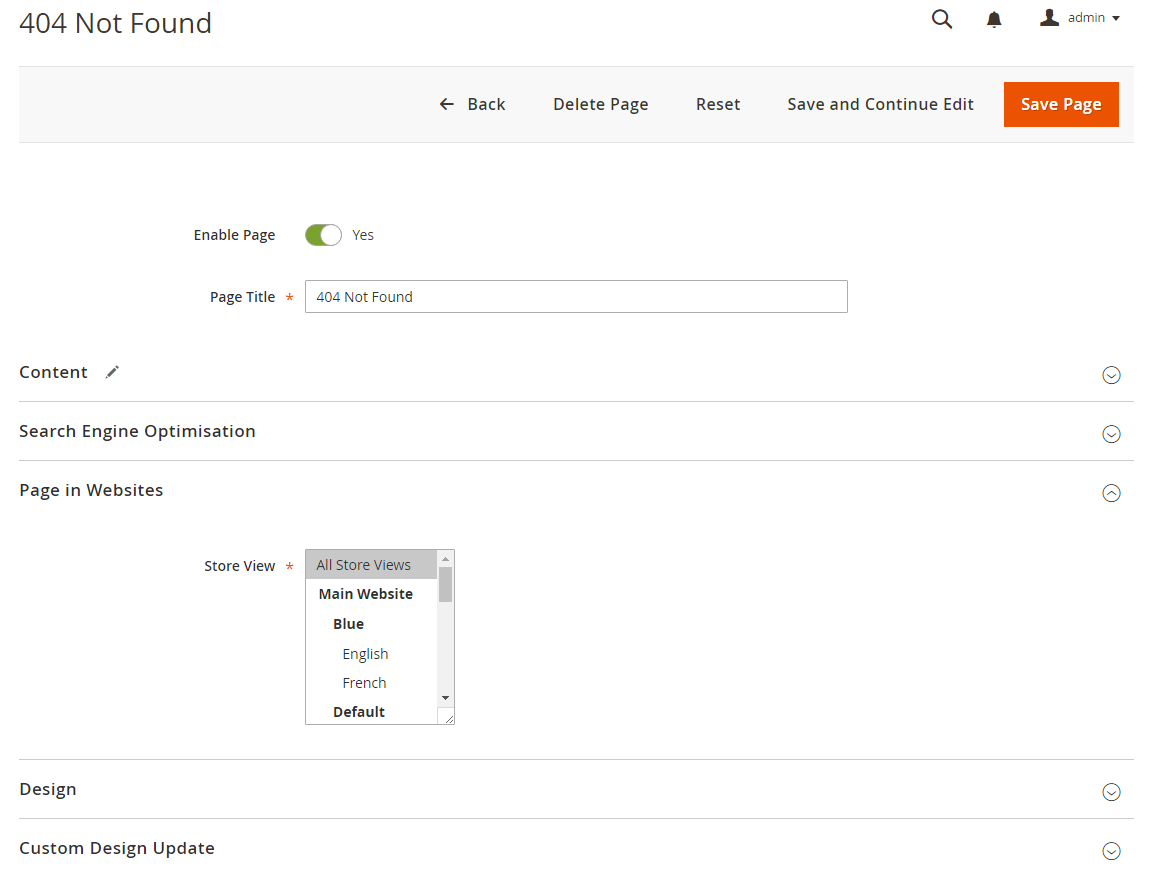
404 Page Configuration
To configure this page, in the Admin Panel, navigate to Content | Elements | Pages, then select 404 Not Found page to update the settings as follows:
- Content tab: click to see the Back-end setting
- Page in Websites tab: click to see the Back-end setting
Copy and paste the code below on the Content field:
<div id="ub-error">
<div class="page-head-alt">
<h2>404</h2>
</div>
<h3>The page you requested was not found, and we have a fine guess why</h3>
<ul class="none-disc">
<li>If you typed the URL directly, please make sure the spelling is correct.</li>
<li>If you clicked on a link to get here, the link is outdated.</li>
</ul>
<dl><dt>What can you do?</dt><dd>Have no fear, help is near! There are many ways you can get back on track with Magento Demo Store.</dd><dd>
<ul class="none-disc">
<li><a onclick="history.go(-1);" href="#">Go back</a> to the previous page.</li>
<li>Use the search bar at the top of the page to search for your products.</li>
</ul>
</dd><dt>Follow these links to get you back on track!</dt><dd>
<ul class="none-disc">
<li><a href="{{store url=""}}">Store Home</a></li>
<li><a href="{{store url="customer/account"}}">My Account</a></li>
</ul>
</dd></dl></div>
Front-end Appearance:

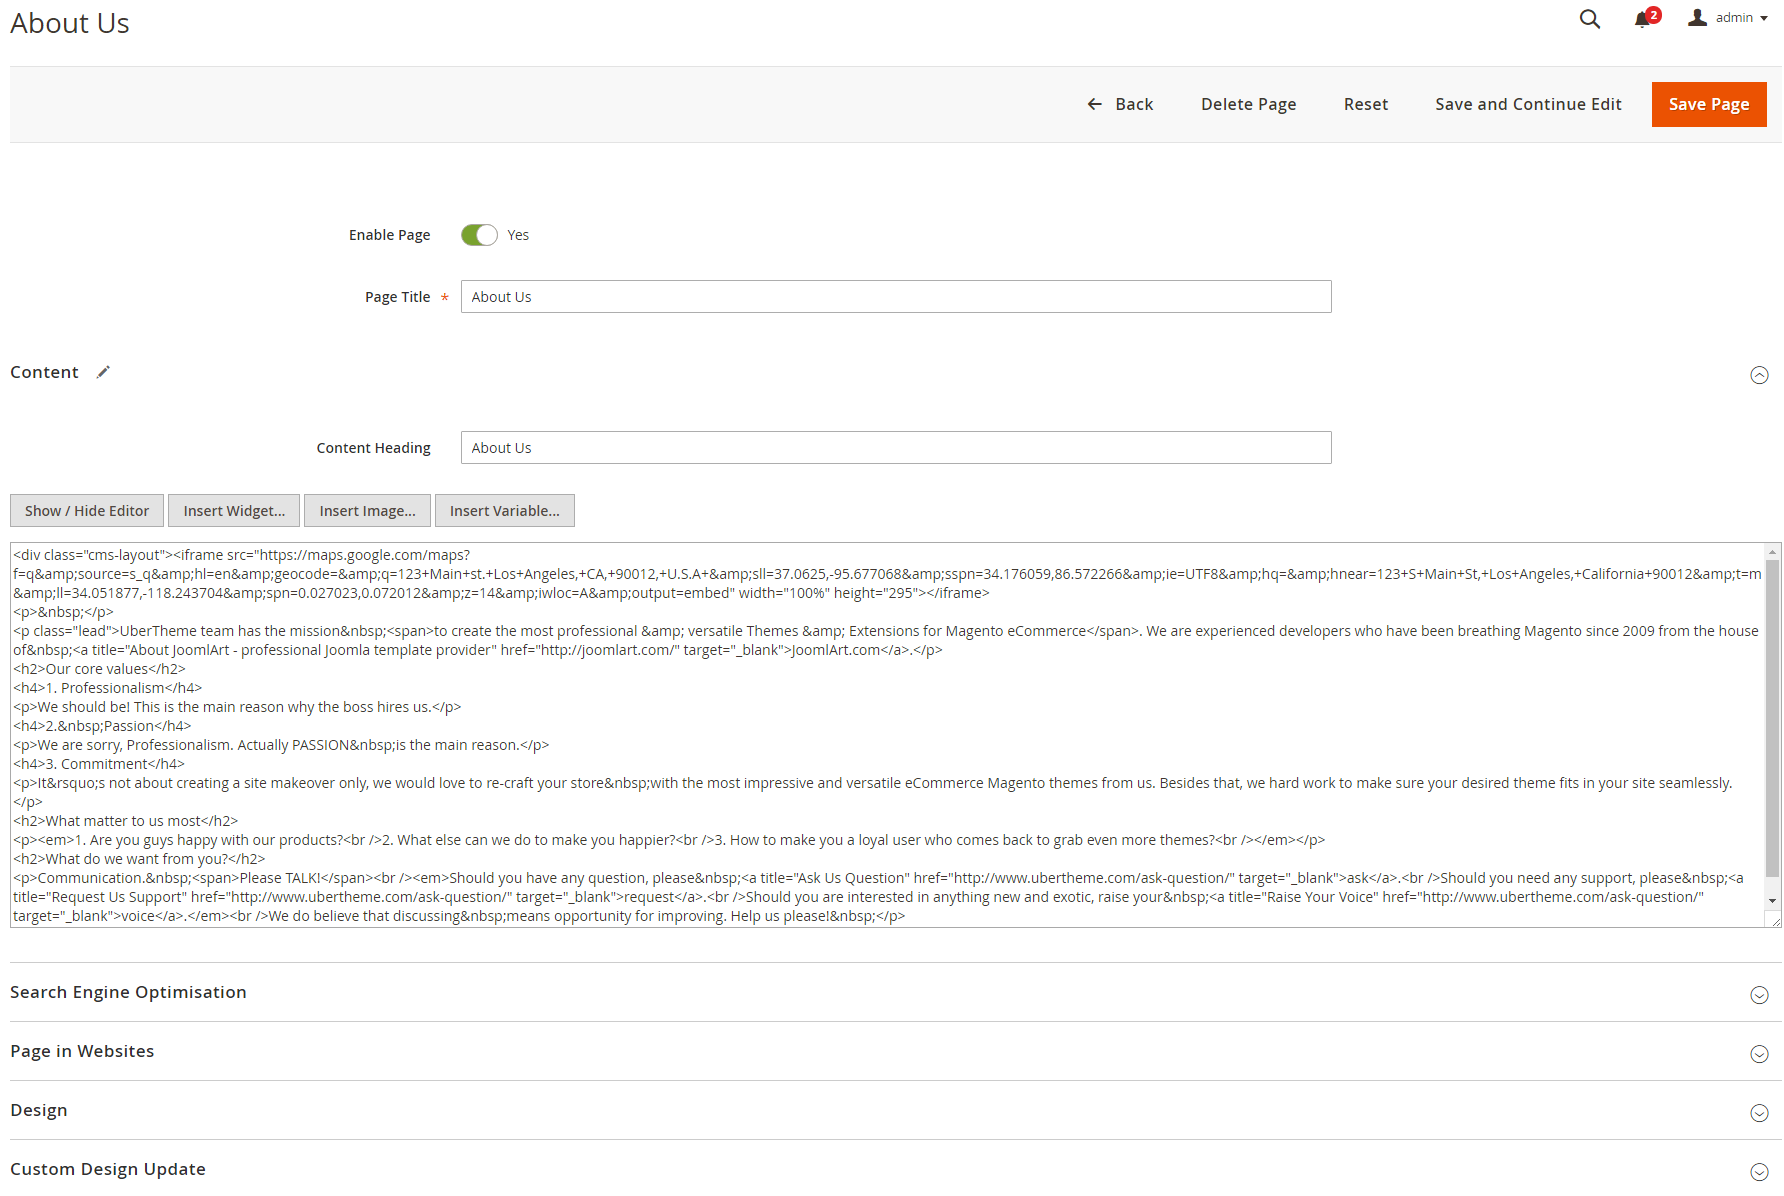
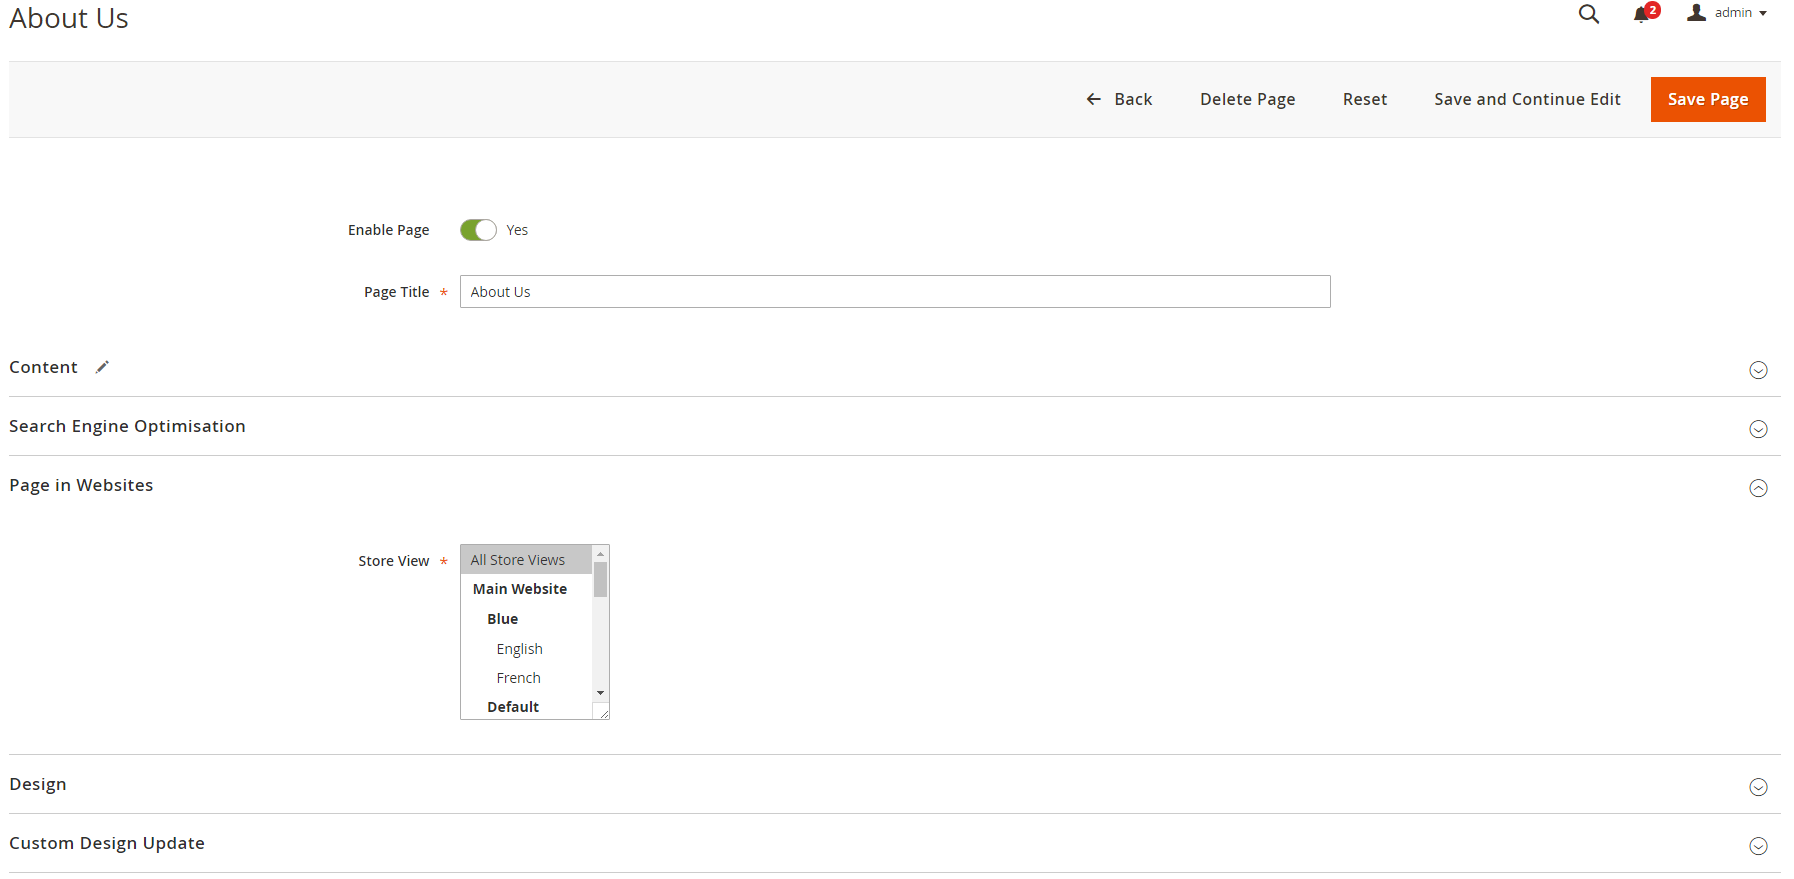
About Us Configuration
To configure this page, in the Admin Panel, navigate to Content | Elements | Pages, then select About Us page to update the settings as follows:
-
- Content tab: click to see the Back-end setting
- Page in Websites tab: click to see the Back-end setting
Copy and paste the code below on the Content field:
<div class="cms-layout"><iframe src="https://maps.google.com/maps?f=q&source=s_q&hl=en&geocode=&q=123+Main+st.+Los+Angeles,+CA,+90012,+U.S.A+&sll=37.0625,-95.677068&sspn=34.176059,86.572266&ie=UTF8&hq=&hnear=123+S+Main+St,+Los+Angeles,+California+90012&t=m&ll=34.051877,-118.243704&spn=0.027023,0.072012&z=14&iwloc=A&output=embed" width="100%" height="295"></iframe> <p> </p> <p class="lead">UberTheme team has the mission <span>to create the most professional & versatile Themes & Extensions for Magento eCommerce</span>. We are experienced developers who have been breathing Magento since 2009 from the house of <a title="About JoomlArt - professional Joomla template provider" href="http://joomlart.com/" target="_blank">JoomlArt.com</a>.</p> <h2>Our core values</h2> <h4>1. Professionalism</h4> <p>We should be! This is the main reason why the boss hires us.</p> <h4>2. Passion</h4> <p>We are sorry, Professionalism. Actually PASSION is the main reason.</p> <h4>3. Commitment</h4> <p>It’s not about creating a site makeover only, we would love to re-craft your store with the most impressive and versatile eCommerce Magento themes from us. Besides that, we hard work to make sure your desired theme fits in your site seamlessly.</p> <h2>What matter to us most</h2> <p><em>1. Are you guys happy with our products?<br />2. What else can we do to make you happier?<br />3. How to make you a loyal user who comes back to grab even more themes?<br /></em></p> <h2>What do we want from you?</h2> <p>Communication. <span>Please TALK!</span><br /><em>Should you have any question, please <a title="Ask Us Question" href="http://www.ubertheme.com/ask-question/" target="_blank">ask</a>.<br />Should you need any support, please <a title="Request Us Support" href="http://www.ubertheme.com/ask-question/" target="_blank">request</a>.<br />Should you are interested in anything new and exotic, raise your <a title="Raise Your Voice" href="http://www.ubertheme.com/ask-question/" target="_blank">voice</a>.</em><br />We do believe that discussing means opportunity for improving. Help us please! </p> </div>
Front-end Appearance:

VI. Static Block Configuration
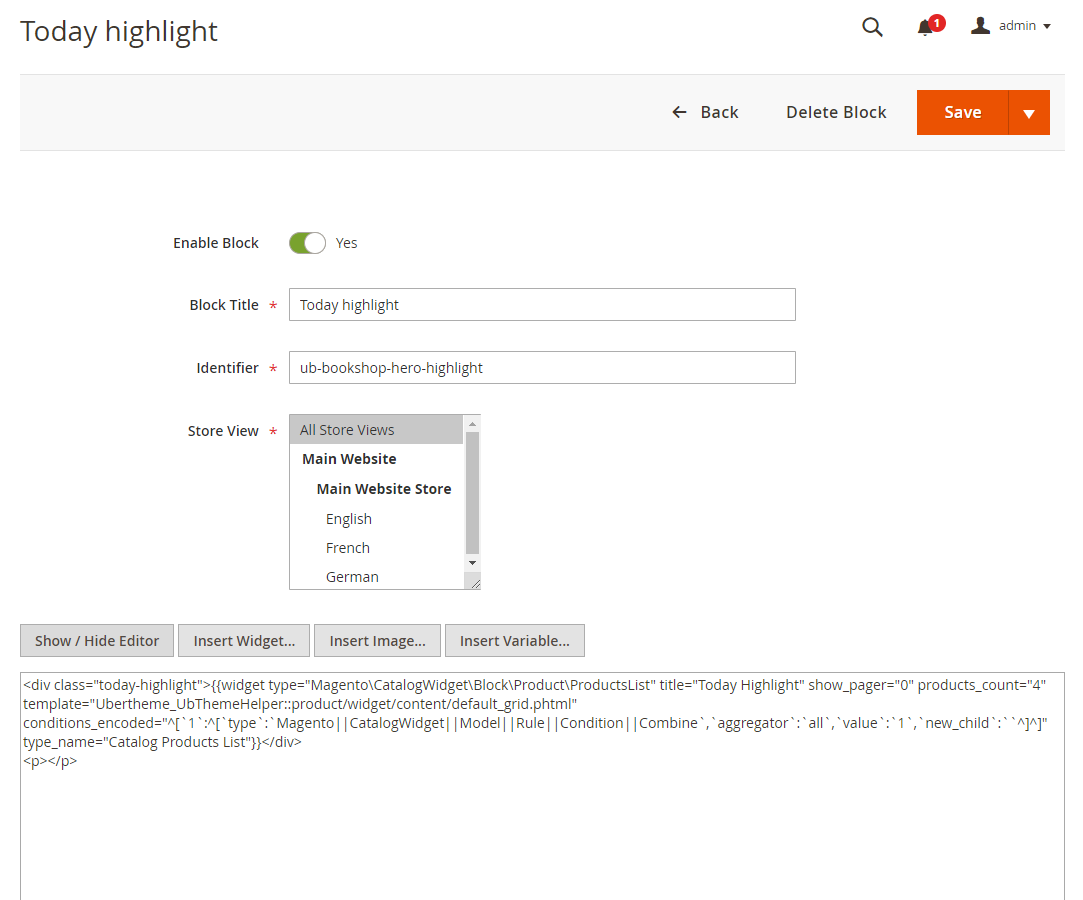
1. Today Hightlight
Step 1: In your admin dashboard, click Content | (Elements) Blocks | Add New Block, then create Today hightlight block with configuration as follows: Back-end setting
Option 1: In the Content field, click Show/Hide Editor button, then copy and paste the following code:
<div class="today-highlight">
{{widget type="Magento\CatalogWidget\Block\Product\ProductsList" title="Today Highlight" show_pager="0" products_count="4" template="Ubertheme_UbThemeHelper::product/widget/content/default_grid.phtml" conditions_encoded="^[`1`:^[`type`:`Magento||CatalogWidget||Model||Rule||Condition||Combine`,`aggregator`:`all`,`value`:`1`,`new_child`:``^]^]" type_name="Catalog Products List"}}
</div>
Option 2: In the Content tab, click Show / Hide Editor button, and click Insert Widget button:
Front-end Appearance:

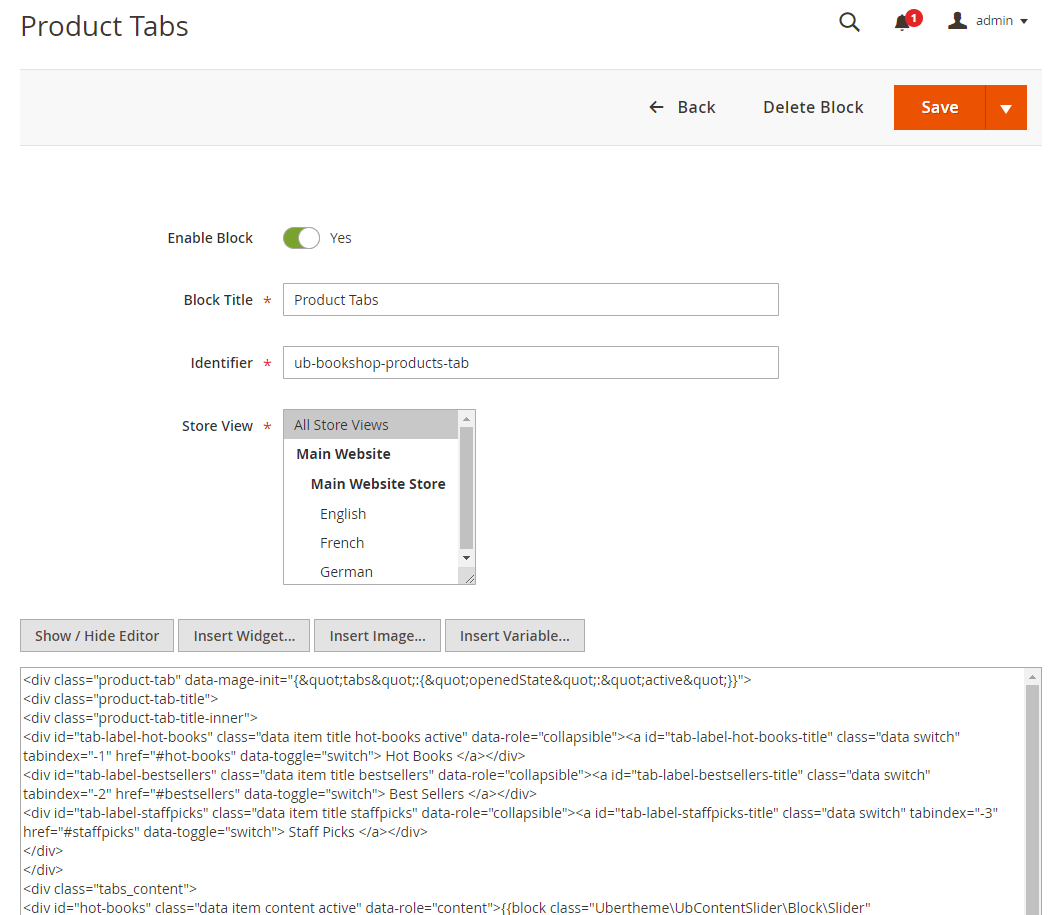
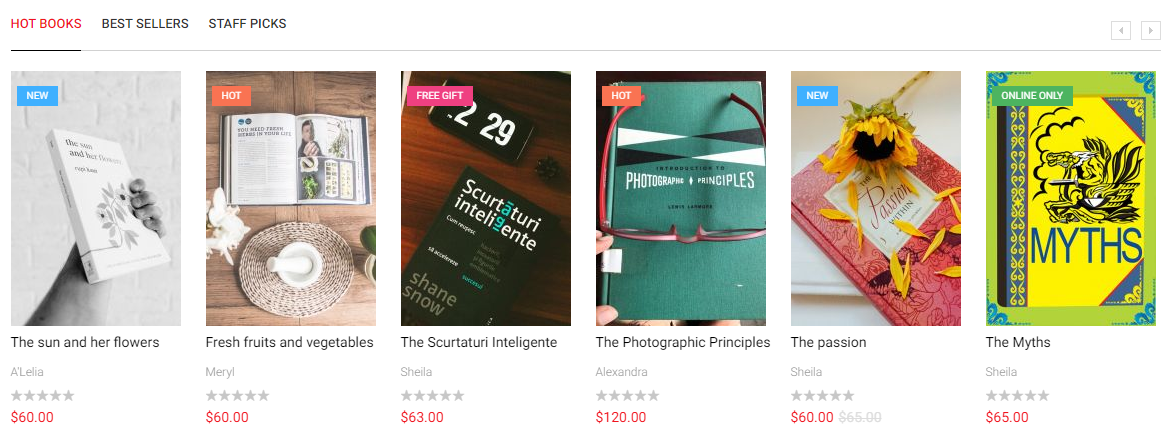
2. Product Tabs
In your admin dashboard, click Content | (Elements) Blocks | Add New Block, then create Product Tabs block with configuration as follows:
Back-end setting
In the Content field, click Show/Hide Editor button, then copy and paste the following code:
<div class="product-tab" data-mage-init="{"tabs":{"openedState":"active"}}">
<div class="product-tab-title">
<div class="product-tab-title-inner">
<div id="tab-label-hot-books" class="data item title hot-books active" data-role="collapsible"><a id="tab-label-hot-books-title" class="data switch" tabindex="-1" href="#hot-books" data-toggle="switch"> Hot Books </a></div>
<div id="tab-label-bestsellers" class="data item title bestsellers" data-role="collapsible"><a id="tab-label-bestsellers-title" class="data switch" tabindex="-2" href="#bestsellers" data-toggle="switch"> Best Sellers </a></div>
<div id="tab-label-staffpicks" class="data item title staffpicks" data-role="collapsible"><a id="tab-label-staffpicks-title" class="data switch" tabindex="-3" href="#staffpicks" data-toggle="switch"> Staff Picks </a></div>
</div>
</div>
<div class="tabs_content">
<div id="hot-books" class="data item content active" data-role="content">{{block class="Ubertheme\UbContentSlider\Block\Slider" name="ub.content.slider.hot.books" content_type="hot_products" title="Hot Books" number_items="6" number_items_desktop="5" number_items_desktop_small="5" number_items_tablet="4" number_items_tablet_small="3" number_items_mobile="2" show_desc="0" show_readmore="0" qty="8" single_item="0" show_review="1" show_price="1" show_add_cart="1" auto_run="1" item_width="202" thumb_width="202" auto_height="0"}}</div>
<div id="bestsellers" class="data item content" data-role="content">{{block class="Ubertheme\UbContentSlider\Block\Slider" name="ub.content.slider.best.sellers" content_type="latest_products" title="Best Sellers" number_items="6" number_items_desktop="5" number_items_desktop_small="5" number_items_tablet="4" number_items_tablet_small="3" number_items_mobile="2" show_desc="0" show_readmore="0" qty="8" single_item="0" show_review="1" show_price="1" show_add_cart="1" auto_run="1" item_width="202" thumb_width="202" auto_height="0"}}</div>
<div id="staffpicks" class="data item content" data-role="content">{{block class="Ubertheme\UbContentSlider\Block\Slider" name="ub.content.slider.staff.picks" content_type="new_products" title="Staff Picks" number_items="6" number_items_desktop="5" number_items_desktop_small="5" number_items_tablet="4" number_items_tablet_small="3" number_items_mobile="2" show_desc="0" show_readmore="0" qty="8" single_item="0" show_review="1" show_price="1" show_add_cart="1" auto_run="1" item_width="202" thumb_width="202" auto_height="0"}}</div>
</div>
</div>
Front-end Appearance:
3. Customer Service
In your admin dashboard, click Content | (Elements) Blocks | Add New Block, then create Customer Service block with configuration as follows:
Back-end setting
In the Content field, click Show/Hide Editor button, then copy and paste the following code:
<ul class="customer-services">
<li>(012) 345 6789</li>
<li><a href="{{store url="customer-service"}}">Shipping & Customer Service</a></li>
</ul>
Front-end Appearance:

4. Socials
In your admin dashboard, click Content | (Elements) Blocks | Add New Block, then create Socials block with configuration as follows:
Back-end setting
In the Content field, click Show/Hide Editor button, then copy and paste the following code:
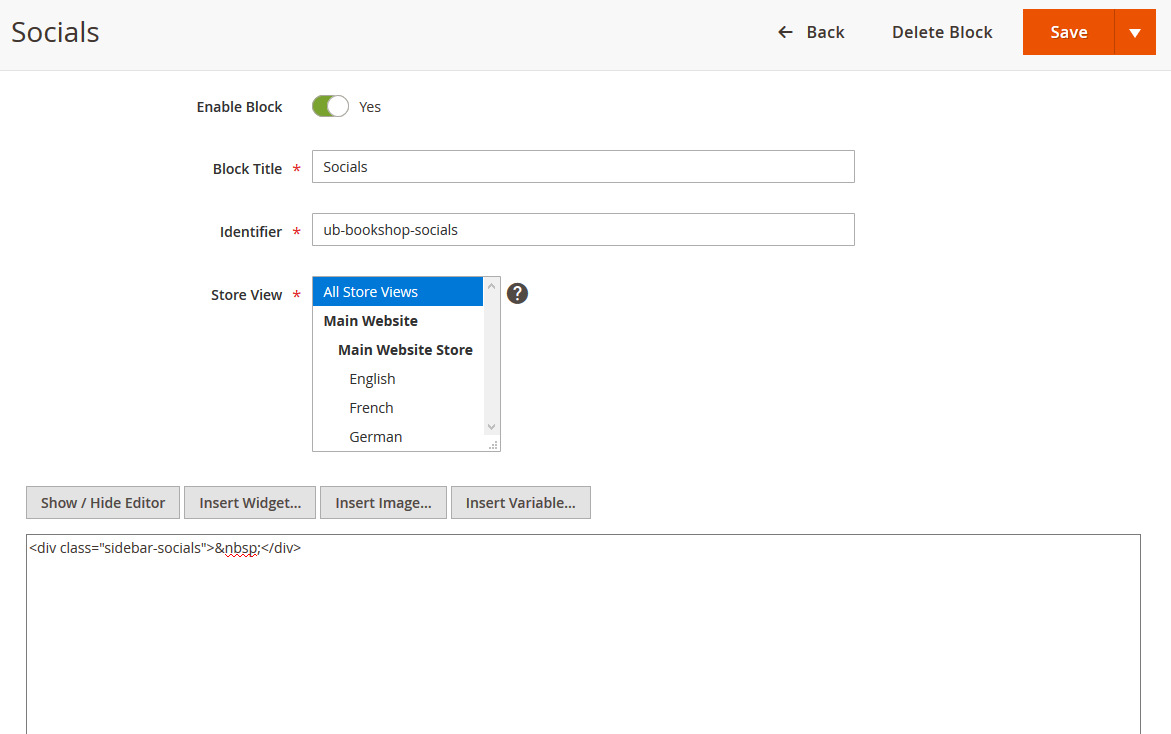
<div class="sidebar-socials"> </div>
Front-end Appearance:

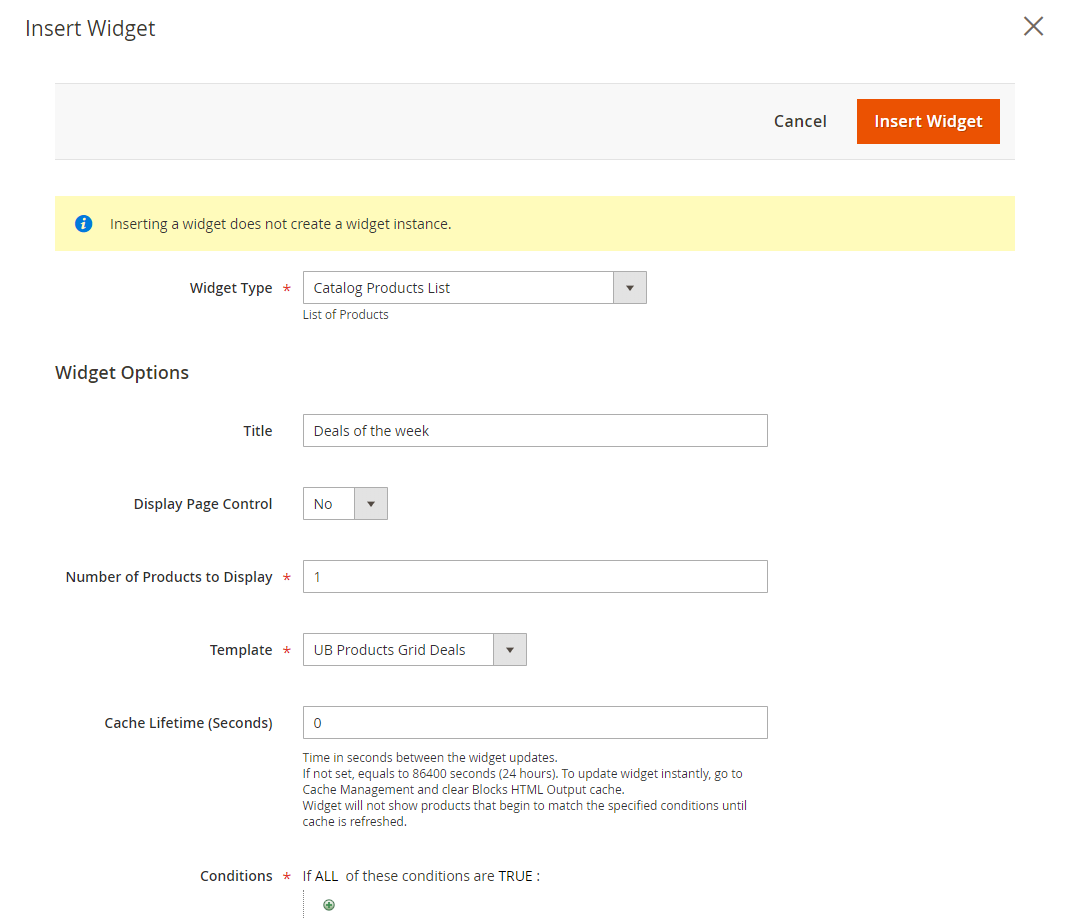
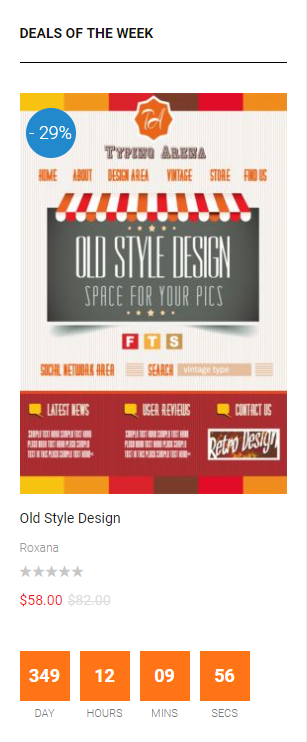
5. Deals of the week
In your admin dashboard, click Content | (Elements) Blocks | Add New Block, then create Deals of the week block with configuration as follows:
Back-end setting
Option 1: In the Content field, click Show/Hide Editor button, then copy and paste the following code:
<div class="deals">
{{widget type="Magento\CatalogWidget\Block\Product\ProductsList" title="Deals of the week" show_pager="0" products_count="1" cache_lifetime="0" template="Ubertheme_UbThemeHelper::product/widget/content/deals_grid.phtml" conditions_encoded="^[`1`:^[`type`:`Magento||CatalogWidget||Model||Rule||Condition||Combine`,`aggregator`:`all`,`value`:`1`,`new_child`:``^],`1--1`:^[`type`:`Magento||CatalogWidget||Model||Rule||Condition||Product`,`attribute`:`special_price`,`operator`:`^)`,`value`:`1`^]^]" type_name="Catalog Products List"}}
</div>
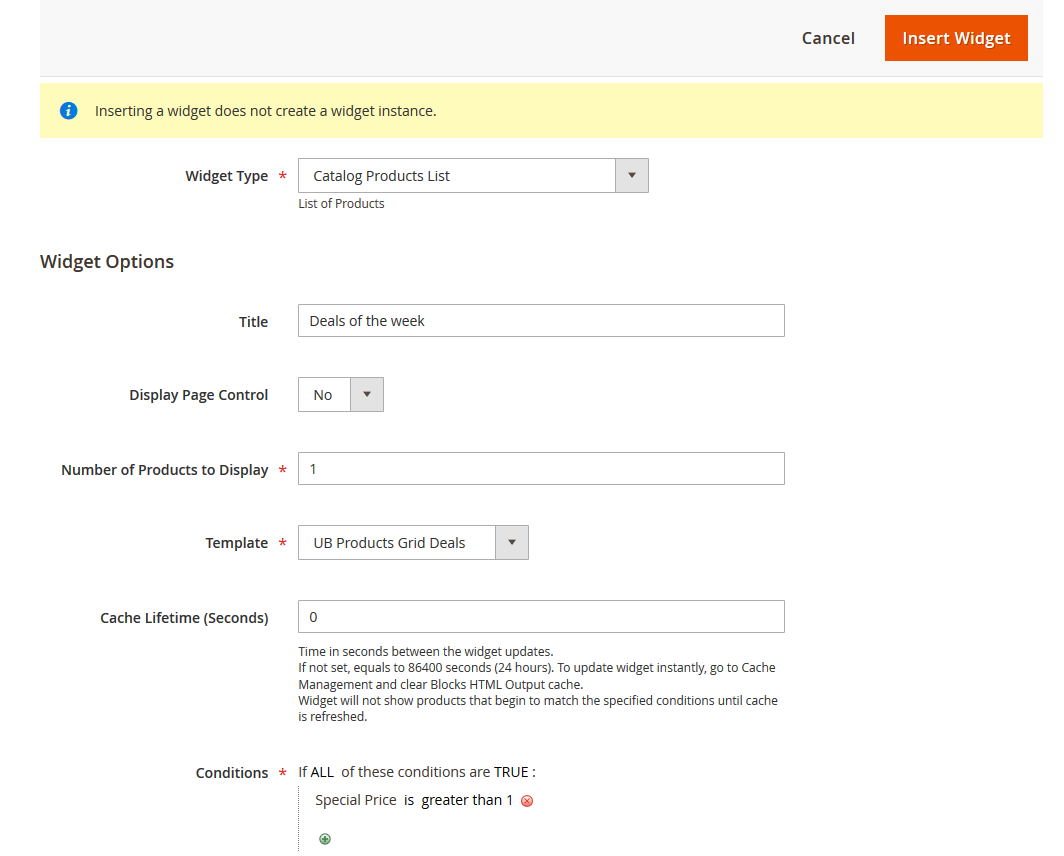
Option 2: In the Content tab, click Show / Hide Editor button, and click Insert Widget button:
Front-end Appearance:
6. Deals of the week (Mobile)
In your admin dashboard, click Content | (Elements) Blocks | Add New Block, then create Deals of the week block with configuration as follows:
Back-end setting
Option 1: In the Content field, click Show/Hide Editor button, then copy and paste the following code:
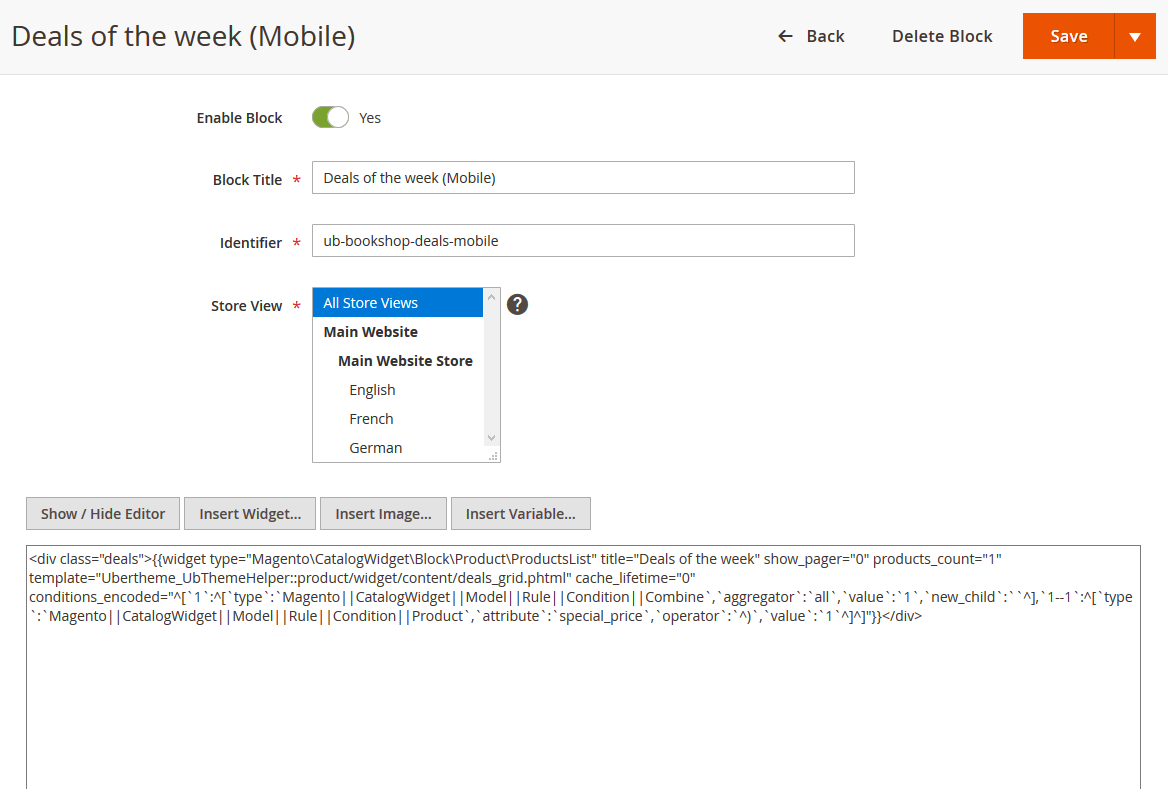
<div class="deals">
{{widget type="Magento\CatalogWidget\Block\Product\ProductsList" title="Deals of the week" show_pager="0" products_count="1" template="Ubertheme_UbThemeHelper::product/widget/content/deals_grid.phtml" cache_lifetime="0" conditions_encoded="^[`1`:^[`type`:`Magento||CatalogWidget||Model||Rule||Condition||Combine`,`aggregator`:`all`,`value`:`1`,`new_child`:``^],`1--1`:^[`type`:`Magento||CatalogWidget||Model||Rule||Condition||Product`,`attribute`:`special_price`,`operator`:`^)`,`value`:`1`^]^]"}}
</div>
Option 2: In the Content tab, click Show / Hide Editor button, and click Insert Widget button:
Front-end Appearance:
7. Brands Logo
In your admin dashboard, click Content | (Elements) Blocks | Add New Block, then create Brands Logo block with configuration as follows:
Back-end setting
In the Content field, click Show/Hide Editor button, then copy and paste the following code:
<ul class="brands">
<li><img src="{{media url="wysiwyg/logo/1.jpg"}}" alt=""></li>
<li><img src="{{media url="wysiwyg/logo/2.jpg"}}" alt=""></li>
<li><img src="{{media url="wysiwyg/logo/3.jpg"}}" alt=""></li>
<li><img src="{{media url="wysiwyg/logo/4.jpg"}}" alt=""></li>
<li><img src="{{media url="wysiwyg/logo/5.jpg"}}" alt=""></li>
<li><img src="{{media url="wysiwyg/logo/6.jpg"}}" alt=""></li>
<li><img src="{{media url="wysiwyg/logo/7.jpg"}}" alt=""></li>
</ul>
Front-end Appearance:
8. Sidebar Banner
In your admin dashboard, click Content | (Elements) Blocks | Add New Block, then create Sidebar Banner block with configuration as follows:
Back-end setting
In the Content field, click Show/Hide Editor button, then copy and paste the following code:
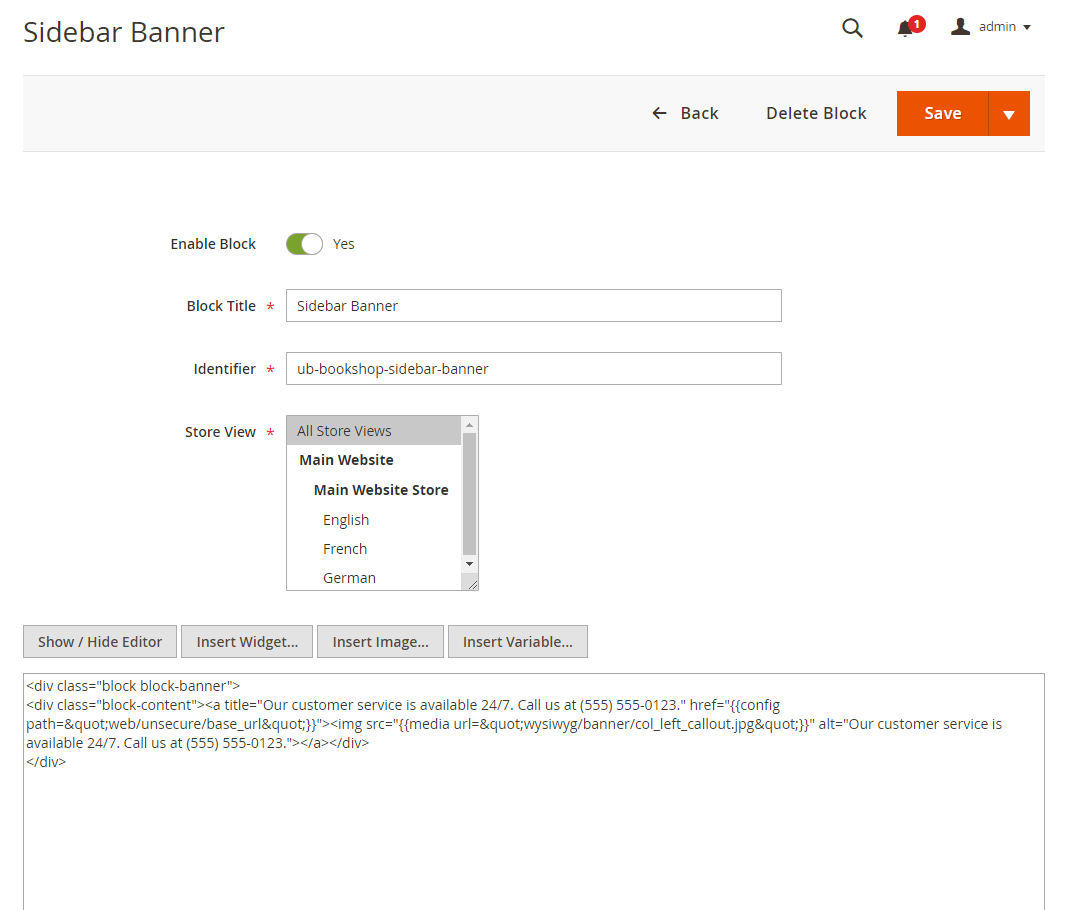
<div class="block block-banner">
<div class="block-content"><a title="Our customer service is available 24/7. Call us at (555) 555-0123." href="{{config path="web/unsecure/base_url"}}"><img src="{{media url="wysiwyg/banner/col_left_callout.jpg"}}" alt="Our customer service is available 24/7. Call us at (555) 555-0123."></a></div>
</div>
Front-end Appearance:

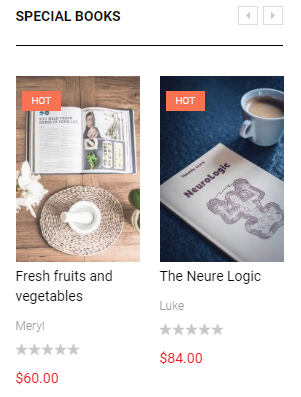
9. Special books
In your admin dashboard, click Content | (Elements) Blocks | Add New Block, then create Special books block with configuration as follows:
Back-end setting
In the Content field, click Show/Hide Editor button, then copy and paste the following code:
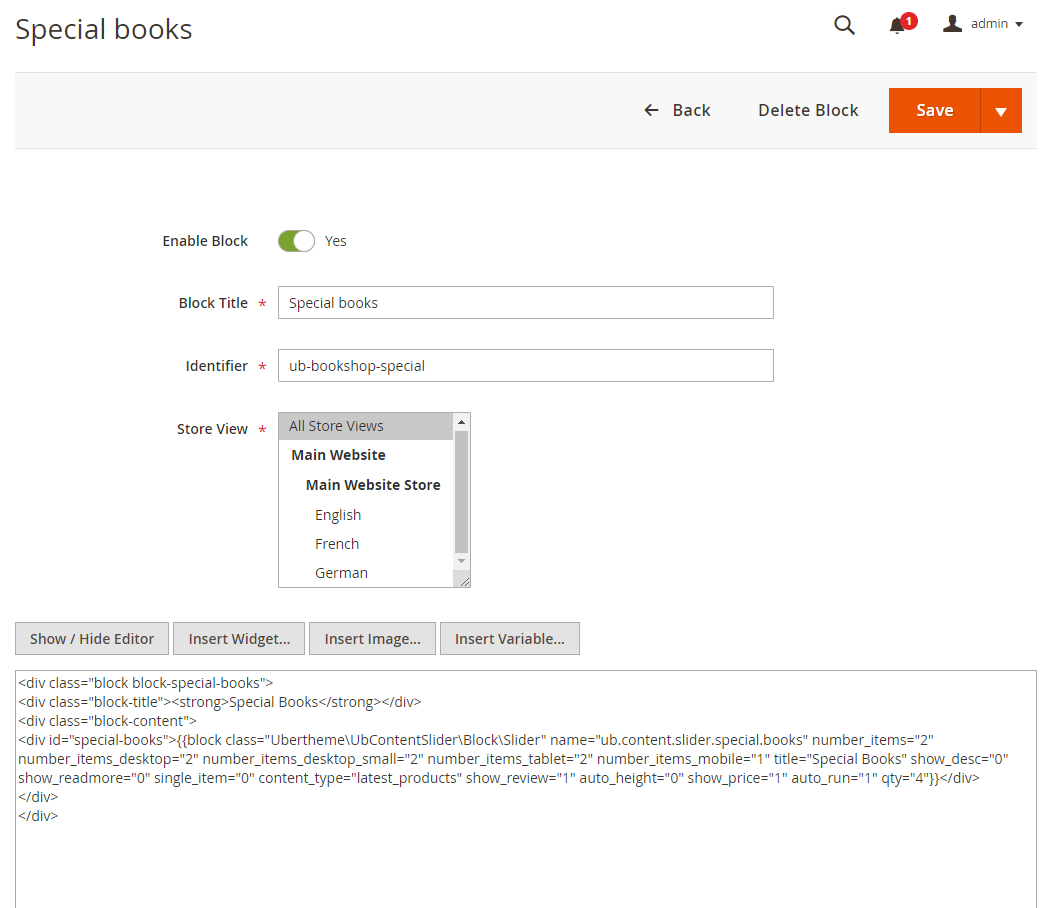
<div class="block block-special-books">
<div class="block-title"><strong>Special Books</strong></div>
<div class="block-content">
<div id="special-books">{{block class="Ubertheme\UbContentSlider\Block\Slider" name="ub.content.slider.special.books" number_items="2" number_items_desktop="2" number_items_desktop_small="2" number_items_tablet="2" number_items_mobile="1" title="Special Books" show_desc="0" show_readmore="0" single_item="0" content_type="latest_products" show_review="1" auto_height="0" show_price="1" auto_run="1" qty="4"}}</div>
</div>
</div>
Front-end Appearance:
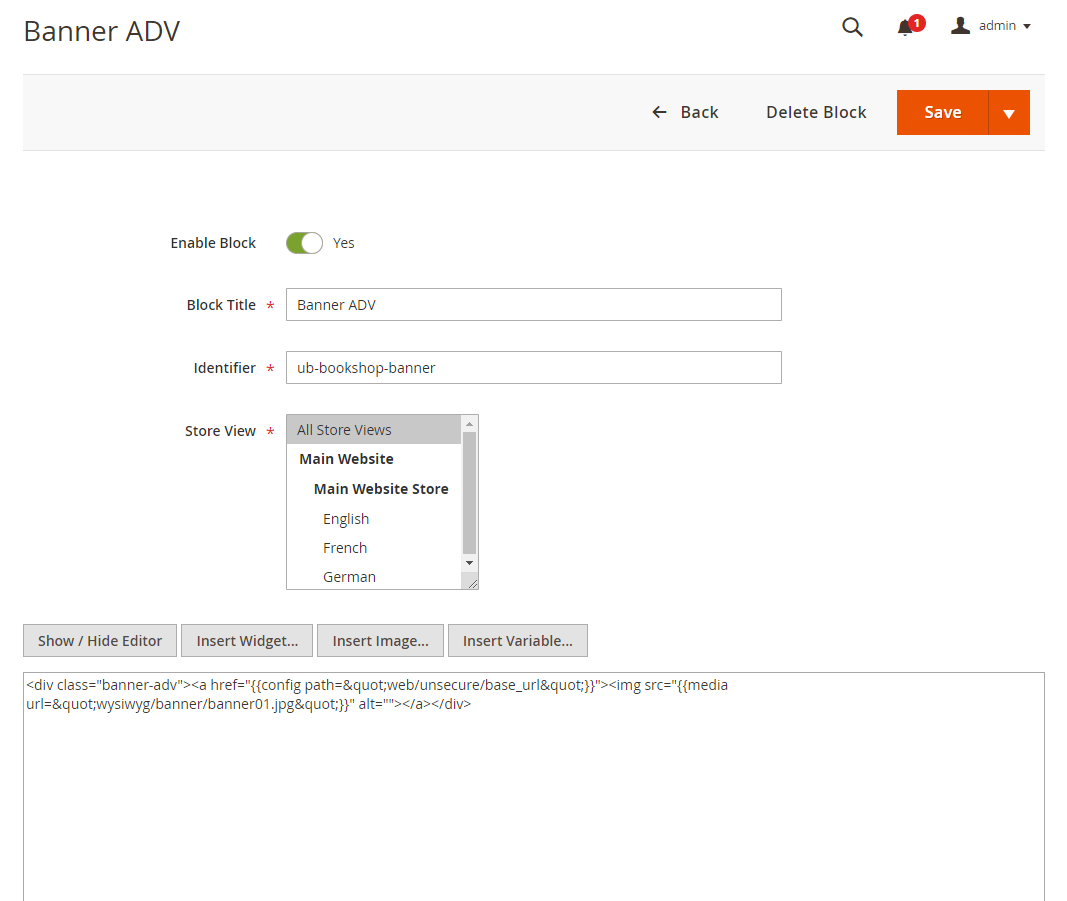
10. Banner ADV
In your admin dashboard, click Content | (Elements) Blocks | Add New Block, then create Banner ADV block with configuration as follows:
Back-end setting
In the Content field, click Show/Hide Editor button, then copy and paste the following code:
<div class="banner-adv"><a href="{{config path="web/unsecure/base_url"}}"><img src="{{media url="wysiwyg/banner/banner01.jpg"}}" alt=""></a></div>
Front-end Appearance:

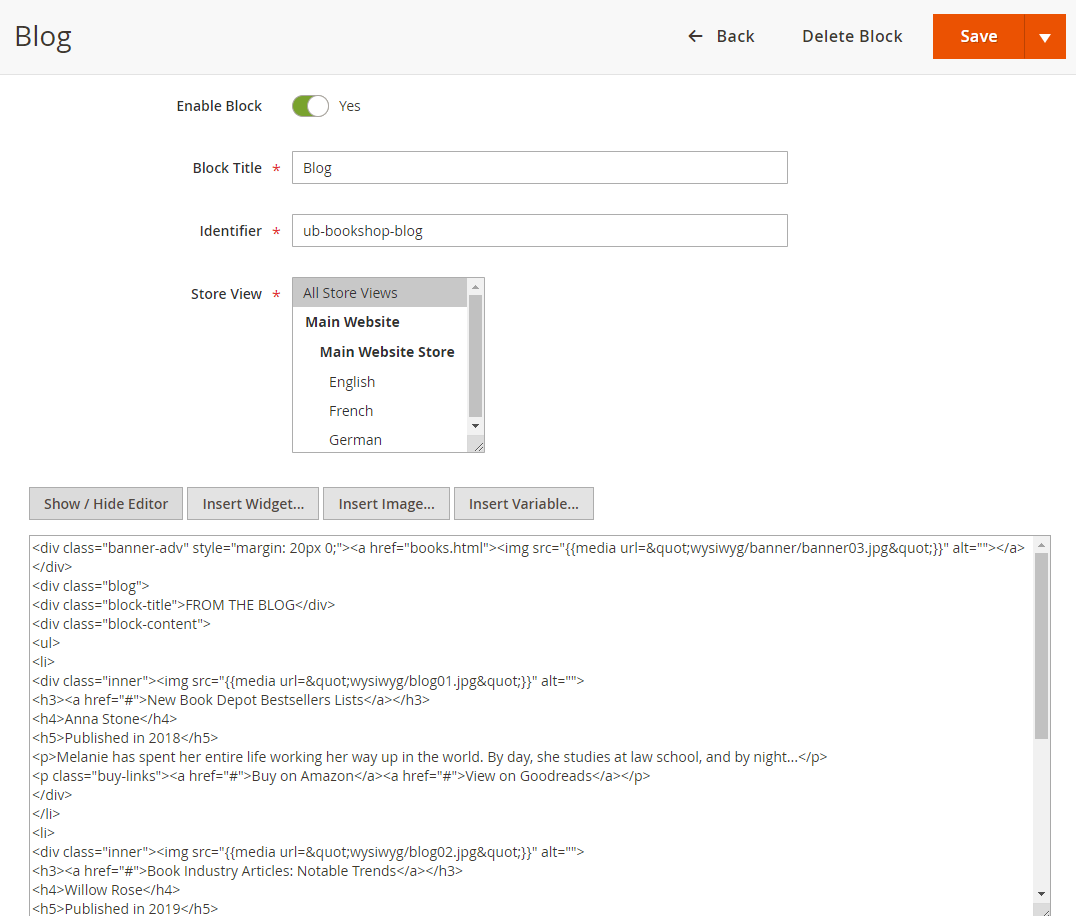
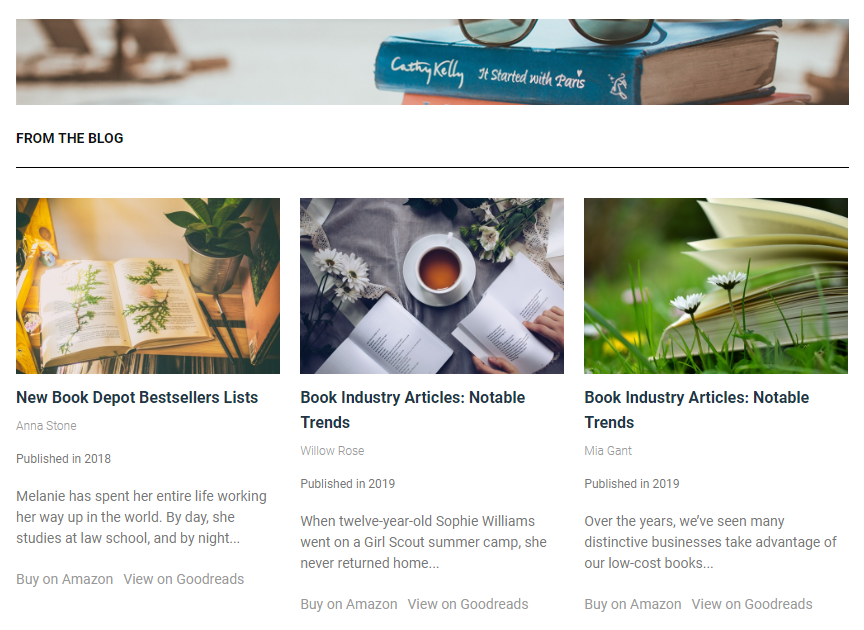
11. Blog
In your admin dashboard, click Content | (Elements) Blocks | Add New Block, then create Footer links block with configuration as follows:
Back-end setting
In the Content field, click Show/Hide Editor button, then copy and paste the following code:
<div class="banner-adv" style="margin: 20px 0;"><a href="books.html"><img src="{{media url="wysiwyg/banner/banner03.jpg"}}" alt=""></a></div>
<div class="blog">
<div class="block-title">FROM THE BLOG</div>
<div class="block-content">
<ul>
<li>
<div class="inner"><img src="{{media url="wysiwyg/blog01.jpg"}}" alt="">
<h3><a href="#">New Book Depot Bestsellers Lists</a></h3>
<h4>Anna Stone</h4>
<h5>Published in 2018</h5>
<p>Melanie has spent her entire life working her way up in the world. By day, she studies at law school, and by night...</p>
<p class="buy-links"><a href="#">Buy on Amazon</a><a href="#">View on Goodreads</a></p>
</div>
</li>
<li>
<div class="inner"><img src="{{media url="wysiwyg/blog02.jpg"}}" alt="">
<h3><a href="#">Book Industry Articles: Notable Trends</a></h3>
<h4>Willow Rose</h4>
<h5>Published in 2019</h5>
<p>When twelve-year-old Sophie Williams went on a Girl Scout summer camp, she never returned home...</p>
<p class="buy-links"><a href="#">Buy on Amazon</a><a href="#">View on Goodreads</a></p>
</div>
</li>
<li>
<div class="inner"><img src="{{media url="wysiwyg/blog03.jpg"}}" alt="">
<h3><a href="#">Book Industry Articles: Notable Trends</a></h3>
<h4>Mia Gant</h4>
<h5>Published in 2019</h5>
<p>Over the years, we’ve seen many distinctive businesses take advantage of our low-cost books...</p>
<p class="buy-links"><a href="#">Buy on Amazon</a><a href="#">View on Goodreads</a></p>
</div>
</li>
</ul>
</div>
</div>
Front-end Appearance:
12. Footer links
In your admin dashboard, click Content | (Elements) Blocks | Add New Block, then create Footer links block with configuration as follows:
Back-end setting
In the Content field, click Show/Hide Editor button, then copy and paste the following code:
<div class="block block-shipping">
<div class="inner">
<ul class="list-shipping">
<li class="shipping-item"><span class="title">Free Shipping</span> <span class="desc">on orders over $49</span></li>
<li class="exchange-item"><span class="title">1st Exchange Free</span> <span class="desc">on 3 days</span></li>
<li class="support-item"><span class="title">Online support 24/7</span> <span class="desc">123 456 7890</span></li>
<li class="friends-item"><span class="title">Tell Friends and get $5</span> <span class="desc">a small gift for you</span></li>
</ul>
</div>
</div>
<div class="block-browser col-1 first">
<div class="col-inner">
<div class="block-title"><strong>Browser</strong></div>
<div class="block-content">
<ul>
<li><a href="{{config path="web/unsecure/base_url"}}">Books</a></li>
<li><a href="{{config path="web/unsecure/base_url"}}">Gift Cards</a></li>
<li><a href="{{config path="web/unsecure/base_url"}}">Teens</a></li>
<li><a href="{{config path="web/unsecure/base_url"}}">Nook Book</a></li>
<li><a href="{{config path="web/unsecure/base_url"}}">Kids</a></li>
</ul>
</div>
</div>
</div>
<div class="block-information col-2">
<div class="col-inner">
<div class="block-title"><strong>Information</strong></div>
<div class="block-content">
<ul>
<li><a href="{{config path="web/unsecure/base_url"}}">About Us</a></li>
<li><a href="{{config path="web/unsecure/base_url"}}">Customer Service</a></li>
<li><a href="{{config path="web/unsecure/base_url"}}">Privacy Policy</a></li>
<li><a href="{{config path="web/unsecure/base_url"}}">Search Terms</a></li>
<li><a href="{{config path="web/unsecure/base_url"}}">Orders and Returns</a></li>
<li><a href="{{config path="web/unsecure/base_url"}}">Advanced Search</a></li>
</ul>
</div>
</div>
</div>
<div class="block-my-account col-3">
<div class="col-inner">
<div class="block-title"><strong>My account</strong></div>
<div class="block-content">
<ul>
<li><a href="{{config path="web/unsecure/base_url"}}">Sign In</a></li>
<li><a href="{{config path="web/unsecure/base_url"}}">View Cart</a></li>
<li><a href="{{config path="web/unsecure/base_url"}}">My Wishlist</a></li>
<li><a href="{{config path="web/unsecure/base_url"}}">Check out</a></li>
<li><a href="{{config path="web/unsecure/base_url"}}">Track My Orders</a></li>
<li><a href="{{config path="web/unsecure/base_url"}}">Contact us</a></li>
</ul>
</div>
</div>
</div>
<div class="block-location col-4 last">
<div class="col-inner">
<div class="block-title"><strong>Location</strong></div>
<div class="block-content">
<p>Address: 2411 Any Street. Any Town. United Kingdom.</p>
<p>Mail to: <a title="[email protected]" href="mailto:[email protected]">[email protected]</a></p>
<p>Phone: +123 456 7890</p>
<p>Fax: +123 456 7890</p>
</div>
</div>
</div>
Front-end Appearance:

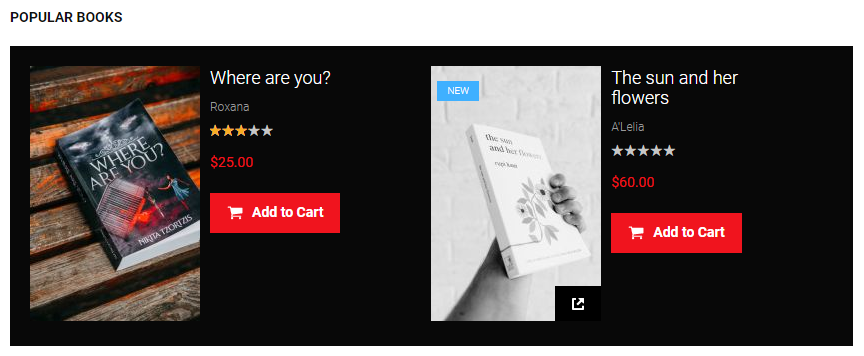
13. Popular Products
In your admin dashboard, click Content | (Elements) Blocks | Add New Block, then create Popular Products block with configuration as follows:
Back-end setting
In the Content field, click Show/Hide Editor button, then copy and paste the following code:
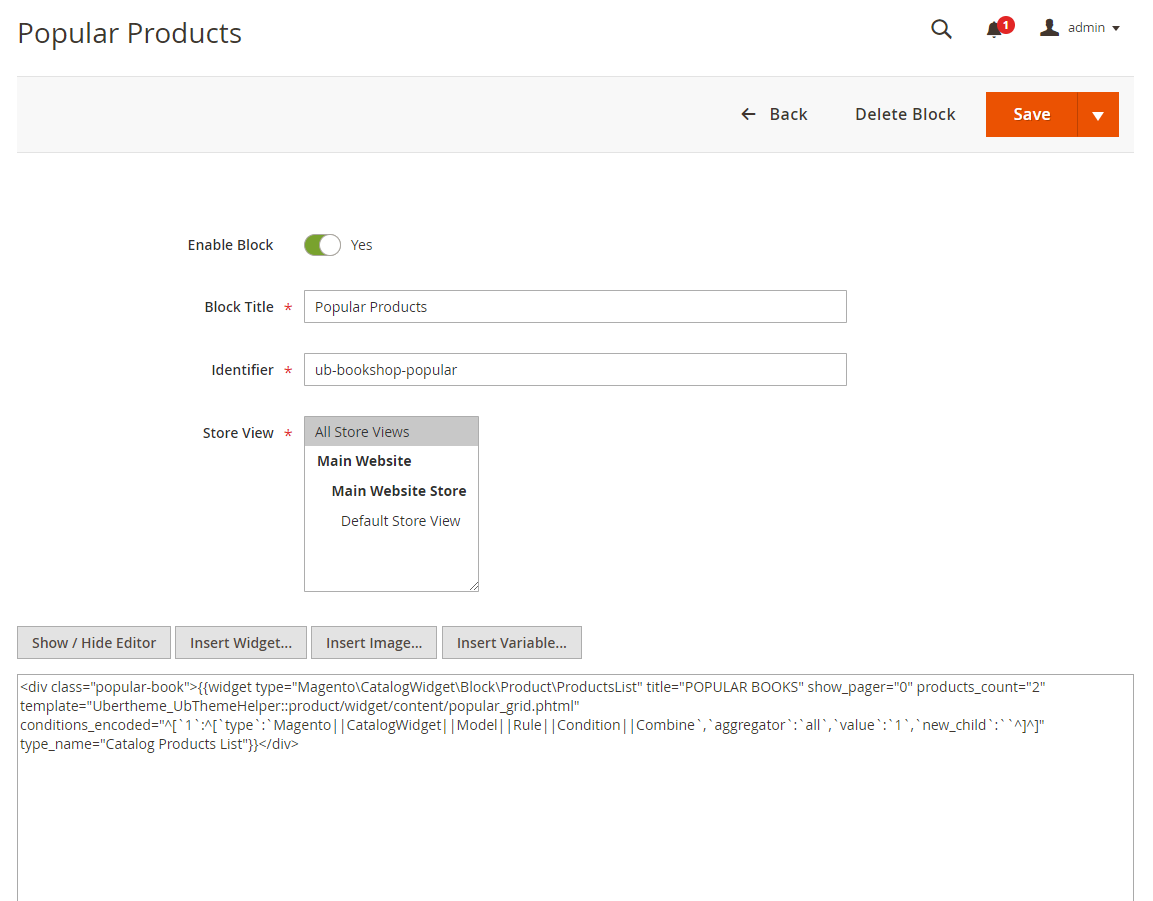
<div class="popular-book">
{{widget type="Magento\CatalogWidget\Block\Product\ProductsList" title="POPULAR BOOKS" show_pager="0" products_count="2" template="Ubertheme_UbThemeHelper::product/widget/content/popular_grid.phtml" conditions_encoded="^[`1`:^[`type`:`Magento||CatalogWidget||Model||Rule||Condition||Combine`,`aggregator`:`all`,`value`:`1`,`new_child`:``^]^]" type_name="Catalog Products List"}}
</div>
Front-end Appearance:
14. Contacts Map
In your admin dashboard, click Content | (Elements) Blocks | Add New Block, then create Contacts Map block with configuration as follows:
Back-end setting
In the Content field, click Show/Hide Editor button, then copy and paste the following code:
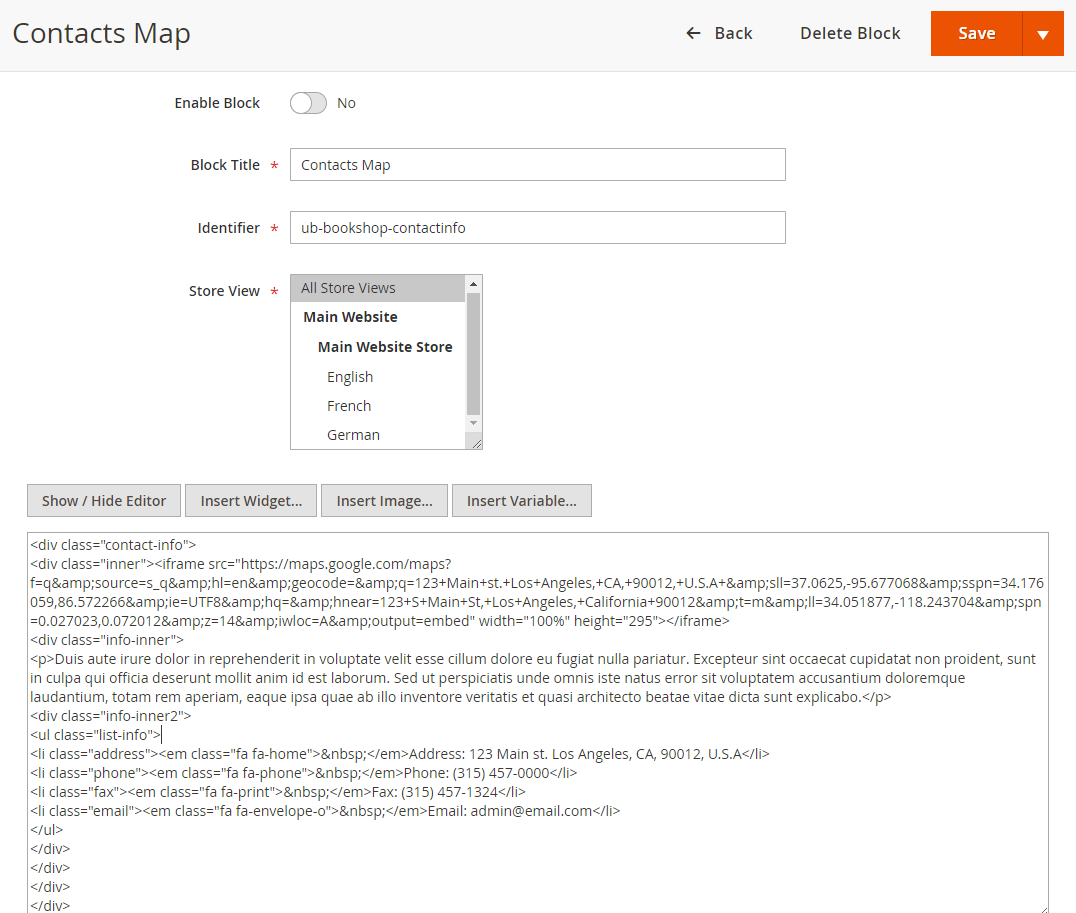
<div class="contact-info"> <div class="inner"><iframe src="https://maps.google.com/maps?f=q&source=s_q&hl=en&geocode=&q=123+Main+st.+Los+Angeles,+CA,+90012,+U.S.A+&sll=37.0625,-95.677068&sspn=34.176059,86.572266&ie=UTF8&hq=&hnear=123+S+Main+St,+Los+Angeles,+California+90012&t=m&ll=34.051877,-118.243704&spn=0.027023,0.072012&z=14&iwloc=A&output=embed" width="100%" height="295"></iframe> <div class="info-inner"> <p>Duis aute irure dolor in reprehenderit in voluptate velit esse cillum dolore eu fugiat nulla pariatur. Excepteur sint occaecat cupidatat non proident, sunt in culpa qui officia deserunt mollit anim id est laborum. Sed ut perspiciatis unde omnis iste natus error sit voluptatem accusantium doloremque laudantium, totam rem aperiam, eaque ipsa quae ab illo inventore veritatis et quasi architecto beatae vitae dicta sunt explicabo.</p> <div class="info-inner2"> <ul class="list-info"> <li class="address"><em class="fa fa-home"> </em>Address: 123 Main st. Los Angeles, CA, 90012, U.S.A</li> <li class="phone"><em class="fa fa-phone"> </em>Phone: (315) 457-0000</li> <li class="fax"><em class="fa fa-print"> </em>Fax: (315) 457-1324</li> <li class="email"><em class="fa fa-envelope-o"> </em>Email: [email protected]</li> </ul> </div> </div> </div> </div>
Front-end Appearance:

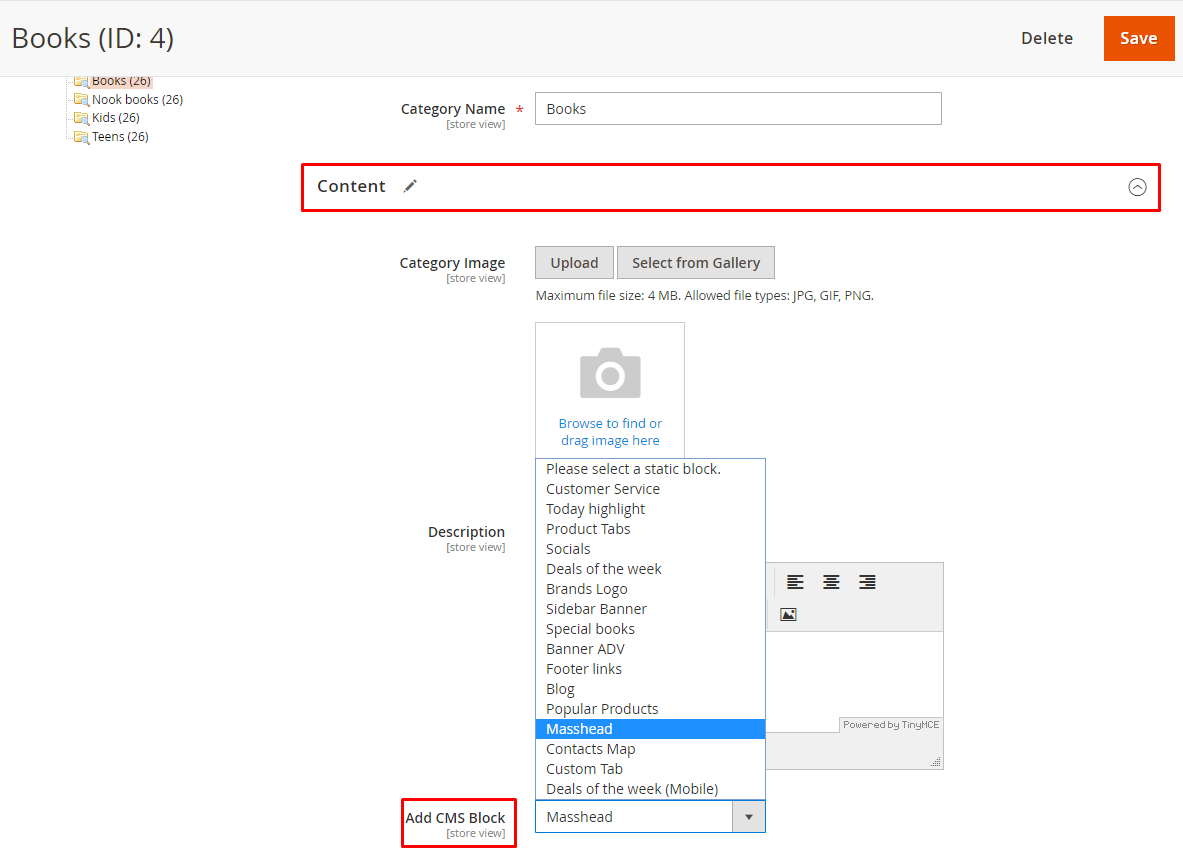
15. Masshead
In your admin dashboard, click Content | (Elements) Blocks | Add New Block, then create Masshead block with configuration as follows:
Back-end setting
In the Content field, click Show/Hide Editor button, then copy and paste the following code:
<div class="masshead"><img src="http://bookshop.demo.ubertheme.com/media/wysiwyg/banner/banner01.jpg" alt="Masshead"></div>
Front-end Appearance:
Go to Category want to show Masshead, configuration steps: Back-end setting > Back-end setting
16. Custom Tab
In your admin dashboard, click Content | (Elements) Blocks | Add New Block, then create Custom Tab block with configuration as follows:
Back-end setting
In the Content field, click Show/Hide Editor button, then copy and paste the following code:
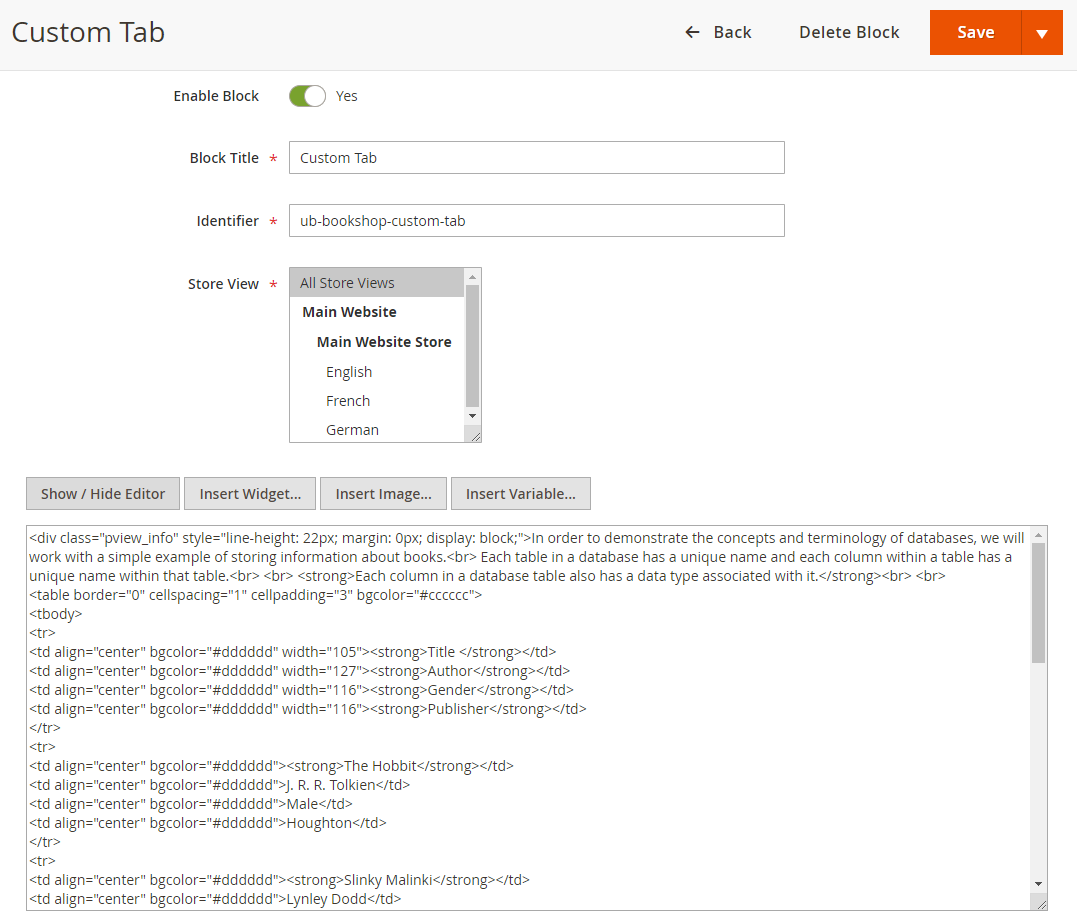
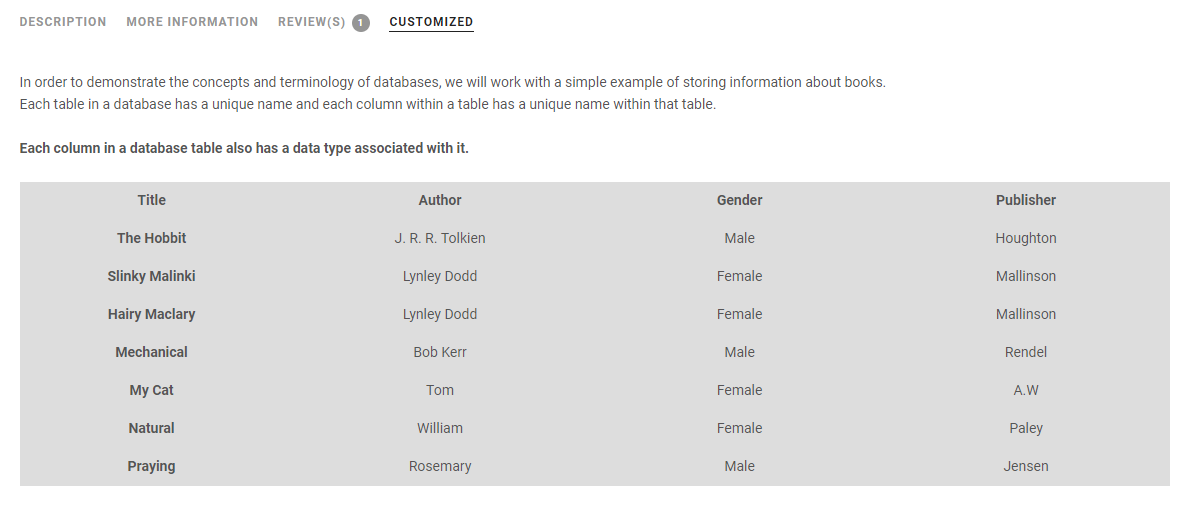
<div class="pview_info" style="line-height: 22px; margin: 0px; display: block;">In order to demonstrate the concepts and terminology of databases, we will work with a simple example of storing information about books.<br> Each table in a database has a unique name and each column within a table has a unique name within that table.<br> <br> <strong>Each column in a database table also has a data type associated with it.</strong><br> <br>
<table border="0" cellspacing="1" cellpadding="3" bgcolor="#cccccc">
<tbody>
<tr>
<td align="center" bgcolor="#dddddd" width="105"><strong>Title </strong></td>
<td align="center" bgcolor="#dddddd" width="127"><strong>Author</strong></td>
<td align="center" bgcolor="#dddddd" width="116"><strong>Gender</strong></td>
<td align="center" bgcolor="#dddddd" width="116"><strong>Publisher</strong></td>
</tr>
<tr>
<td align="center" bgcolor="#dddddd"><strong>The Hobbit</strong></td>
<td align="center" bgcolor="#dddddd">J. R. R. Tolkien</td>
<td align="center" bgcolor="#dddddd">Male</td>
<td align="center" bgcolor="#dddddd">Houghton</td>
</tr>
<tr>
<td align="center" bgcolor="#dddddd"><strong>Slinky Malinki</strong></td>
<td align="center" bgcolor="#dddddd">Lynley Dodd</td>
<td align="center" bgcolor="#dddddd">Female</td>
<td align="center" bgcolor="#dddddd">Mallinson</td>
</tr>
<tr>
<td align="center" bgcolor="#dddddd"><strong>Hairy Maclary</strong></td>
<td align="center" bgcolor="#dddddd">Lynley Dodd</td>
<td align="center" bgcolor="#dddddd">Female</td>
<td align="center" bgcolor="#dddddd">Mallinson</td>
</tr>
<tr>
<td align="center" bgcolor="#dddddd"><strong>Mechanical</strong></td>
<td align="center" bgcolor="#dddddd">Bob Kerr</td>
<td align="center" bgcolor="#dddddd">Male</td>
<td align="center" bgcolor="#dddddd">Rendel</td>
</tr>
<tr>
<td align="center" bgcolor="#dddddd"><strong>My Cat</strong></td>
<td align="center" bgcolor="#dddddd">Tom</td>
<td align="center" bgcolor="#dddddd">Female</td>
<td align="center" bgcolor="#dddddd">A.W</td>
</tr>
<tr>
<td align="center" bgcolor="#dddddd"><strong>Natural</strong></td>
<td align="center" bgcolor="#dddddd">William</td>
<td align="center" bgcolor="#dddddd">Female</td>
<td align="center" bgcolor="#dddddd">Paley</td>
</tr>
<tr>
<td align="center" bgcolor="#dddddd"><strong>Praying</strong></td>
<td align="center" bgcolor="#dddddd">Rosemary</td>
<td align="center" bgcolor="#dddddd">Male</td>
<td align="center" bgcolor="#dddddd">Jensen</td>
</tr>
</tbody>
</table>
</div>
Front-end Appearance:
VII. Extension Configuration
Three Magento 2 extensions -- UB Mega Menu, UB Quick View, UB Content Slider -- are packed with UB Bookshop by default, please follow specific userguides below to configure each extension:
1. UB Content Slider extension
In the Magento Admin Panel, navigate to Ubertheme’s Extensions | Content Slider | Manage Slider and configure the default settings as the Back-end setting.
Now your slider should be displayed in the frontend.

This section provides detailed instruction to configure Mega Menu style as per our UB Bookshop demo site.

Step 1 -- Create the Top Menu group
In the Magento backend, navigate to Ubertheme’s Extensions | (Mega Menu) Manage Menu, then click Add New Menu. In the popup, you can configure as per this screenshot (Make sure you insert menu key as main-menu).
Once done, you should see the new menu group visible as illustration in the following screenshort:

Step 2 -- Create menu item in the Top Menu
Supposed that you have some sample products in place already, now we start to create menu items for the mega menu. In the same Menu Group panel, go to Select | Manage Menu items:

Step 2.1 -- Create Books and its sub-menu items:

Click Add New Menu Item button to create each of menu item, and follow configuration below:
- Books: Configuration steps -- menu setting 1 > menu setting 2
- Categories: Configuration steps -- menu setting 1 > menu setting 2
- Biography: Configuration steps -- menu setting 1 > menu setting 2
Step 2.2 -- Insert Product banner into Mega menu

Create Products banner item (by clicking Add New Menu Item) as sub-menu of Books > Banners following settings below:
Setting 1 > Setting 2 (Make sure in the Setting 2 step, you insert Custom Content)
Step 2.3 -- Create Product List menu items
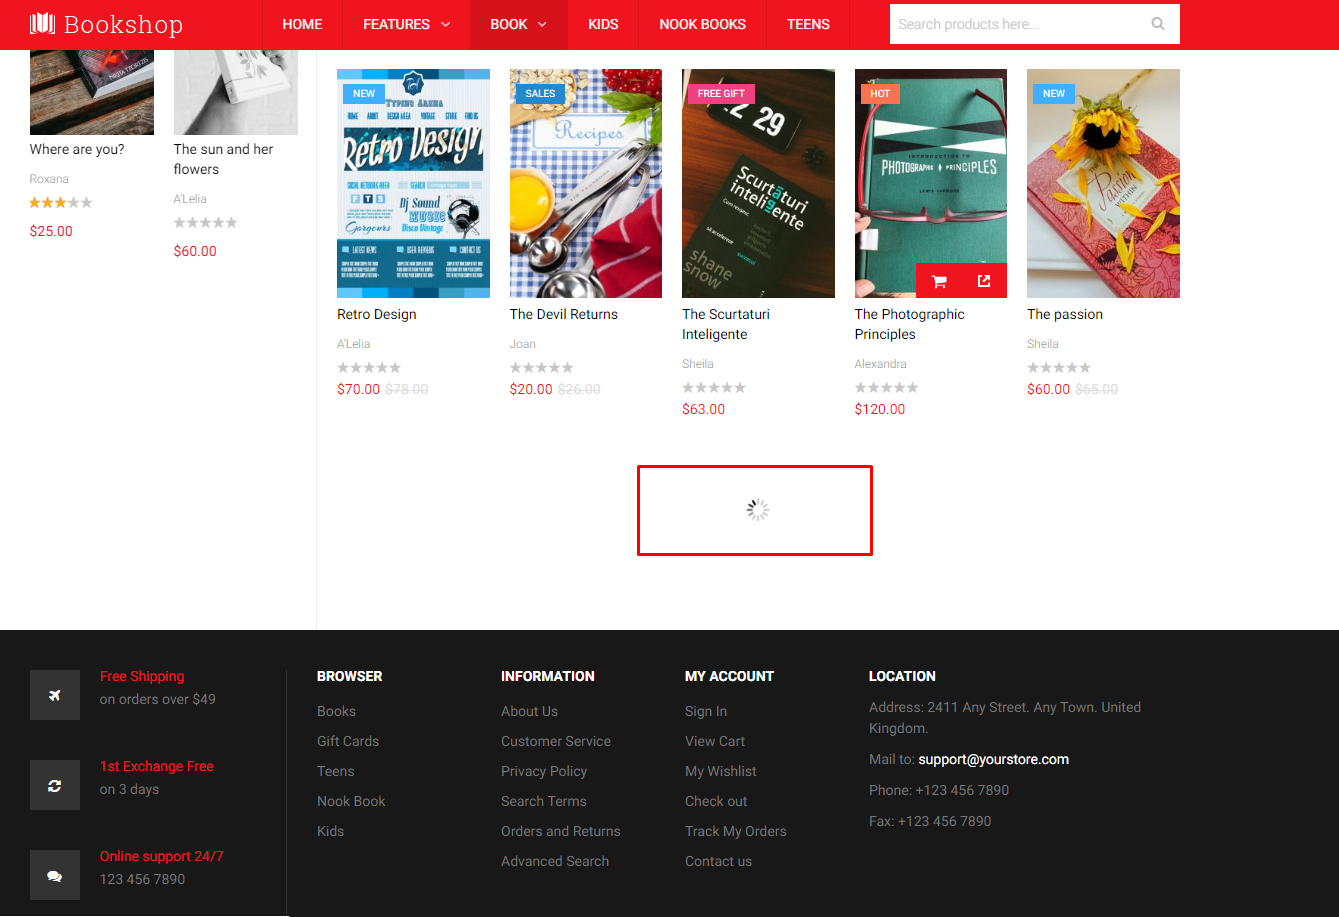
Front-end Appearance:

WEEK’S BIGGEST BOOK: Configuration steps -- Setting 1 > Setting 2 (Make sure in the Setting 2 step, you insert Custom Content as per screenshot)
UB Mega Menu Documentation
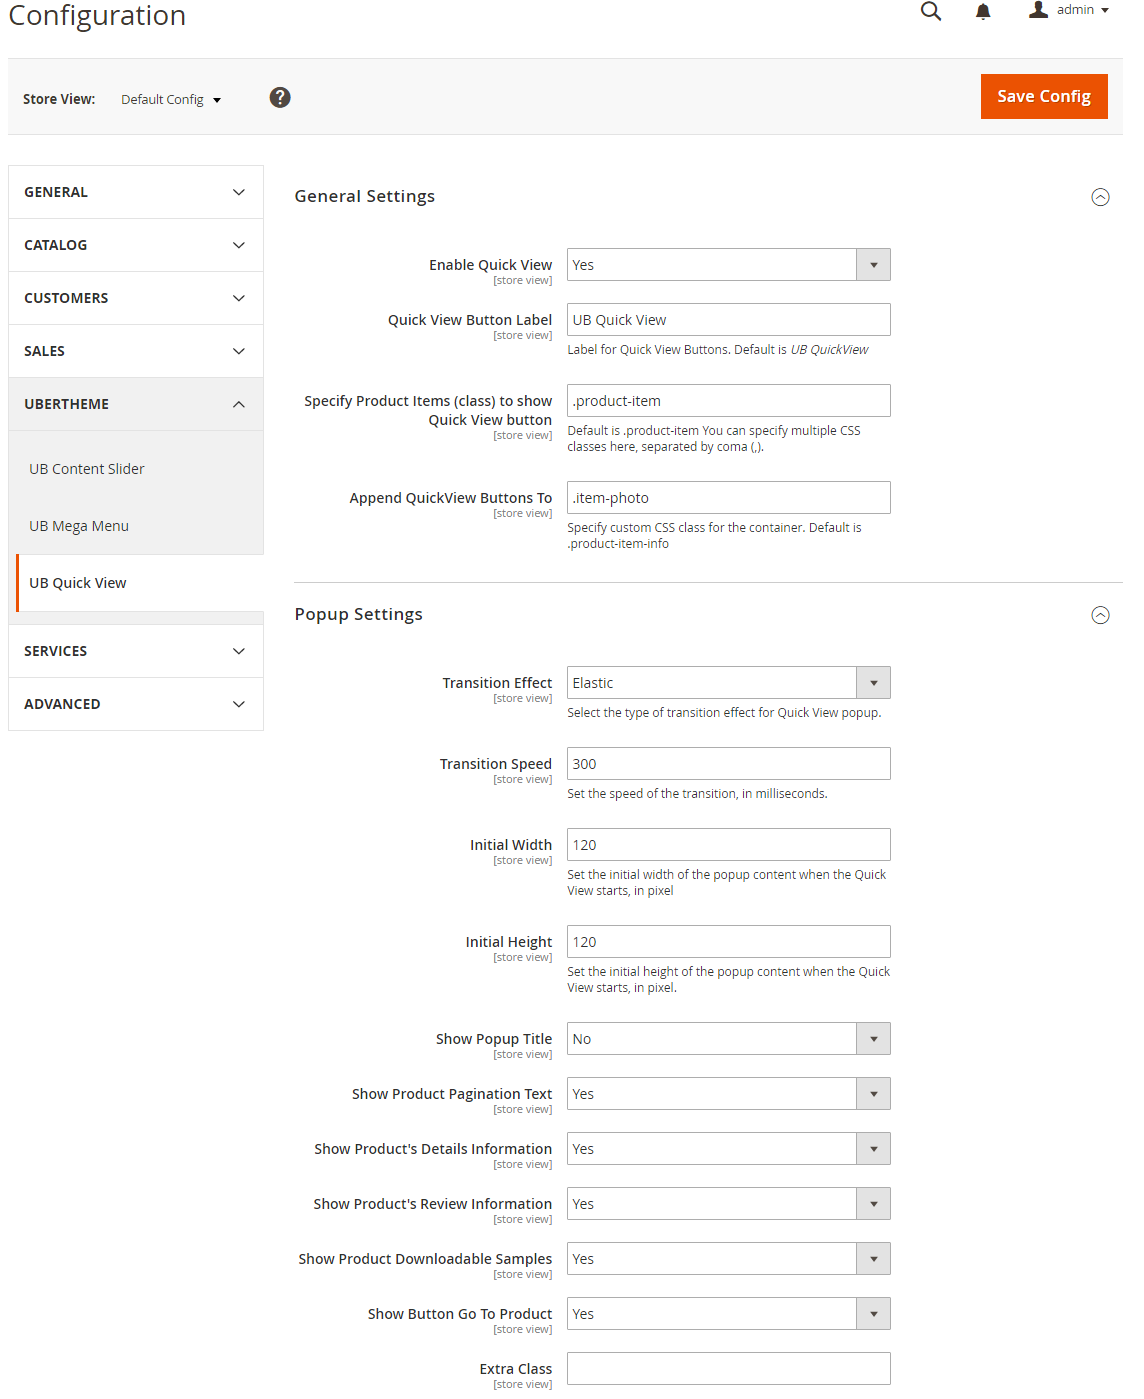
3. UB Quick View extension
In the Magento Admin Panel, navigate to Ubertheme’s Extensions | Quick View | Setting and configure the default settings as the Back-end setting
Front-end Appearance:
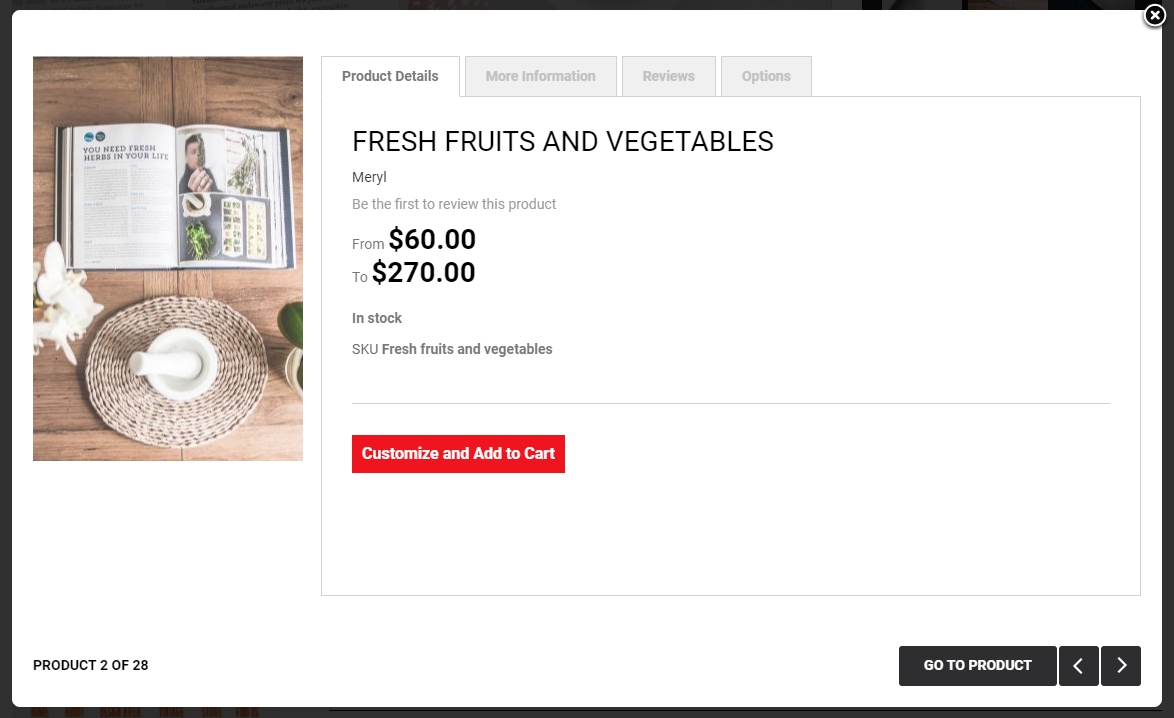
UB Quick View Documentation
VIII. UB Theme Helper Configuration
The documentation below will guide you through steps to customize our Magento 2 theme with UB Theme Helper.
1. Theme Configuration
1.1 Typography Setting
1.1.1 Base font size
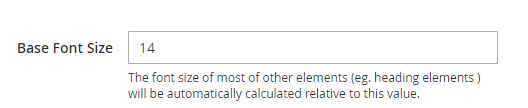
Base Font Size: The font size of most of other elements (eg. heading elements ) will be automatically calculated relative to this value. Default value: 14px.
1.2 Color Settings
1.2.1 Pages Color

UB Bookshop supports primary color and secondary color as follows:
- Primary Color: Primary color refers to the color scheme of theme design. We recommend you leave this setting unchanged, unless you want to make custom graphic UI. Default color: #f0141e. If empty, default value will be used.
- Primary Text Color: Default color: #777. If empty, default value will be used.
- Secondary Text Color: Default color: #999. If empty, default value will be used.
- Primary Link Color: Default color: #000. If empty, default value will be used.
- Primary Link Hover Color: Default color: #f0141e. If empty, default value will be used.
- Primary Border Color: Default color: #eee. If empty, default value will be used.
- Secondary Border Color: Default color: #000. If empty, default value will be used.
1.2.2 Header Color
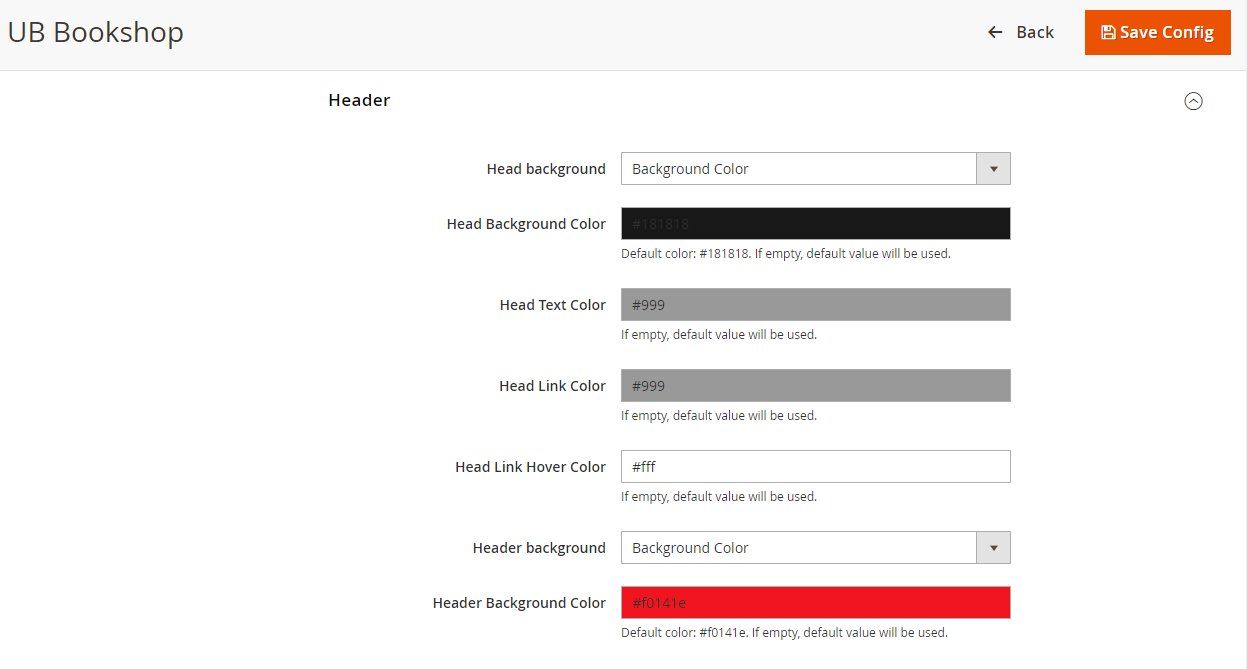
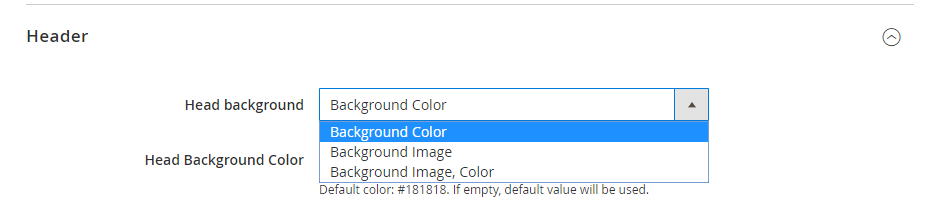
1.2.2.1 Head Background
Front-end Appearance:

To change Head background, you can choose of one three types: Background color; Background image; or Background image, color.
Background Color:
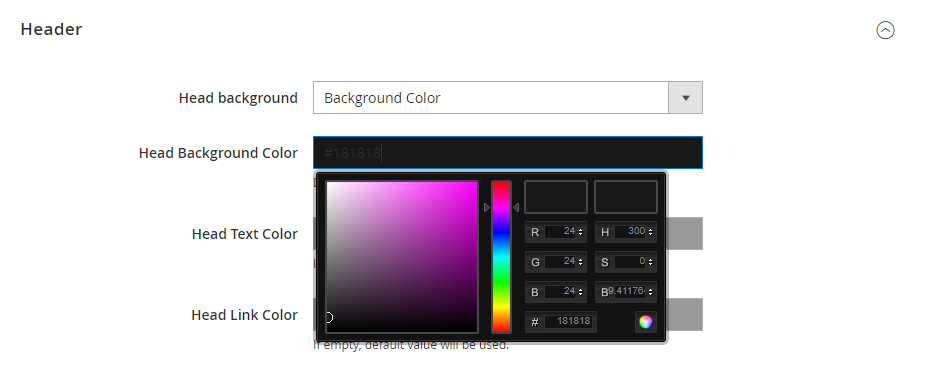
Simply fill in the color of your choice using the Color picker.
Note: To apply the changes you made, you must run deploy command to apply the changes. Go to your root and run the command:
- rm -R pub/static/*
- php bin/magento setup:static-content:deploy -f
- php -f bin/magento cache:clean
Background Image:
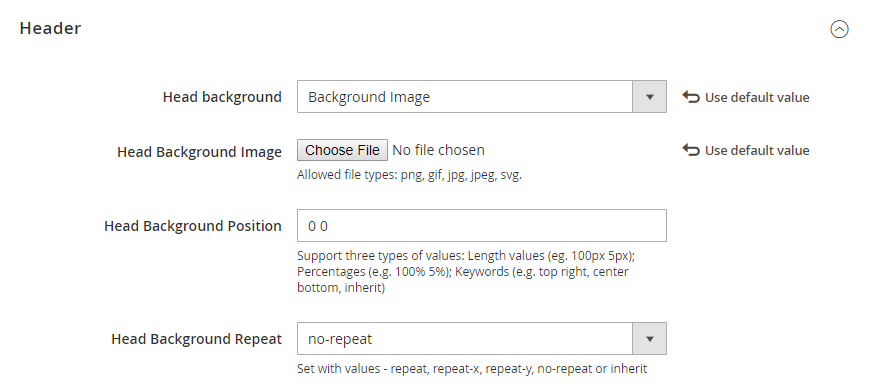
- Head Background Image: Upload the image from your computer. To delete a selected image by check delete box. Allowed file types: png, gif, ipg, jpeg, svg.
- Head Background Position: Support three types of values: Length values (eg. 100px 5px); Percentages (e.g. 100% 5%); Keywords (e.g. top right, center bottom, inherit).
- Head Background Repeat:
- Repeat: The background image will be repeated both vertically and horizontally. This is default.
- Repeat-x: The background image will be repeated only horizontally.
- Repeat-y: The background image will be repeated only vertically.
- No-repeat: The background-image will not be repeated.
- Inherit: Inherits this property from its parent element.
Background Image, Color:
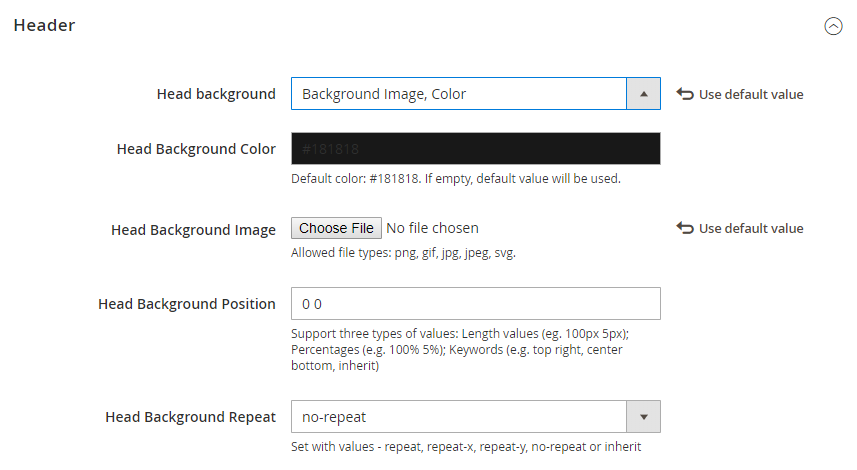
This setting simply combines both options mentioned above — Background Image and Background Color.
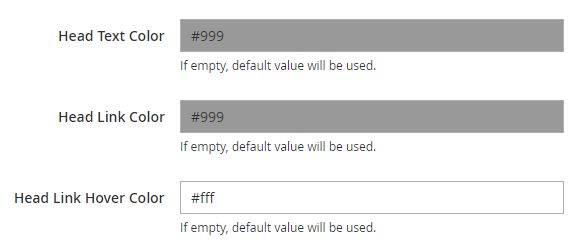
- Head Text Color: Default color: #999. If empty, default value will be used.
- Head Link Color: Default color: #999. If empty, default value will be used.
- Head Link Hover Color: Default color: #fff. If empty, default value will be used.
1.2.2.2 Header Background
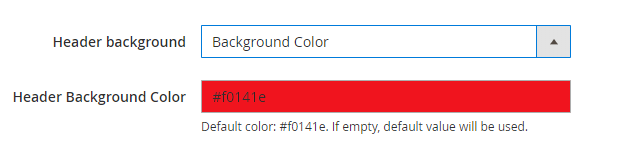
- Header background: Similar setting as per afore-mentioned section Page Color | Header | Head background.
- Header Background Color: Similar setting as per afore-mentioned section Page Color | Header | Head background Color.
Front-end Appearance:

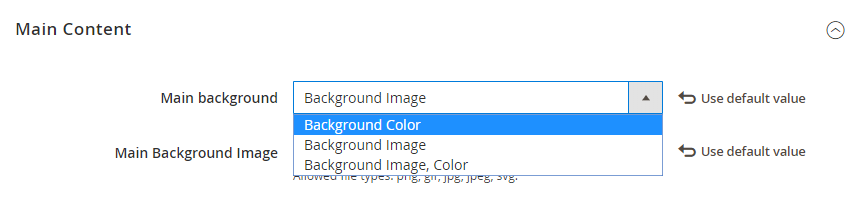
1.2.3 Main Content Color
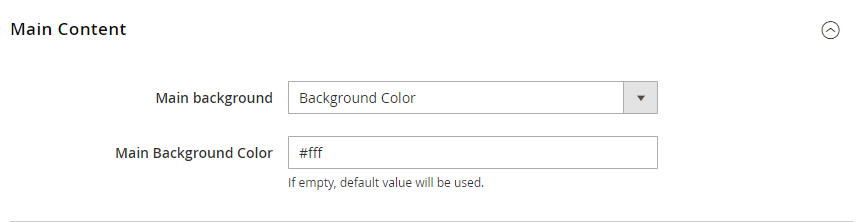
Main Content Background: You can select one of three options: Background Color, Background Image, or Background Image, Color.
- Main Content Background: Similar setting as per afore-mentioned section 1.2.2.1 Page Color | Header | Head Background.
- Main Content Background Color: Default color: #fff. If empty, default value will be used.
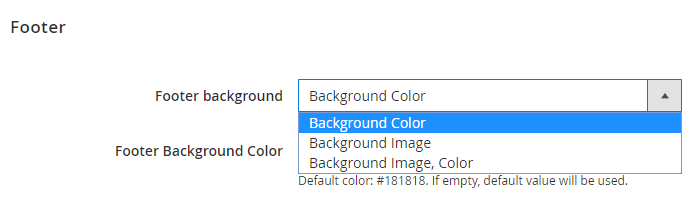
1.2.4 Footer Color
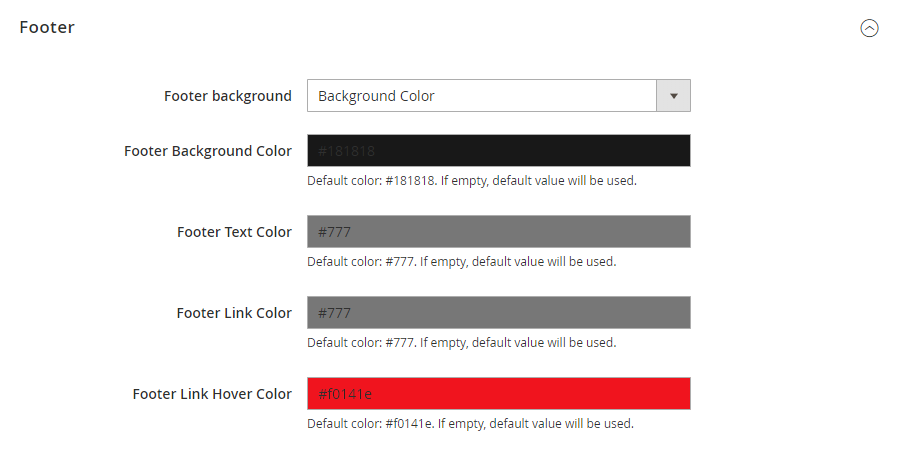
Footer Background: You can select one of three options: Background Color, Background Image, or Background Image, Color.
- Footer Background: Similar setting as per afore-mentioned section 1.2.2.1 Page Color | Header | Head Background.
- Footer Background Color: Default color: #181818. If empty, default value will be used.
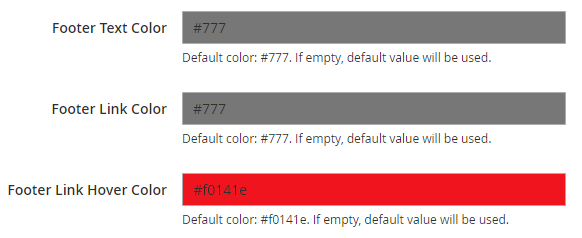
- Footer Text Color: Default color: #777. If empty, default value will be used.
- Footer Link Color: Default color: #777. If empty, default value will be used.
- Footer Link Hover Color: Default color: #f0141e. If empty, default value will be used.
1.3 Element Settings
1.3.1 Header
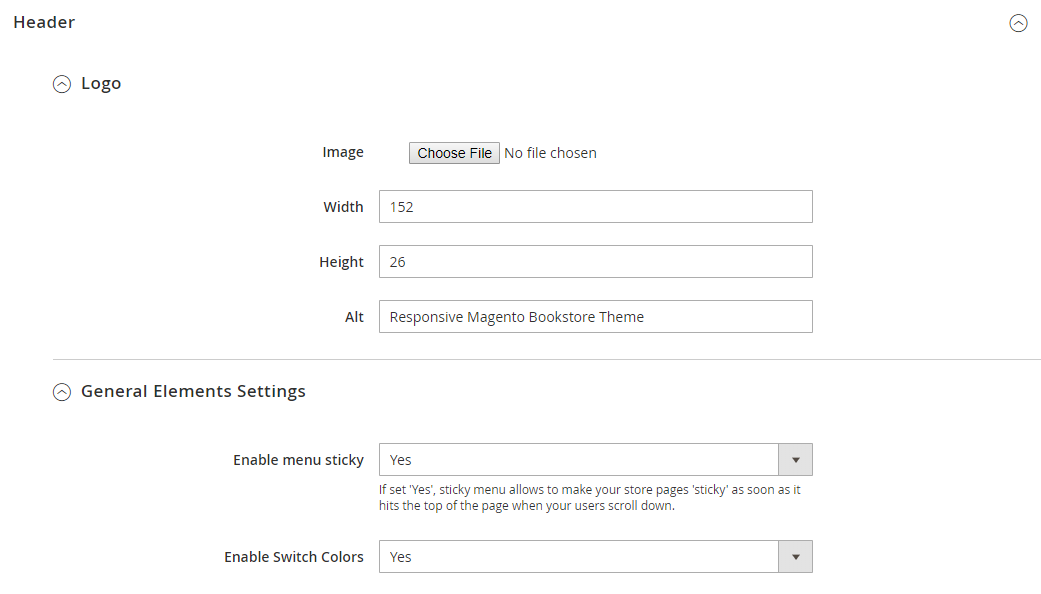
- Enable menu sticky: Set ‘Yes’, sticky menu allows to make your store pages ‘sticky’ as soon as it hits the top of the page when your users scroll down.
- Enable Switch Colors: Set ‘Yes’, allow switch color changes on Theme. Switch-color
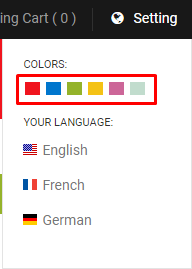
1.3.2 Main
1.3.2.1 Preloader Manager

Front-end Appearance:

1.3.2.2 Back to top

Front-end Appearance:

1.3.2.3 Infinite Scrolling
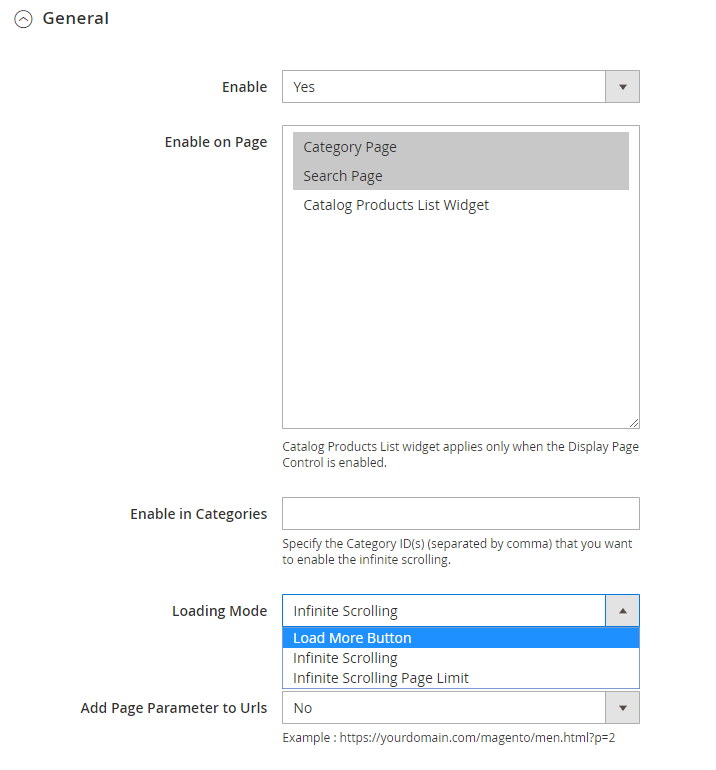
- Enable Infinite Scrolling: Set ‘Yes’, Infinite Scrolling allows to make your category pages ‘load’ as soon as it hits the end of the page when your users scroll down.
- Enable on Page: Allow page selection to display (Category Page/ Search Page/ Catalog Product List Widget).
- Enable in Categories: Specify the Category ID(s) (separated by comma) that you want to enable the infinite scrolling.
- Loading Mode: Allow choose the display form (Load More Button/ Infinite Scrolling/ Infinite Scrolling Page Limit).
Front-end Appearance:
2. Pages Configuration
2.1. Catagory view
2.1.1. General
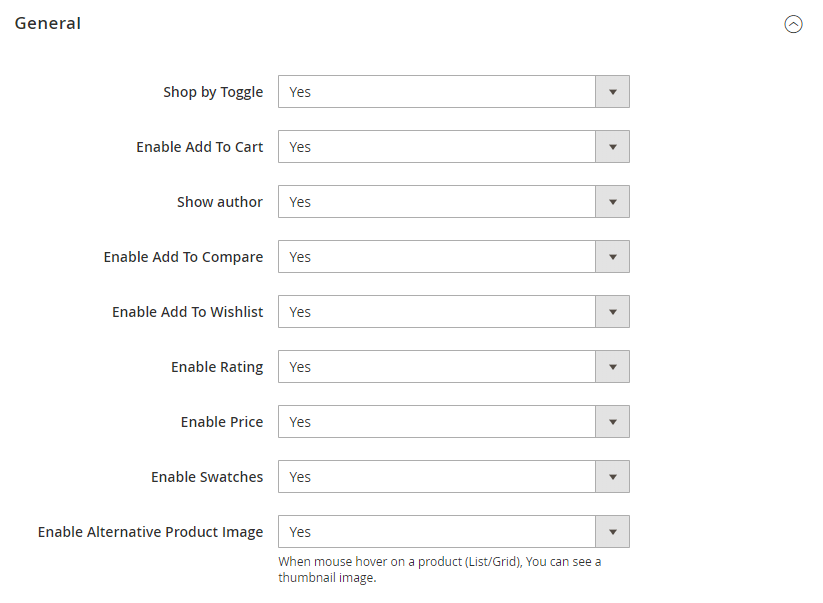
- Other settings are as per our standard UB Theme Helper Documentation.
2.1.2. Grid Configuration
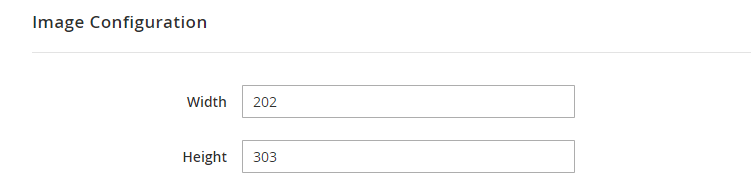
2.1.2.1 Product Grid Image Settings
Set your own image width and height values. Default value Width is 202px and default value Height is 303px. If empty, default value will be used.
2.1.2.2 Product Columns (Desktop)
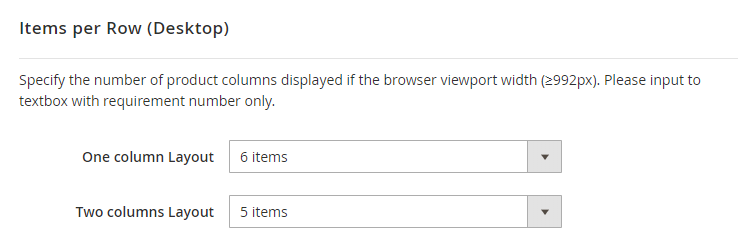
The section allows to specify the number of product columns, if the browser viewport width >= 992px.
- Product Colunms -- One column Layout: this setting applies for One column layout. Simply set the number of product columns you want.
- Product columns -- Two colums Layout: this setting applies for Two column layout. Simply set the number of product columns you want.
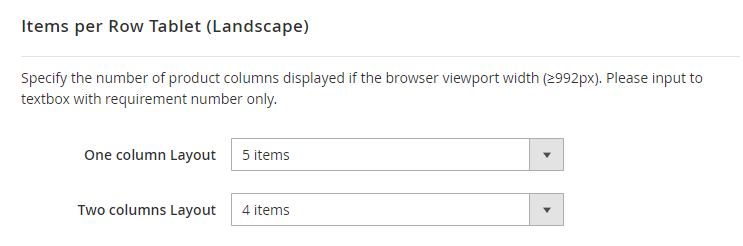
2.1.2.3 Product Columns Tablet (Landscape)
Specify the number of product columns displayed if the browser viewport width (≥992px).
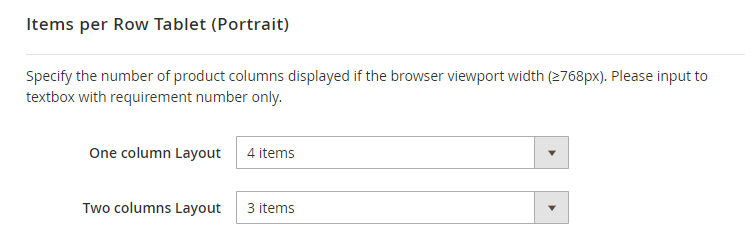
2.1.2.4 Product Columns Tablet (Portrait)
Specify the number of product columns displayed if the browser viewport width (≥768px).
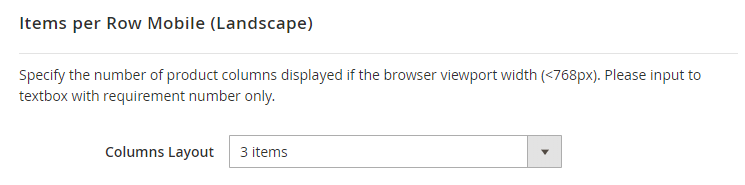
2.1.2.5 Product Columns Mobile (Landscape)
Specify the number of product columns displayed if the browser viewport width (<768px).
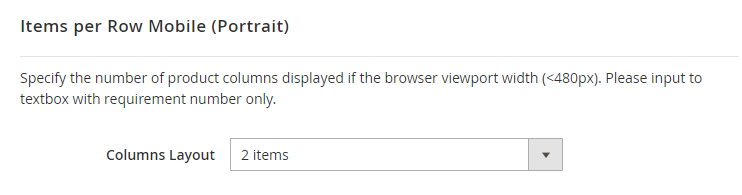
2.1.2.6 Product Columns Mobile (portrait)
Specify the number of product columns displayed if the browser viewport width (<480px).
2.1.3. List Configuration
Set your own image width and height values. Default value Width is 152px, default value Height is 228px and default value Maximum Description Length is 350px. If empty, default value will be used.
- Enable Product Description: Set ‘Yes’ Product Description will display at List view.

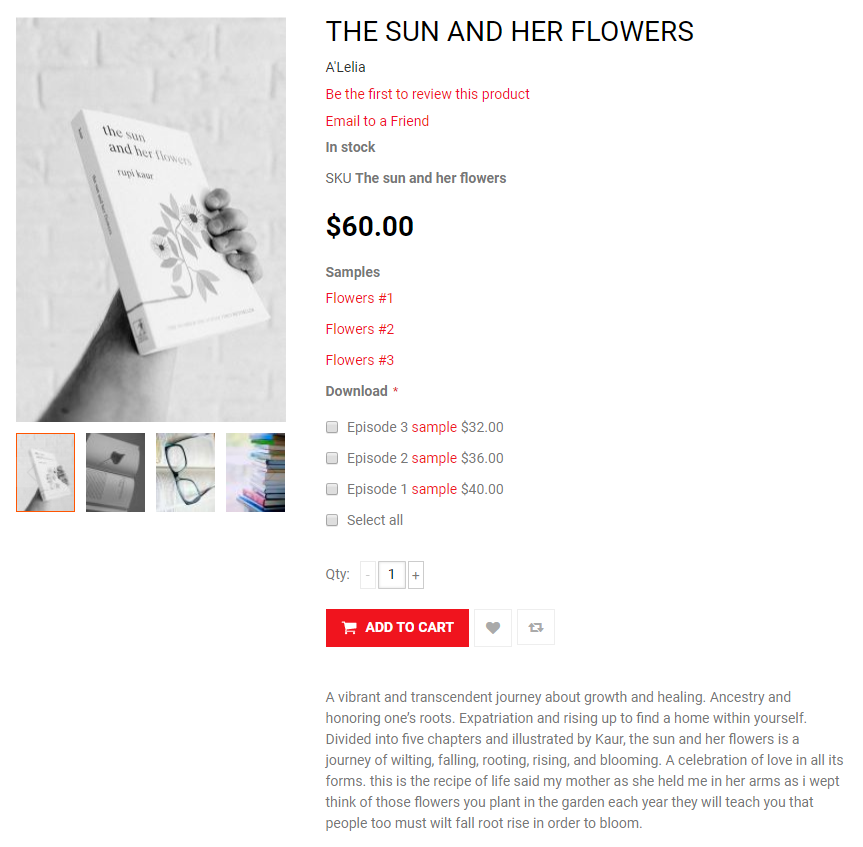
2.2. Product view
2.2.1 Gallery Settings
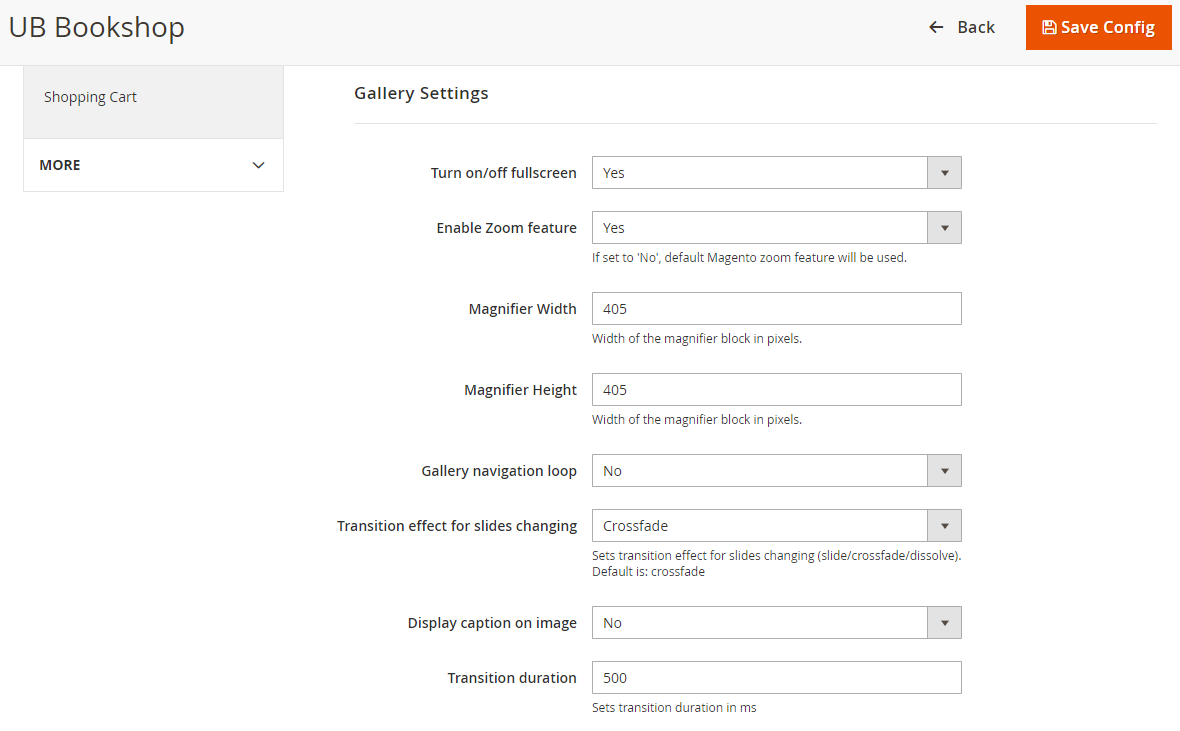
- Turn on/off fullscreen: Set ‘No’, to turn off the full screen mode of image.
- Enable Zoom feature: Set ‘No’, default Magento zoom feature will be used.
- Magnifier Width/ Magnifier Height: Setting Width/Height of the magnifier block in pixels. Default value Width is 405px and default value Height is 405px.
- Gallery navigation loop: Set to ‘No’ if you wish to hide Gallery navigation loop on image the product.
- Transition effect for slides changing: You can choose of one three type: Slider; Crossfade; or Dissolve. You can read more here.
- Display caption on image: Set ‘No’, to turn display Caption on image.
- Transition duration: Set transition duration. Value in ms. Default value is 500ms.
Front-end Appearance:
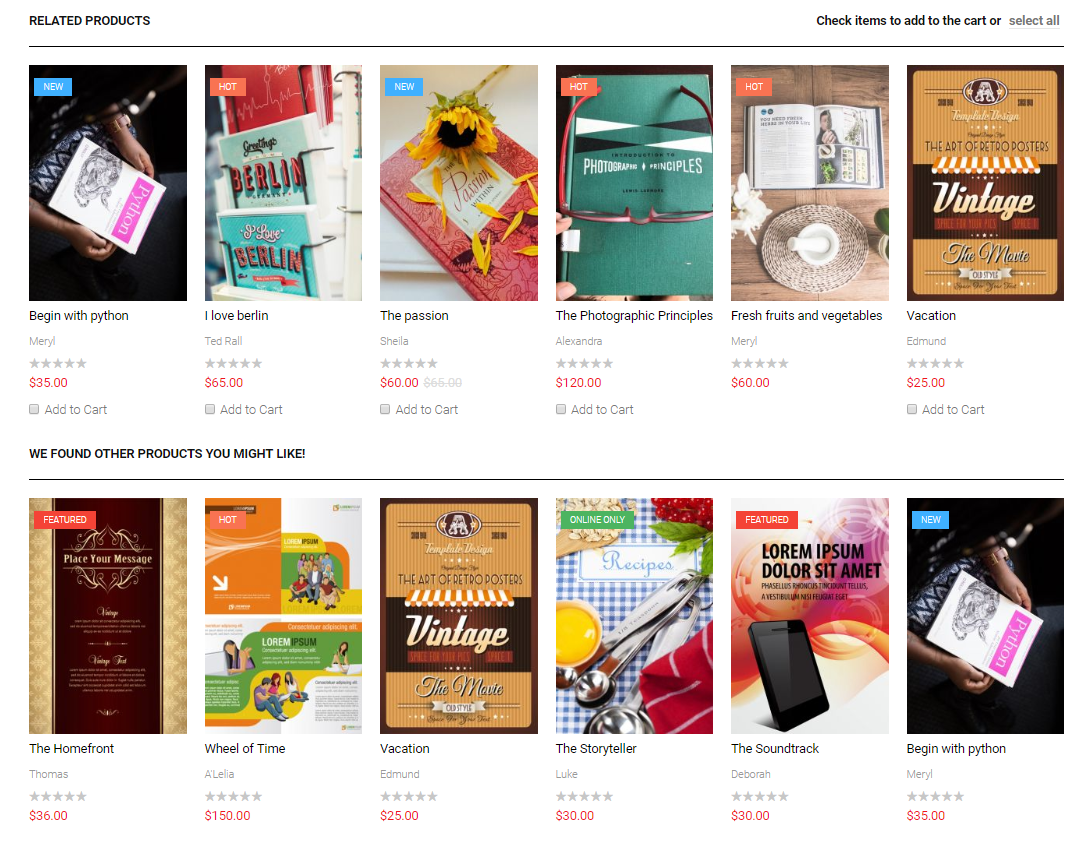
2.2.2 Related/ Upsell Products

- Enable Related/Enable Upsell: Set ‘No’, screen will hide Related/Upsell products on the product page.
- Block Title: Title display on the product page.
- Image Width/Height: Setting Width/Height of the Product block in pixels. Default value Width is 202px and default value Height is 303px.
- Limit: Set a default limit on the number of Related/Upsell products displayed on the product page. Display max is 6.
Front-end Appearance:
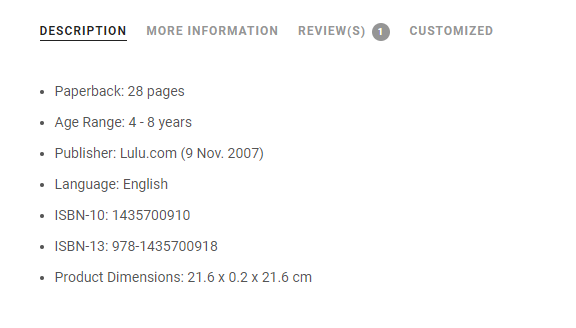
2.2.3 Custom Tabs
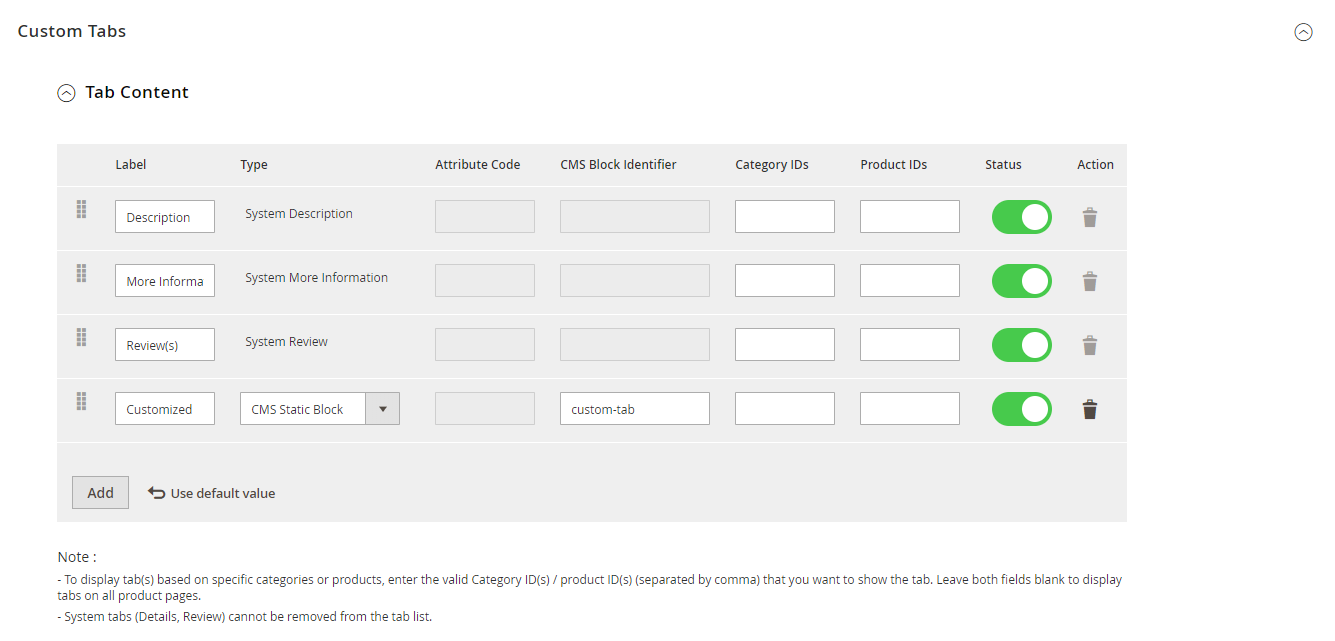
- Status: Enable/ disable Tab Content.
- Action: Remove Tab Content (Tab Description, More Information, Review(s) is default).
- “Add” button: Insert Tab Content.
Front-end Appearance:
2.3. Contact us
Front-end Appearance:
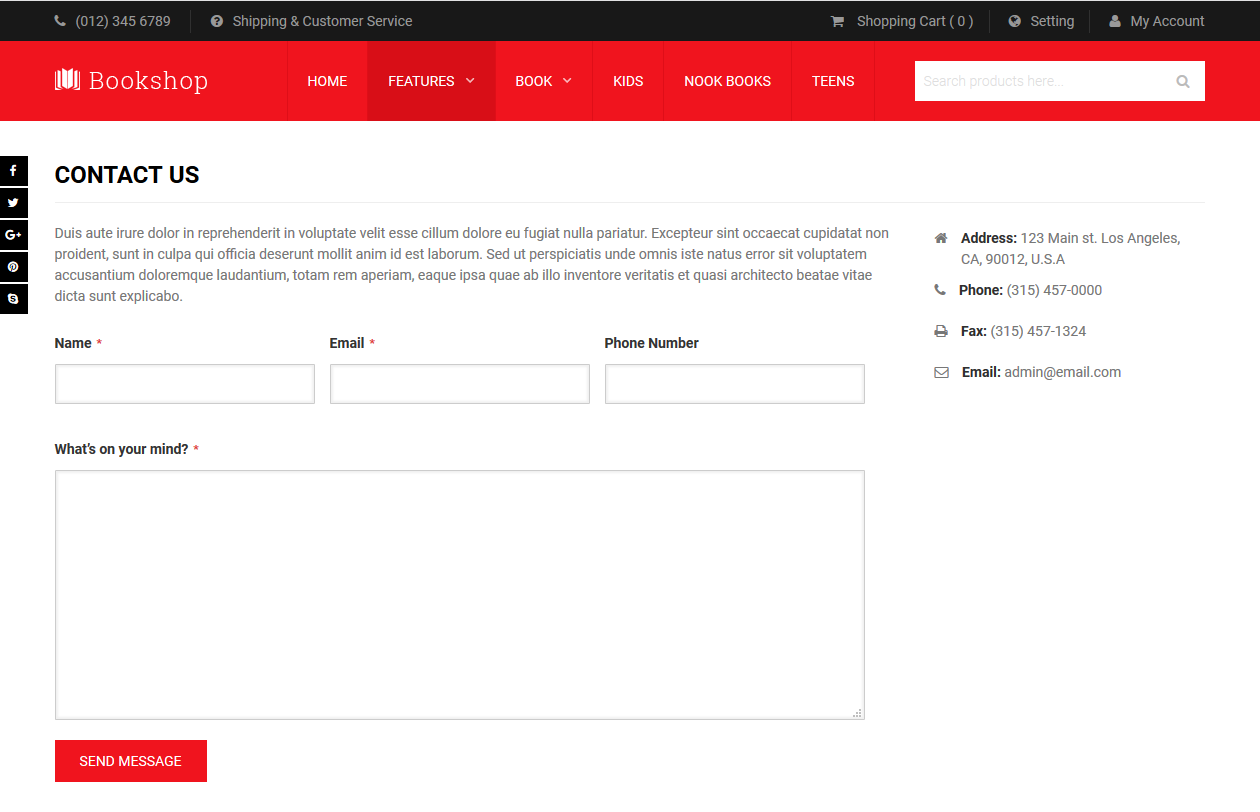
At present, UB Bookshop comes with one default Contact Us layout. Go to Ubertheme’s Extensions | [Pages] Contact Us | then fill in your specific contact info:
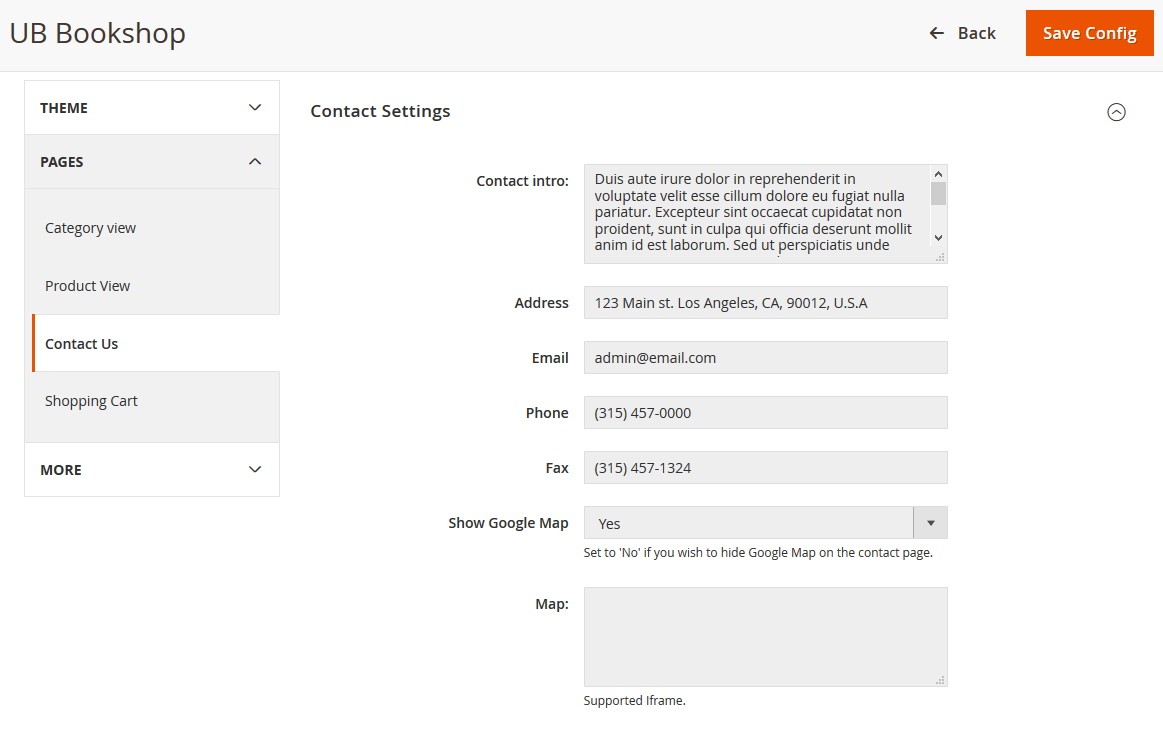
Once done, please clean Magento cache to apply your changes.
2.4. Shopping Cart
Front-end Appearance:
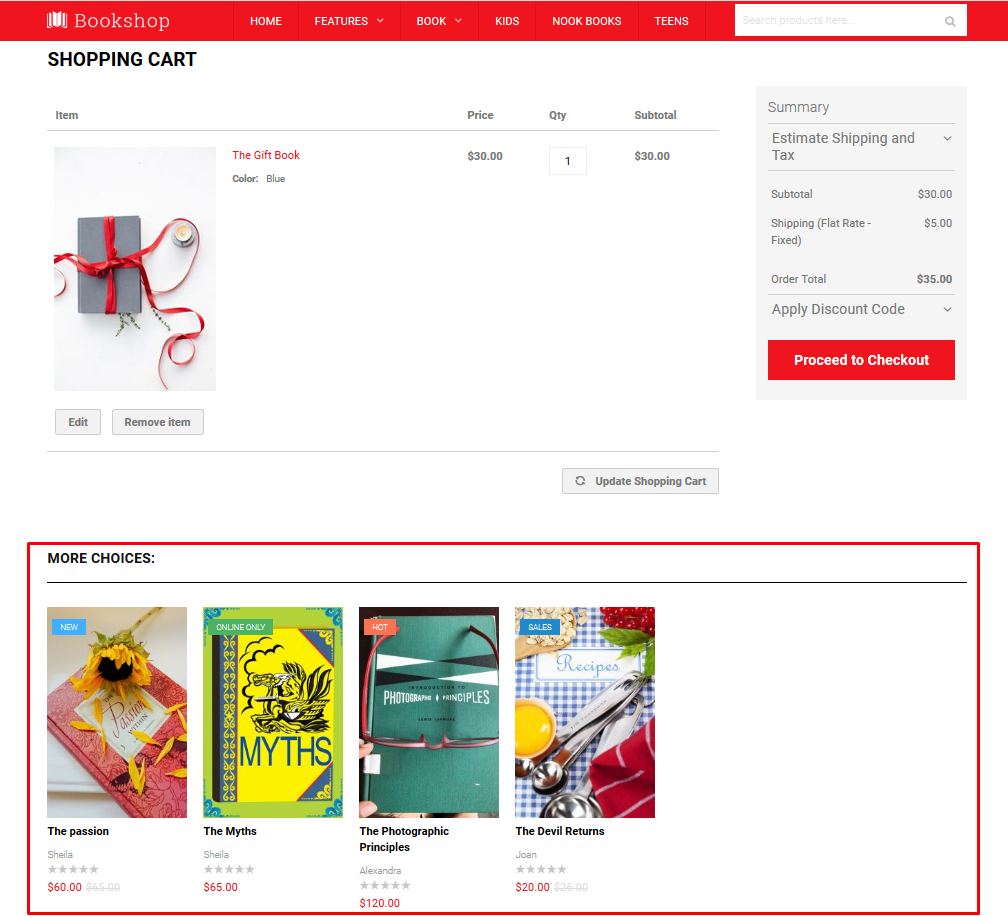
Go to Ubertheme’s Extensions | [Pages] Shopping Cart | you should see the configuration like this:
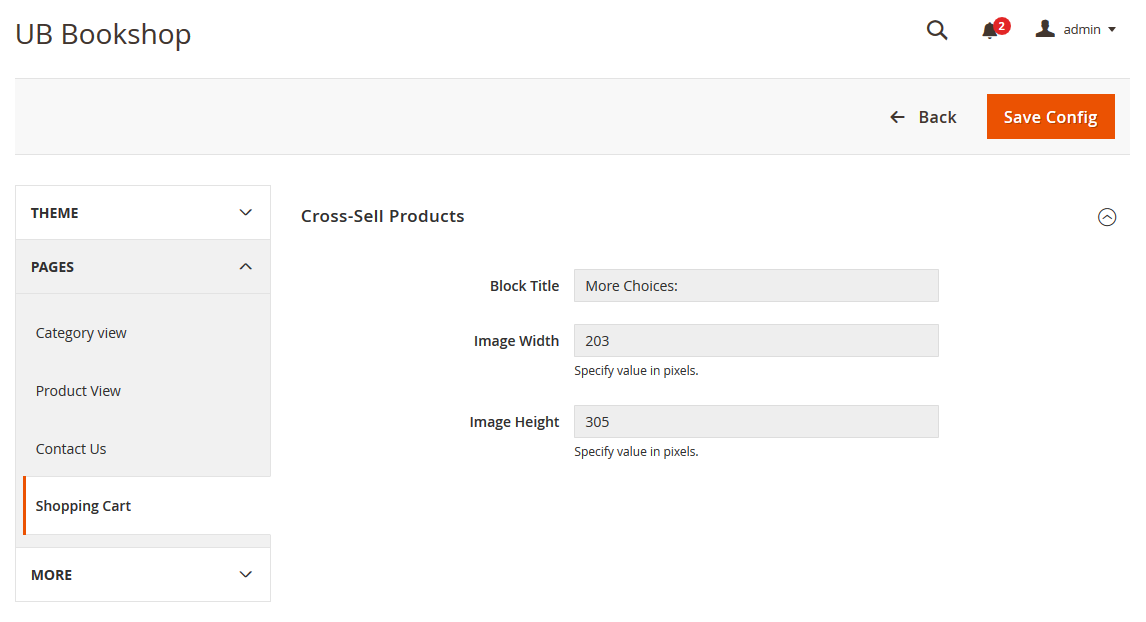
- Block Title: The title of Cross-sell product block on shopping cart page.
- Image Width/Height: Set the Width/Height of the Cross-sell Products’ thumbnail in pixels. Default is Width 203px x Height 305px.UB Trex Pro theme always keep the image aspect ratio 2:3. Please refer to the Related Products to learn more about this aspect ratio.
Once done, please clean Magento cache to apply your changes.
3. Custom CSS
Go to Ubertheme’s Extensions | [More] Custom CSS | you should see the option like this:
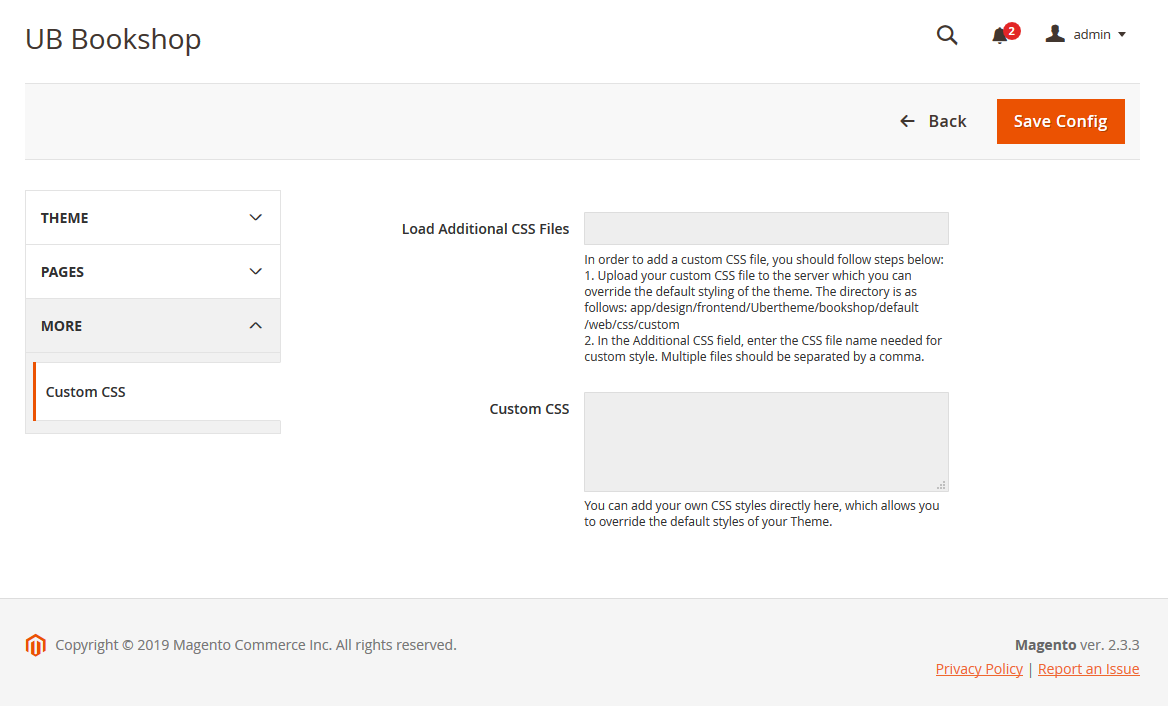
In order to add custom CSS, you should follow one of the following options:
- Upload your custom CSS file to the server which you can override the default styling of the theme. In the Additional CSS field, enter the CSS file name needed for custom style. Multiple files should be separated by a comma. Or,
- Add your custom CSS directly to the Custom CSS field.
You can add your own CSS styles directly here, which allows you to override the default styles of your Theme.